Showing posts with label sew along. Show all posts

Sunday, November 15, 2015

1940' Bra Sew-Along - Finishing with a closure.


Hello my dears. I hope you're having a lovely weekend so far.
I just want to start this post out today with a warm hug for my friends and followers in France. Your country was my first love and my oldest friend, and after the events of yesterday, you are in my thoughts and prayers.

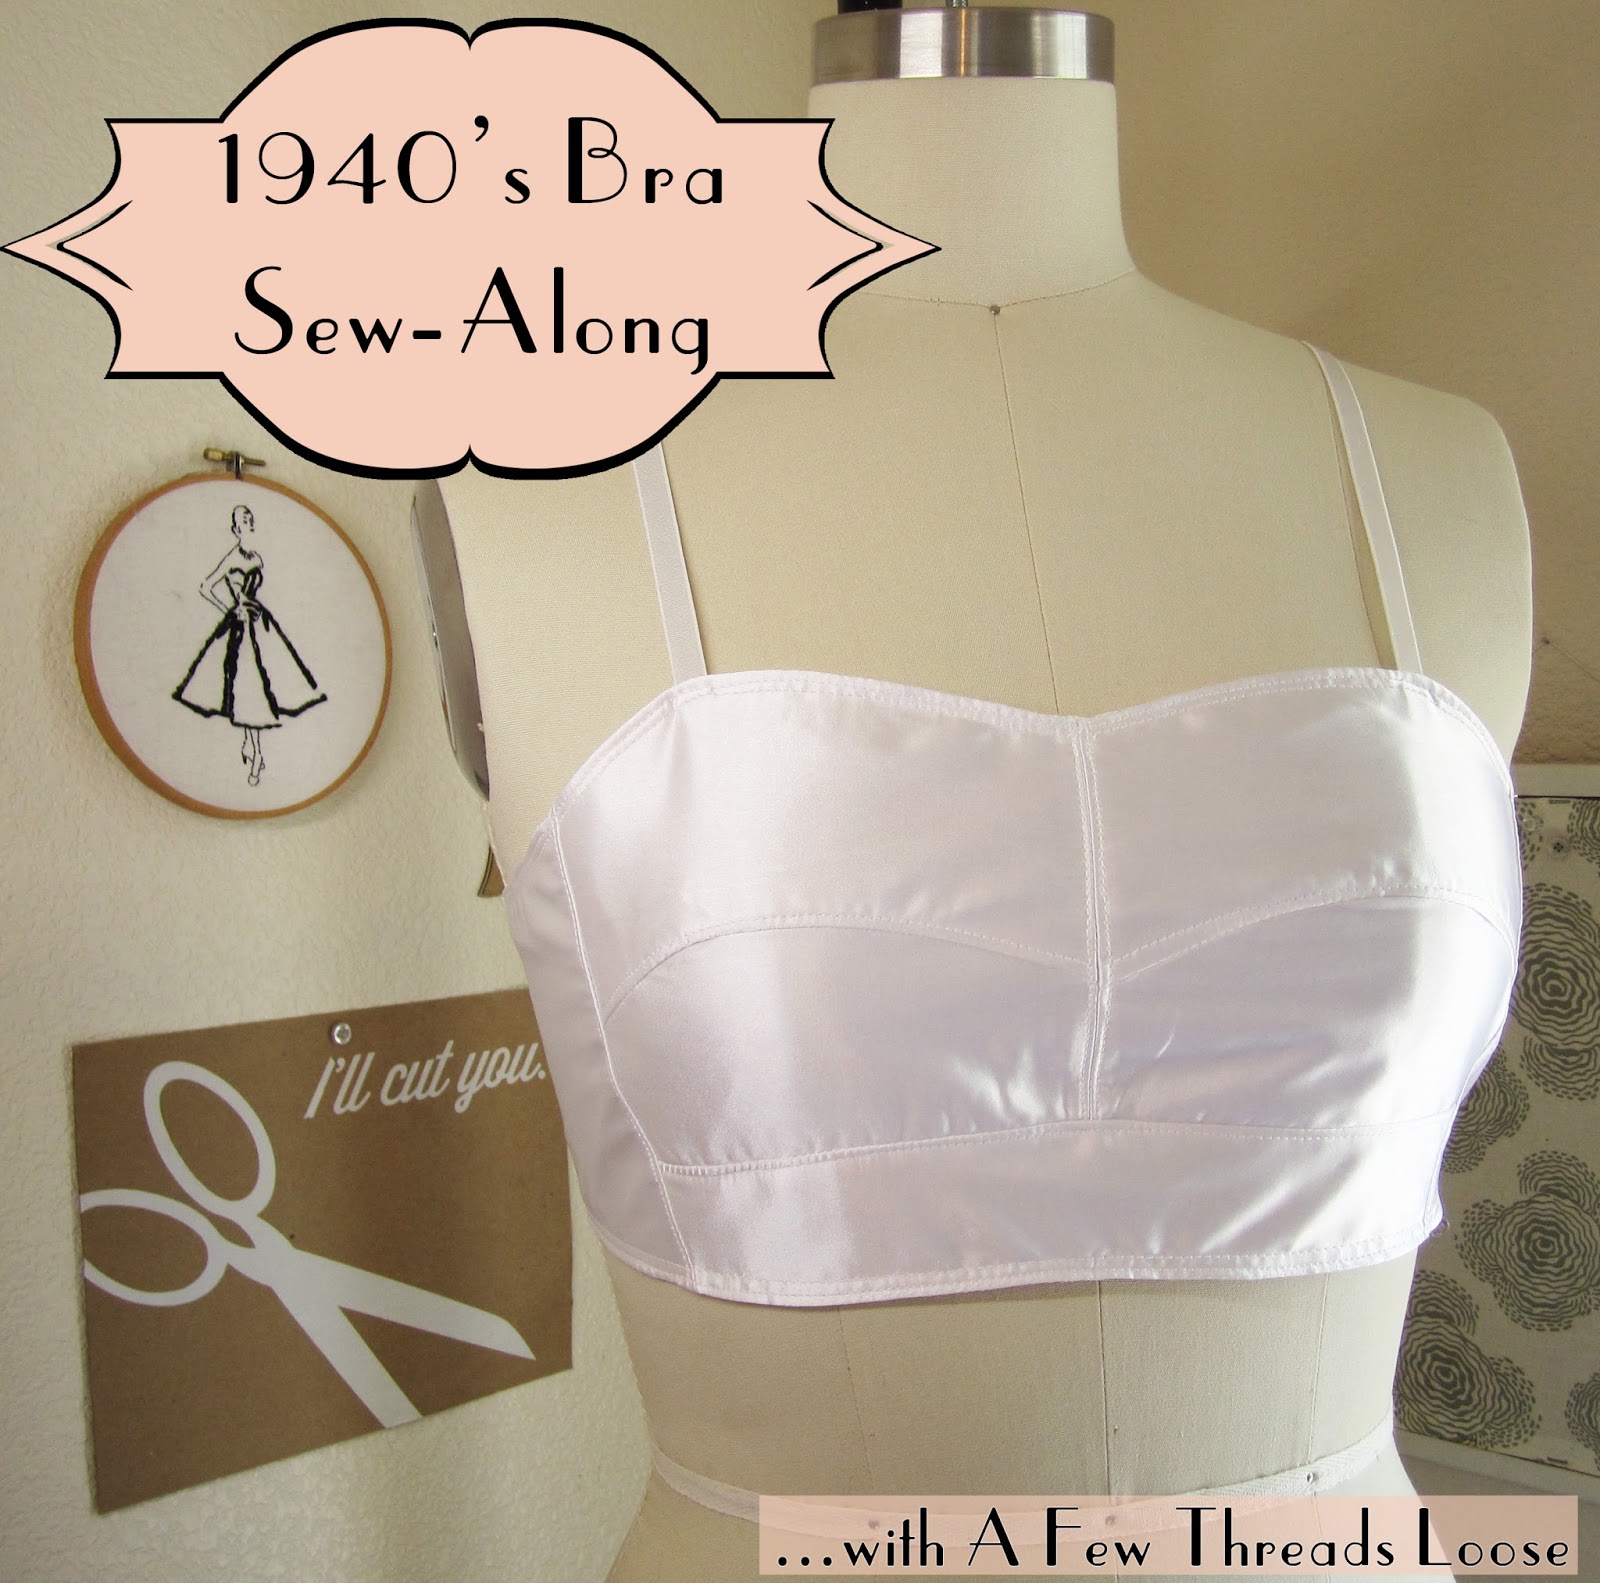
It's a chilly day here in Monterey and the sun is at a low angle in the sky. My house smells like a house should on a cold day - hints of apple cider and a pot roast in the oven are wafting up the stairs to my studio. And it's the perfect time to type up a blog post and finish our sew-along.

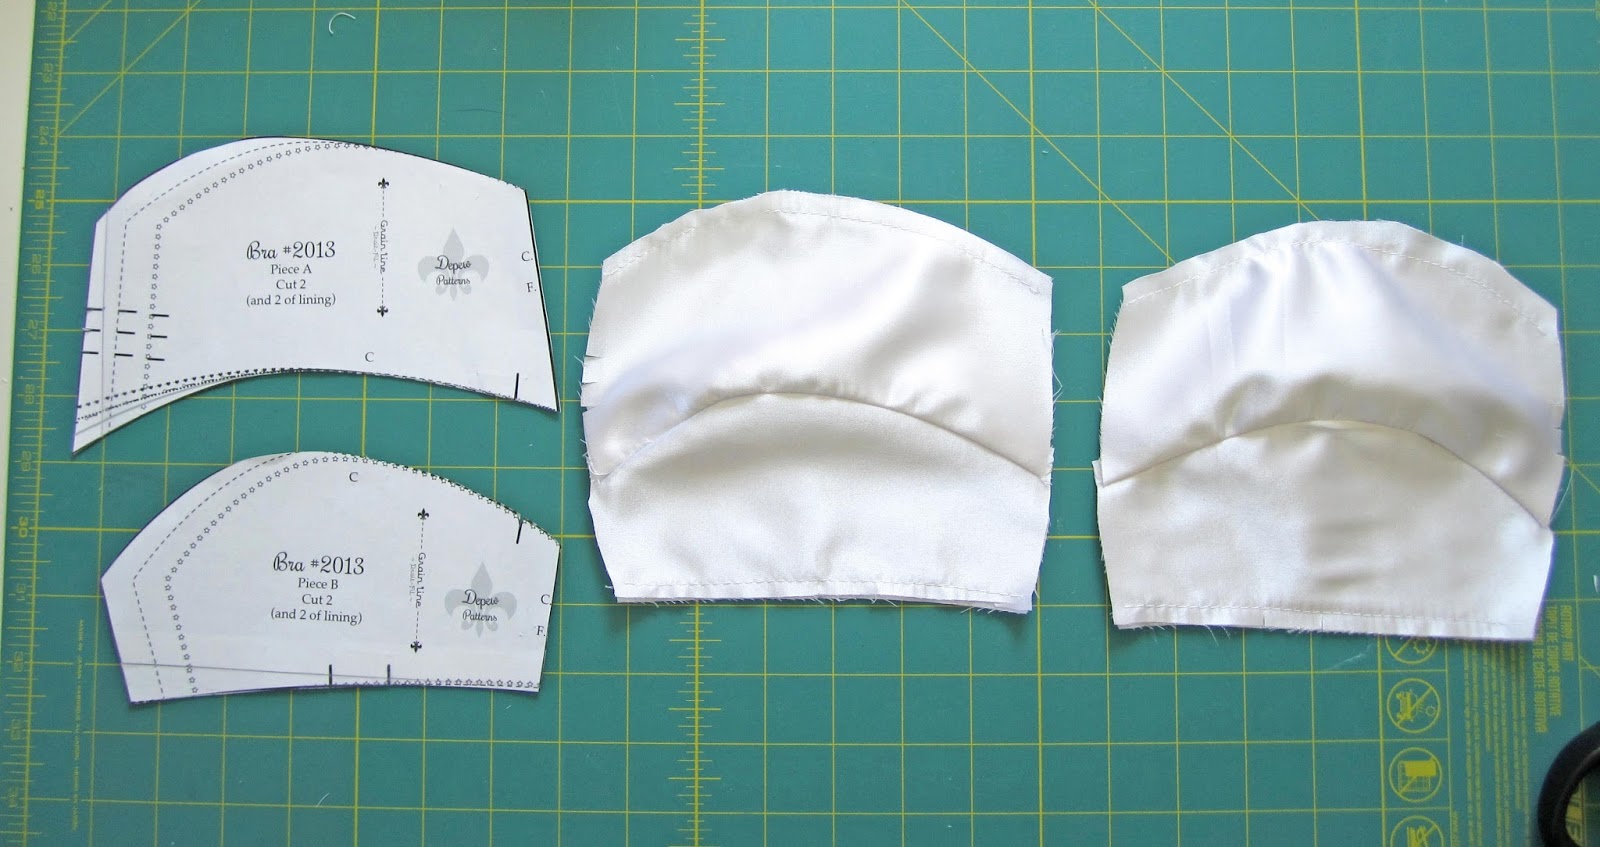
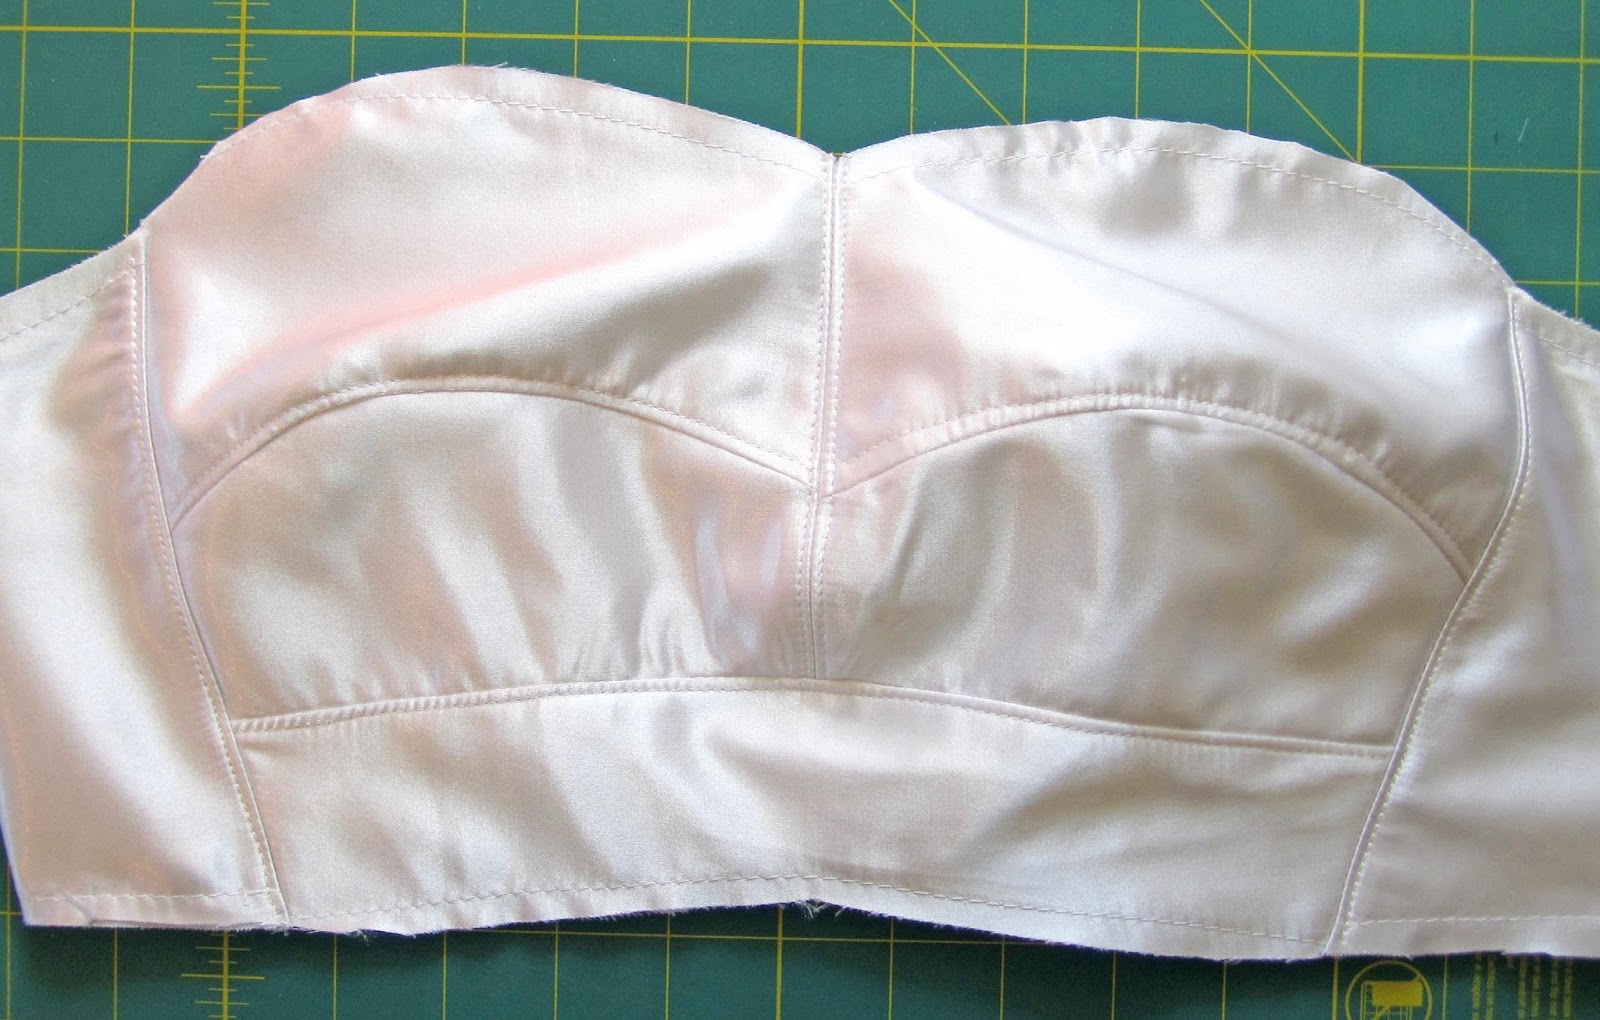
In our last post we discussed edge finishing and sewing our straps in. Now all that's left to do is add our back closure and we should be done! I know we're all used to hook and eye closures in bras these days and that's what I prefer for this bra. But if you're going for a full 1940's bra style, know that you can also use buttons and loops if you like, or a French bra back, which is essentially two lengths of elastic and a hook.

For this project I have used plush-backed hook and eye tape with a double set of eyes for adjusting fit. This is pretty much plug and play, but there are a few notes on placement.

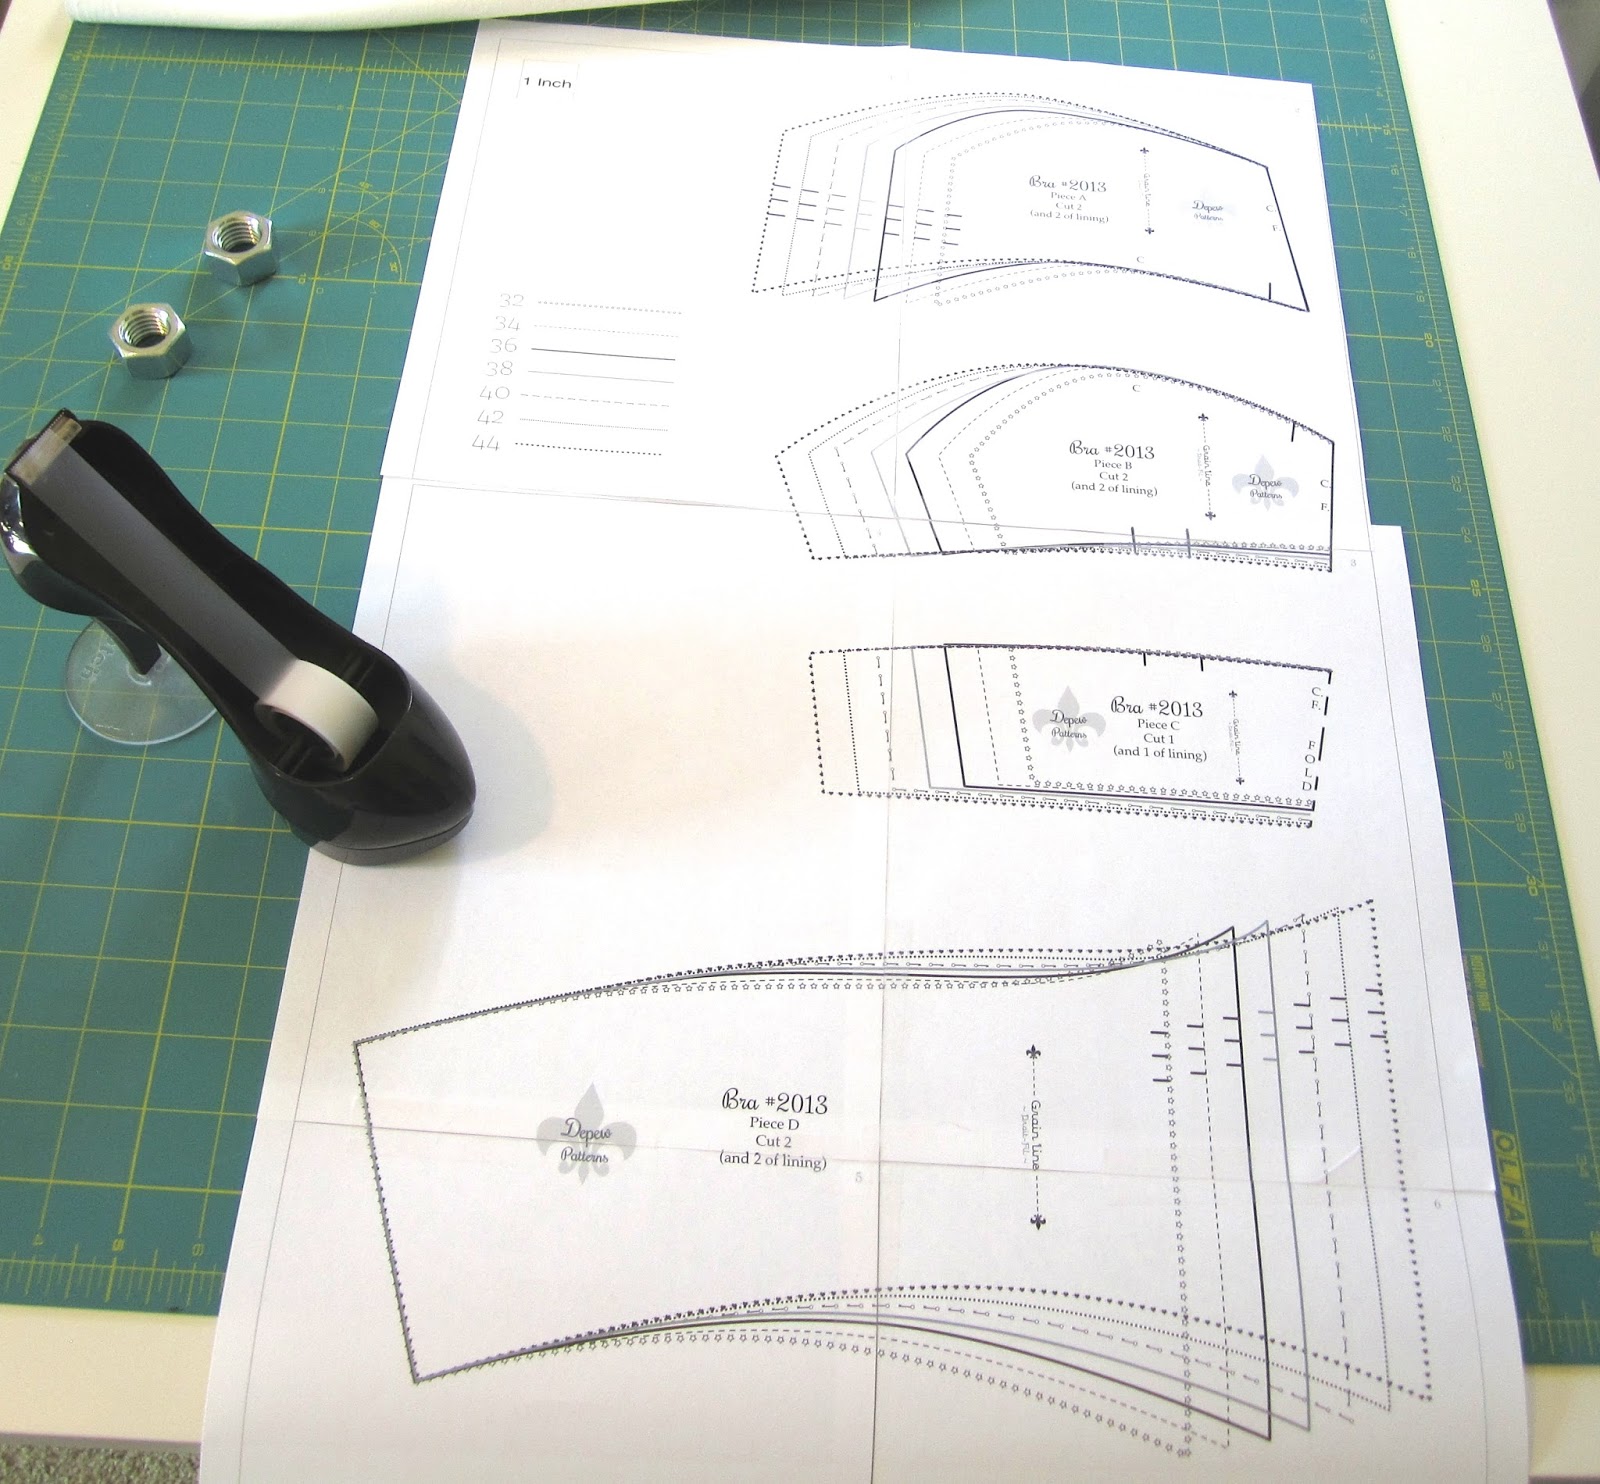
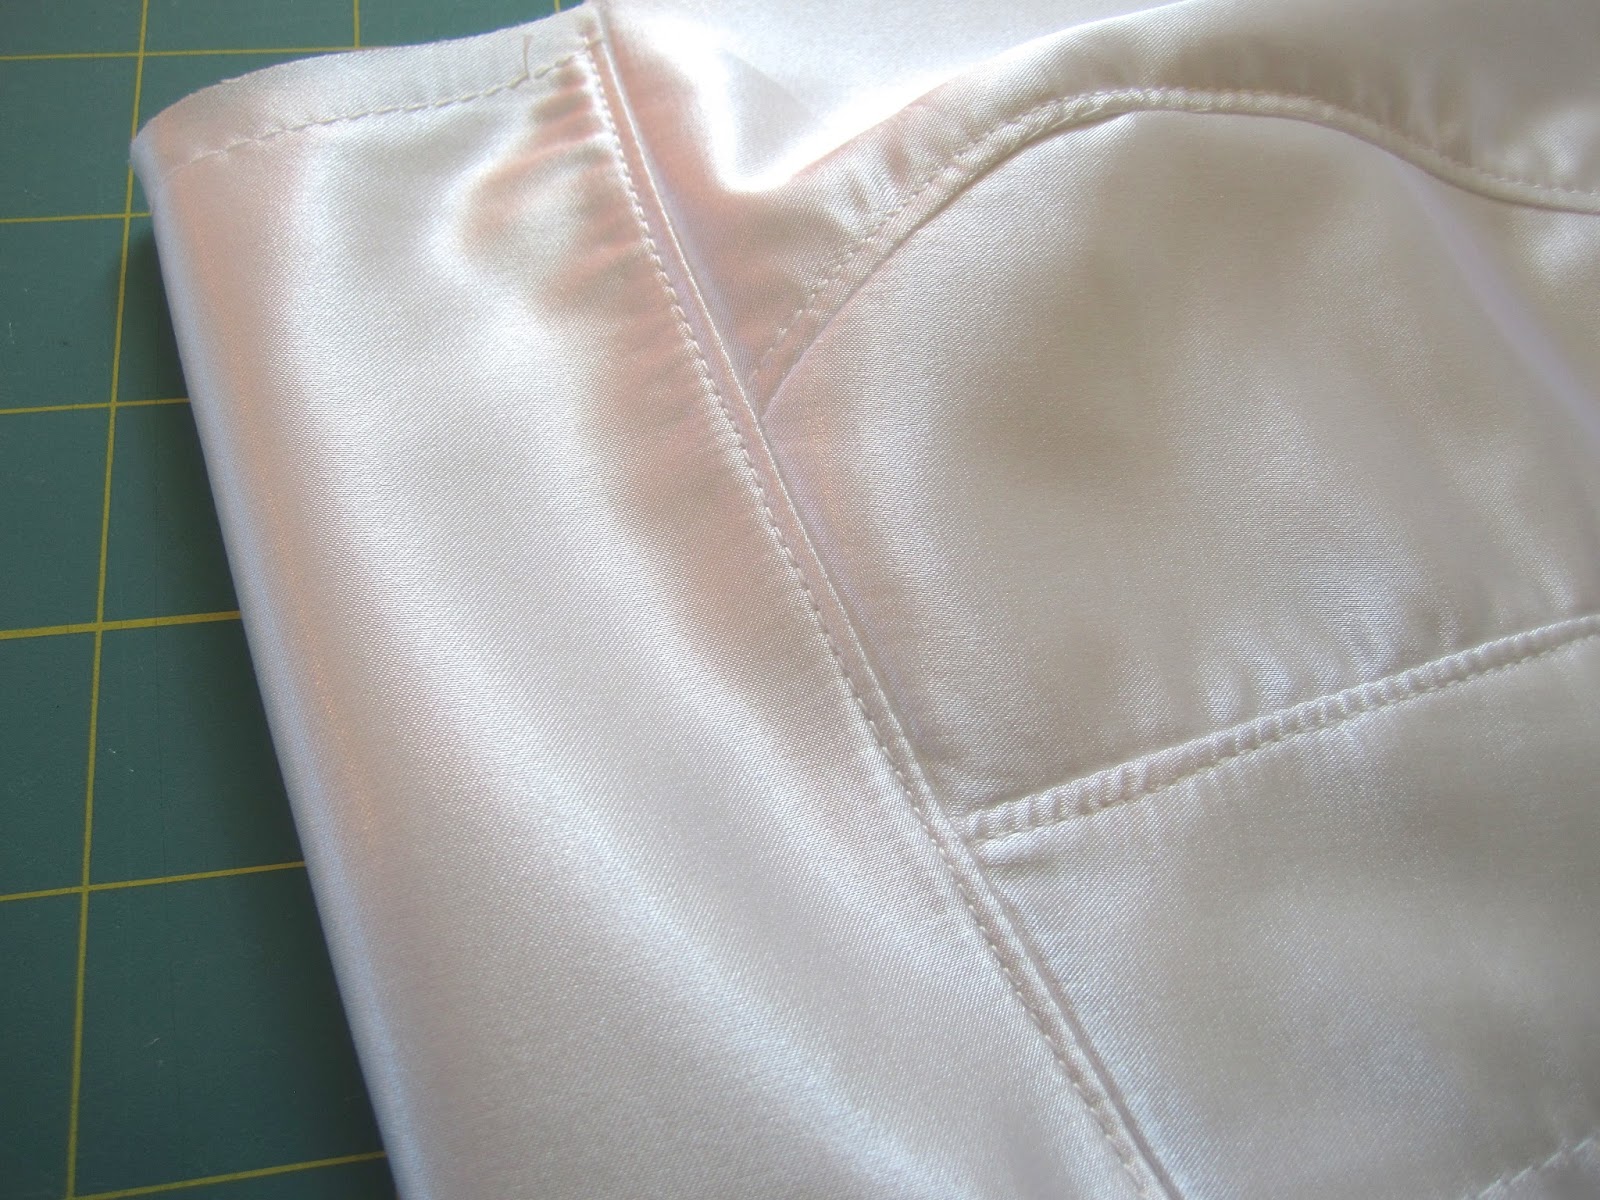
The first thing to do no matter what type of closure you use, is to stay-stitch the center back of each piece D to keep it from stretching while you work. This can be done with any straight stitch 1/8" from the edge.


Tuesday, November 10, 2015

1940's Bra Sew-Along - Sewing the real thing.


Hi there lovely readers. I hope I'm posting at an o.k. rate for you. It's been a strange week and I've been unfortunate enough to have a headache for 5 days now. I went to the doctor today just to be on the safe side and everything is fine - I'm just one unlucky girl this week...
For today's post we're going to sew our actual bra together now! In our last post, we went over lining and facing options. Now that we've squared that away, and you've faced your pattern pieces (if you so chose) we'll put together our bra in the exact same order we put together the test muslin.


This time though, as we sew each individual seam, we're going to stop and press the seam allowance a certain way, then top stitch it in place. This will give us that lovely 1940's look, as well as securing our raw edges.


So we start by sewing pieces A and B together along that tricky curved seam, and then press the stitches as sewn without opening them up. This will set the stitches. Then open pieces A and B, and press the seam allowance UP onto piece A.
Now you're ready to very neatly top-stitch 1/8" from the seam on piece A, as done below.


Now stitch both center front pieces together and press that seam open.


Top stitch again 1/8" from the center front seam on EACH side.

Then sew piece C to the lower edge of pieces B, press the seam allowance DOWN, and top-stitch 1/8" from the edge on piece C.


Now you're ready to attach the back of the bra, pieces D, to the side seams.


Once you have, press the seam allowances outwards to piece D, and top-stitch again.


And voila! You have the lion's share of the sewing done! Next, we'll talk finishing edges and adding straps.

Happy sewing,


Friday, October 30, 2015

1940's Bra Sew-Along - Sewing Your Muslin


A few of you have already commented on our last post to say that you've gotten your pattern and materials so now is a good time to get started in time for some weekend sewing. Shall we discuss sewing our muslin? This is probably the most important part of bra sewing. Making sure that you have the best fit possible will make all of the work you'll put in worth your while. Every body is different, and breasts themselves have wonderful variations that can make bra sewing a bit of a challenge.
This is why we need a  couple of good test versions to perfect any issues before you cut into your good fabric.


To get started, print your pattern out to 100% scale on your home printer. Tape the pieces together and then choose your desired size.
The pattern comes with several sizes included from a 34"- 44" Bust. For this measurement, we're talking about the circumference of the chest, level with the tip of your bust.

Sunday, October 25, 2015

1940's Bra Sew-Along: Where to get your supplies...


Alright then, my dears, it's time to collect our bra-making materials!
Since this is a vintage-inspired bra pattern, the materials won't be quite too hard to find. No need to hunt down underwires or anything like that.

So, here is a list of what you'll need:

1. The pattern. 
2. 1/2 yard of 35" or wider muslin fabric for testing the fit.
3. 1/2 yard of 35" or wider light to medium weight woven (non-stretch) fabric for the outer. I recommend soft cotton or lawn, satin, silk or rayon crepe, or even charmeuse.
4. 1/2 yard of lining fabric (if you choose to line, that is.) I recommend lightweight woven (non-stretch) cotton lawn but the general rule of thumb is, if you don't want it touching your girls, don't line a bra with it.
5. Purchased bra straps. You can use medium to heavy weight ribbon, but adjustable straps are so easy to just sew in.
6. 1/4 yard of plush-backed hook and eye tape, preferably adjustable with at least 2 sets of eyes.
7. Matching thread.


The kit includes enough fabric to test, sew and line your bra, straps, closures, thread, and the pattern.

But if you're not up for white satin, here are a few places I recommend:
Bra Maker's Supply (great for straps and closures).
Sew Sassy Fabrics (great for fabrics and notions).
Etsy.com (great for fabrics and notions).


Once you've got your materials, just leave a comment on this post to let me know you're ready to get started. Keep in mind that sew-alongs don't need to have deadlines, and if you're busy now, or if you need at 2 week break in the middle, the posts will ALWAYS be here on A Few Threads Loose and you can follow along to sew your bra any time that works for your schedule!
Don't forget that you can always leave comments if you have a question about anything - materials, tips, tricks, posts etc. - I'm here to help and there is no such thing as a stupid question here!

This Sew Along is now complete. Click below for each post.

Happy sewing,


Friday, October 16, 2015

1940's Bra Sew-Along, and a Sewing Pattern Giveaway!


Update: This giveaway is now closed.

Well, my dear readers, it's that time again. I have the lingerie sewing bug. It's been ages since our last sew-along and I'm happy to say that my schedule has cleared just enough to allow me to host another one!
And the pattern I would love to make with you is my absolute favorite bra pattern, Depew #2013.

1940's style bra pattern Depew #2013 32"- 44" Bust.

I just most recently made this bra up in white satin and it turned out so beautifully, I thought, "Every girl should have one of these!" I wore this bra ll day yesterday under a semi-sheer top and it was so comfortable! I even had a lady approach me at a shop and say, "This is going to sound weird, but where can I buy a bra like the one you're wearing?" It seriously made my day.

Sadly you can't get a bra like this in stores anymore but I've had something in the works for a while now to make sewing your own easier and a bit more fun.
I've been working for months now to grade this pattern into many more sizes and have also partnered with Take & Make to offer a complete bra sewing kit with everything you need (including the pattern download) to sew the bra pictured below.

The bra sewing kit for pattern #2013.

The kit includes ready made straps and plush hook and eye closures that have been carefully matched with soft white satin, thread, and enough fine, soft muslin to sew a test version, with enough left over to line the bra if you should so choose. You can find the complete kit here.


We decided to go with white satin for the kits so that finding matching underwear wouldn't be a chore.

In one of my most recent posts we looked at an original 1940's bra to study the sewing details used. I'll be including these kinds of details in our sew-along posts and hopefully we'll all get to learn something new.

Top-stitch details are almost a must for any vintage bra!

And of course, this would be no sew-along launch without a giveaway! Next week I'll choose three winners from the comments on this post who will each get a digital copy of the bra pattern we'll be using.
To enter the giveaway here on A Few Threads Loose, simply leave a comment on this post letting me know you're in!

For an extra entry, you can do any or all of the following, just leave a comment letting me know about it!

I'll announce the winner of the giveaway on October 23rd and then we can start gathering our materials for the sew-along.


Happy sewing, and best of luck to the entrants!


Sunday, July 20, 2014

Sewing #610... Intro to a mini sew-along!


Happy weekend, my lovely readers! Recently, you might remember, I sewed a 1930's bra for myself using one of the draft-at-home patterns from my shop, Depew #610.
Many readers wrote that they were curious about my process and wanted to see more so I decided to turn the project into a mini sew-along.


While sewing this bra, I took a lot of photos, but since this was more of a "getting back into sewing therapy" project for me, I didn't take nearly enough photos of nearly enough steps so I thought, why not do it all again for a mini sew-along?

I loved this bra so much that I have no reservations at all about sewing about a dozen more of them so I'll be starting from the beginning and posting as I sew.

You're welcome to join in with me and post questions as I go. The more, the merrier!
If you'd like to follow along, here is what you'll need:

1. The pattern comes in two different versions Digital (if you want to print at home) or Print (if you'd rather get goodies in the mail).

The 1930's bra pattern I'll be using.

2. Fabric: You'll need about 1/2 yard of 36" or wider fabric, plus the same for an optional lining (I used light weight silk so I lined mine). You'll also want about 1/2 yard of muslin for a test version.
This is a great pattern to use up fabric scraps, or the great vintage silk scarves you scored at the thrift shop and then never wore.

Tip: I got my lovely silk fabric, and the silk ribbon I used for the straps online at Farmhouse Fabrics for a really great price!

3. Notions: I recommend a purchased bra back for this project but you can also use hooks and eyes or buttons. For mine, I used a French bra back closure - It's the only bra back closure I think I'll ever use on my bras, it's just so comfortable! You'll also want about 1 yard of ribbon, bra strap elastic, or purchased bra straps.

4. Drafting tools. You most likely have these on hand already bust just in case, you'll need the following:
Pencil with eraser
Large paper (I use tracing paper but you can also use a paper bag or pattern making paper).
Paper scissors
Ruler
Tape
1 thumb tack
French curve (optional).

In the next post, I'll be going over how to draft out the pattern to your size and how to make adjustments to the pattern to make sure that it's accurate and easy to sew.

If you're curious how the draft-at-home patterns work, you can check out this blog post. It really takes something a bit intimidating and makes it quite easy!

I hope you'll join me!

Happy sewing,


Update: Here is a list of the posts!

Wednesday, April 17, 2013

French Knickers Sew-Along... Adding Elastic to the Waist.


Hello lovely readers. Today for the French Knickers Sew-Along I'll show you how to add elastic to the waist of your knickers. First though, to my readers in Boston, know that you're in my thoughts and prayers. I have nothing but admiration for how Bostonians, first responders and civilians alike, have helped victims and their families in these last horrible few days.

It may seem silly to talk about sewing in light of how saddened we all are at such senseless violence, but for some of us, sewing is a form of therapy. For those of you who find comfort in the simple, reliable hum of your sewing machine, and the feel of fabric at your fingertips, here is the next step in our Sew-Along.

~Elastic~


For my knickers, I have chosen 3/8" picot elastic. It has a plush underside that is quite comfortable against one's skin.

First, follow the instructions in the pattern for measuring the length of elastic you'll need.
Lap one end of the elastic over the other and baste in place with a few stitches.


Before pinning your elastic to the waist, first measure your elastic in halves, and then quarters and mark these points with a pin. Pin these quarter points to the front, back and side seams of the knickers so that your elastic is equally distributed between these four points as you stitch.


Picot elastic, pinned plush side up to the RIGHT side of the fabric, and with the plain edge even with the knickers raw edge.

For picot elastic, first pin the elastic to the OUTSIDE of the knickers, with the plain edge of the elastic even with the raw edges at the waist.


Elastic pinned at the four major seams.

 Stitch close to the picot (ornamental) edge with a narrow zig-zag stitch, stretching the elastic gently as you sew and keeping the plain edge of the elastic even with the knickers raw edge.


Here I am keeping my elastic stretched evenly by gently pulling at the nearest seam until it is straight.

To help distribute the elastic evenly as you sew, pinch the waist and elastic at the nearest seam and gently keep it taught as you stitch.


The knickers waist after the first half of elastic stitching.


Now turn the elastic to the inside and carefully trim any excess fabric that peaks above the elastic edge.


The excess fabric trimmed away from the elastic.

Then fold elastic to the inside and stitch again, on the right side using a 3 step zig-zag stitch, again gently stretching the elastic as you go


The elastic stitched to the INSIDE now with a 3 point zig-zag stitch.


The waist after the elastic has been folded to the inside and stitched.


Pretty, no? In our next post we'll add the cotton crotch insert and then we'll go over more ideas for embellishing the knickers.

Any questions?

Tuesday, November 22, 2011

Lingerie Sew-Along: Bust dart and Gathers Part 13

 For our next installments in the Lingerie-Sew-Along we will be working on the bodice pieces, darts and optional gathers, and attaching the bodice pieces to the slip pieces.

To see how to sew a dart, or just to get a look at how the same three darts looked in the Pauline bra pattern, click here.

You have two options with the bodice pattern pieces for this slip. You can either sew the darts as instructed, or you can replace the bottom 3 darts with gathers. I have chosen to use the gathers as the fit is more forgiving to the bust contour, and the gathers provide the illusion of fullness at the bust (and let's face it, I can use all the help I can get in that department.)

There are 4 darts on the bodice piece, the single one at the top, and the set of three at the bottom. Sew the dart at the top as you normally would.


Saturday, October 15, 2011

Lingerie Sew-Along: Closure, Straps and Finishing Touches, Part 6

It's time to finish up our bra, ladies. Are you ready? I chose this lovely set of vintage flower buttons for the closure of my bra (and later my tap pants).
(You can scroll down to see the finished bra if you just can't wait.)


To catch my buttons I'm going to make a simple loop with ribbon. I deplore button holes in lingerie, and they just get worse if you use silk or satin. Slippery fabric + button hole = lots of swearing on my part.

Here is just made a simple loop with a line of stitches to make it lie flat.


Before you sew your ribbon on to your bra, make sure that the button will fit through snugly.


 Before I sew my ribbon loop to the bra band though, I want to cover up the raw edges of the ribbon. Below is the raw edges just sewn together to keep them from spreading out. They are not sewn on to the bra band yet, they are just there for me to get an idea of where to place them.


Below I just wrapped the loose ends of my ribbon in another length of ribbon, hiding my raw ends on the back side


Friday, October 14, 2011

Lingerie Sew-Along: Finishing the Bra Band, Part 5

When we last left off, we had finished binding the top of the bra. Now we're going to finish facing the bra band.

The bra, inside out.
First turn your bra inside out so that the WRONG sides are on the outside. Start at one end and pin the bra band together RIGHT sides together.

The back bra band, RIGHT sides together.
Pin a few inches of the band at one end, then match up the center and pin that for a few inches, and do the same for the opposite end. Then pin the rest of those gaps. This helps to avoid strange bunches of fabric since the band is cut on the bias.

The bra, RIGHT sides together.
You'll want to leave a 2" gap in the band just under one of the cups for turning the bra right sides out again.