
(You can scroll down to see the finished bra if you just can't wait.)

To catch my buttons I'm going to make a simple loop with ribbon. I deplore button holes in lingerie, and they just get worse if you use silk or satin. Slippery fabric + button hole = lots of swearing on my part.


Before you sew your ribbon on to your bra, make sure that the button will fit through snugly.

Before I sew my ribbon loop to the bra band though, I want to cover up the raw edges of the ribbon. Below is the raw edges just sewn together to keep them from spreading out. They are not sewn on to the bra band yet, they are just there for me to get an idea of where to place them.

Below I just wrapped the loose ends of my ribbon in another length of ribbon, hiding my raw ends on the back side
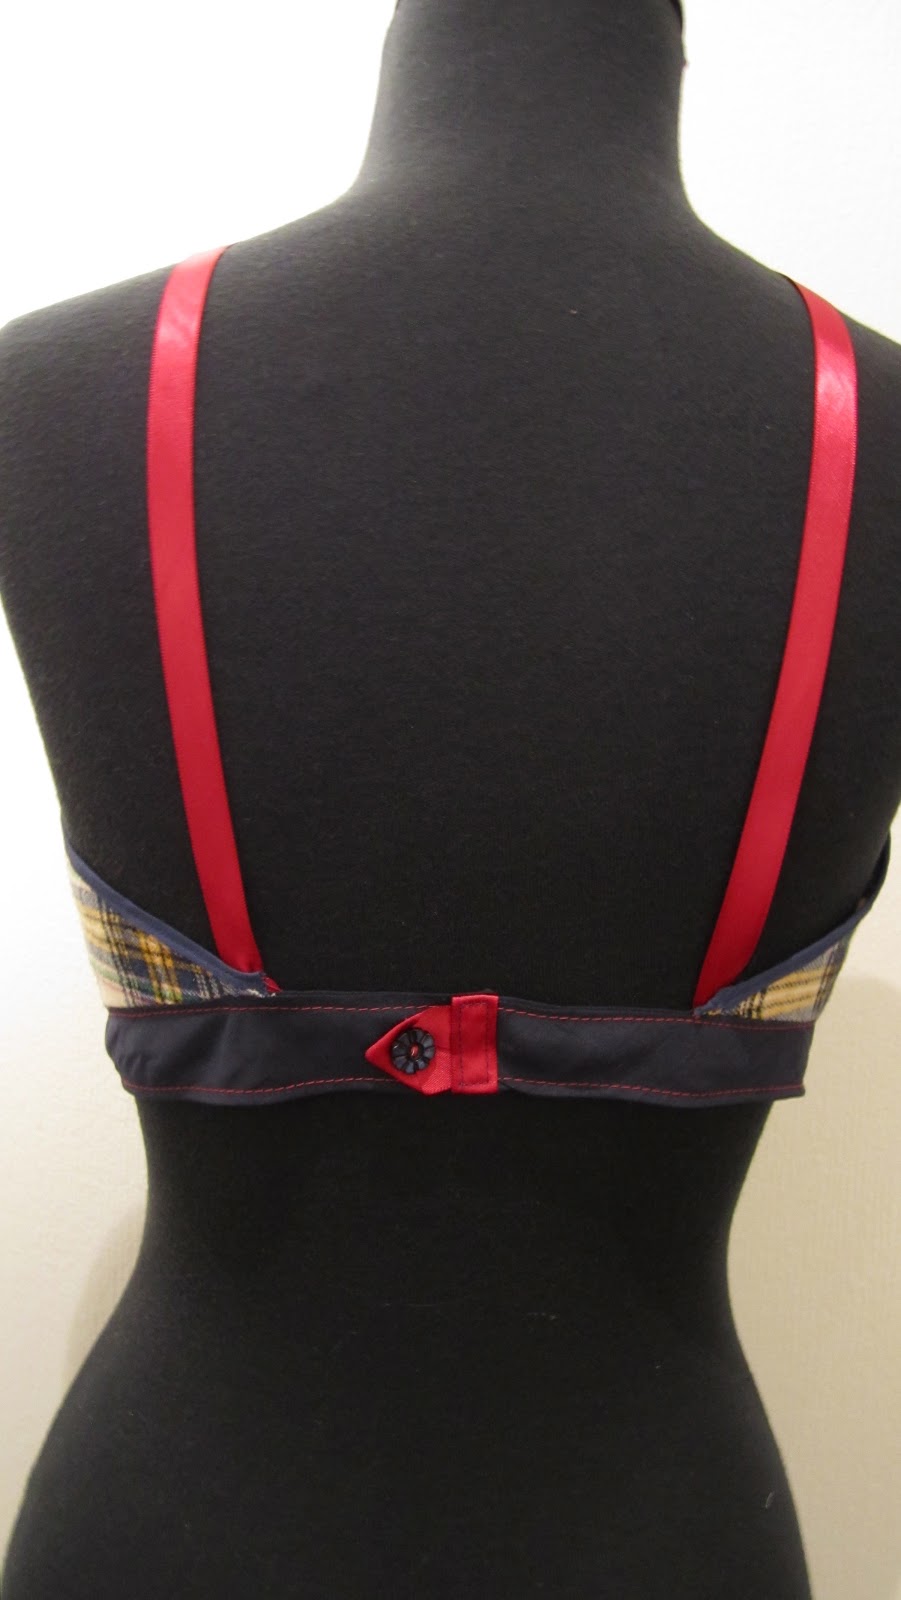
 |
| The bra band, seen from the WRONG side. |
Then I just pinned it in place, stitched it on, and voila!


And now for straps. If you purchased the pdf copy of Pretty Pretties, you can see how to attach ribbon straps on page 11.
 |
| This little jewel taught me everything I know about sewing lingerie! |
This trick is especially handy if your bra is sewn from lace instead of flannel.
First decide where your strap will go. This should be at the rounded slight point to the top of the cup.
Then pin your bra strap to the WRONG side of the bra, with the raw edge facing up. If your ribbon has a right and wrong side, pin the ribbon so that the WRONG side is together with the WRONG side of the bra.
 |
| The ribbon strap pinned to the WRONG side of the bra. |

Now flip your bra strap up again so that the strap is sprouting out of the bra cup top.
Stitch the strap in place again to the very top of the bra, using little invisible stitches. I just grabbed a bit of the back side of my bias binding with the needle.


Now is the part where you grab a friend, or a man, someone with arms who you preferably know already, and have them help you pin the ribbon the other side of the bra while you wear it. The above should be used again to sew this end of the strap in place, and the bra strap should rest just where the bra cup sinks into the bra band in the back.
 |
| This bra does not fit Slut Jane II very well, but it fits me great! |

My dress form (lovingly known as Slut Jane II ) has much bigger jugs than I do so the bra looks a bit misshapen on her, but on the right sized (flat chested as a boy) body, the bra band will lay smoothly and the cups will... well... still have a little too much room in them.

BUT WE"RE DONE!!!!!!!!!!!!!!!!!!!


Tomorrow I fly out to the U.S. for two fantastic weeks of staying with my wonderful family, and getting to see my dog, Boog!
Never fear though, I'm not going to leave you high and dry on the tap pants for 2 whole weeks. What?! I wouldn't do that to you guys! I already have the tap pants done (in one day with more swearing than I care to remember, but done!) and the pictures are taken as well. So I can continue to post how to do the tap pants in a couple of days.
If you feel like jumping the gun and getting started before then: BEWARE! There is a design flaw in the original pattern. According to my mother the expert (seriously, she's an expert) this is rather common for sewing patterns to come flying out of production with glaring mistakes!
If you get started early, at the side gap where you will add your placket, DO NOT cut out the V-shaped part. This will shrink your pattern size by a good 4" in the waist! Instead just cut a single straight line from the waistline to the tip of the v and add your placket there.
 |
| Do not cut out the V! Cut a straight line from the center of the V at the waistline to the tip of the V. |
3 comments:
That is so unbelievably cute!
Thanks for the warning about the panties pattern. I did already cut one but I have extra fabric so can cut another if necessary.
Have a wonderful trip to the US! Don't forget to load up on Mexican food!
It looks great. I love the contrasting straps. I am definitely going to do the loop button thing. I was wondering how I was going to do a buttonhole with my fabric and now I don't need to.
This is my first visit here, and I just love what you've put together! I'm going to have to find post number 1 on the bra and tap pants! I'll be here awhile - enjoy your trip :)
Post a Comment