Showing posts with label pattern. Show all posts

Friday, November 7, 2014

Make your own... Lingerie and Loungewear from 1949.


Hello lovely readers! Today I was browsing my collection of vintage editions of Le Petit Echo de la Mode and I stumbled upon this lovely fashion spread from 1949 featuring trousseau lingerie and lounge wear.


These designs were once available as mail order sewing patterns (oh, to have such a magazine delivered to your mailbox!). I realized though, as I drooled over these patterns, that I have quite a few similar designs in my shop.


So, I thought I'd share today, how to get the 1949 looks pictured in the magazine using patterns from Mrs. Depew Vintage!


1. Bra in Satin - Easily copied using Depew #2015.
2. Panties with gathered waist - Use Depew #7311A and add allowance to the waist for gathers.
3. Corselet - Use Depew #2003 and add a top-stitch motif to the center front.
4. Basic straight slip - Use Depew #604.
5. Rayon bra with lace trim - Use Depew #352.
6. Corselet with wide lace ruffle - Use Depew #2002 and finish the lower edge with 6" or wider lace trim.
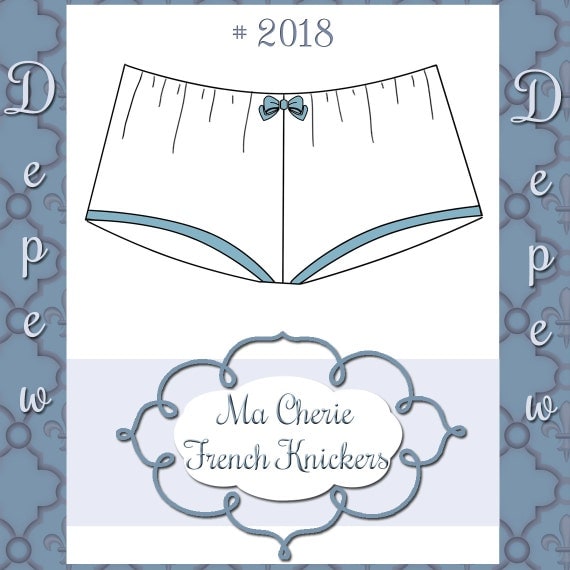
7. Tap pants with gathered side panels - use Depew # 612 and add side panels as cut-outs to the side legs.
8. Slip with ruffle - Use Depew #7314, cut it shorter at the hem and change the neckline as needed.


9. Slip with ruffle and tap pants with ruffled leg. Slip - Use Depew #7314. Tap pants - Use Depew #7314B.
10. Dressing gown - Use Depew #5003.
11. Pajama set - Use Depew #354 or Depew #601.
12. Pink dressing gown - Use Depew #5004 and replace cuffs with lace.  Blue nightgown with lace trim - Use Depew #171.

In other sewing news, I was really excited to learn yesterday that Collete Patterns will be releasing a digital sewing magazine starting in December! Seamwork will feature articles, sewing tutorials, and downloadable easy-to-sew sewing patterns. I really enjoy reading the Coletterie blog and I know that the magazine is going to be even better!

Image courtesy of Seamwork and Collete Patterns.

To get updates on Seamwork's progress, writers, and patterns, and to be entered to win a full year's worth of patterns in the process, sign up here!

Happy sewing, my darlings...


Saturday, March 30, 2013

Announcing the Ma Cherie French Knickers Sew Along!


Well, it turns out I did get the flu after taking care of my sick man, and now that I don't feel like dropping dead any longer, it's time for that sew-along we were talking about!

Underwear are so marvelously versatile and the Ma Cherie French Knickers are no different.


We're going to make some gorgeous underwear together! The plan is for me to sew a basic pair of French Knickers and walk you through the steps as explained in the pattern. Then I'll sew several other versions and demonstrate different techniques for finishing and embellishing them. We'll go over different fabrics you can use and elastic choices. If we have time, I'll show you how to trim them with ribbon facings, lace edging and insets, scallops, bows and even embroidery!

If there's something you'd like me to cover, please leave me a comment and I'll do my best to work it in.
Now for the pattern. Anyone who wishes to participate in the sew-along can now buy the digital version of the pattern at MrsDepew.com at a discounted price. This discount will be available until April 10th.
If you're printerless, don't worry, I have a paper version too! The paper version is available here.

Depew 2018 Ma Cherie French Knickers Pattern
In my next post I'll talk about fabric and trim choices, and I'll give you links to some of my favorite places to find the perfect trimmings for lingerie.

Here's a sneak peek of some of the beautiful things I've bought to embellish my knickers with:

Silk Ribbon, vintage lace, antique silk embroidery threads...we're going to make some beautiful lingerie!
I hope you have a lovely, sunny, and warm weekend. And I hope there's cake involved. Everything is better with cake.


Sunday, August 12, 2012

Grading a pattern: Depew 3009

Good morning beautiful readers. Today I got an email from a customer asking me if there was a way to make one of my patterns smaller to fit her much more petite figure. I proceeded to try and explain how in an email and realized half way through that it would be much easier to do so in a blog post!
Not to mention, some of you may find this handy in the future.
~the following tutorial can be applied to just about any dress, blouse or skirt pattern and can be used to grade the size up or down~

The pattern in question is Depew 3009, a beach dress cover-up pattern based off a vintage French pattern.

Beach Dress Cover-Up
The pattern is only in one size, Medium/ Large with a 30" waist and 38" bust.

And the customer, we'll call her Miss S, needs to size the pattern down to a 25" waist and a 32" bust.
So, we need to subtract 5" from the waist and 6" from the bust.

These subractions need to be evenly distributed between 4 spots for the bodice and the skirt. Here's where we do the math:
Bodice Reduction = 6"÷ 2 (cutting two of each pattern piece) = 3".  And 3" ÷ 4 (front, back, and both side seams) = 3/4". Doing the same for the skirt (5" ÷ 2 = 2.5" then 2.5" ÷ 4 = 5/8")

BODICE:                                        SKIRT
Center Front:        3/4"                                 Center Front          5/8"
Center Back:         3/4"                                Center Back           5/8"
Left Side Seam:     3/4"                               Left Side Seam       5/8"
Right Side Seam:   3/4"                              Right Side Seam      5/8"

This might help.
The portions highlighted in yellow will be where you'll make your subtractions. First trace each pattern piece off of the pattern sheet. (Don't trace them double as they are laid out for cutting, just do the halves as they appear on your pattern sheet. Make your reductions and be sure to graduate a bit on the bodice pieces between the 3/4" at the bust and the 5/8" at the waist.

Now for the red. On the bodice front you'll need to redraft your darts. (simply copy the old ones from the pattern sheet, centering the dart over the line that you reduced the bust front at). Do the same for the bodice back.

At the skirt, you'll want to move your pleat lines towards the side seams. You removed 5/8" from the center front so move your pleat lines over 5/8" each. Do some measuring and make sure that your closed darts at the bodice front will match up perfectly with the side pleats on the skirt front as they do in the pattern illustration.

Now since these proportions are much smaller than the original pattern, we can assume that Miss S is a bit shorter too. The bodice may need to be shortened a bit to match... the same may go for the the straps as well. And lastly, the belt will need to be shortened by 5".

That about sums it up. As with any pattern that has been heavily altered, make a muslin version first so that you can test the fit before cutting into your more expensive fabrics.

Whew! I got so into this that I forgot to eat breakfast! I'm going to take my over caffeinated shaky self downstairs for some food before I break something expensive :)


Monday, May 7, 2012

What the heck is a PDF and why you might like them...

Today I'd like to talk a little about PDF patterns and e-books. With the digital world quickly catching up to the world of print, the term PDF comes up more and more often.


For those of you not familiar, a "PDF" is just a type of file, (like jpeg, tiff, or png ) and stands for "Portable Document Format." It's essentially a file like any other you might encounter and usually requires Adobe Reader to open, (which I might add, is on just about every computer these days).

Underwear and Lingerie E-book.

The great thing is, wonderful, beautiful, rare things are being digitized and protected from decay and disappearance and made available at the click of a button for research, education, or just pure pleasure. E-books in pdf form may be read on your computer desktop, kindle, iPad and even most new cell phones! They can also be printed out and enjoyed away from a digital device.

1920s Tunic Dress - an instant download, print at home sewing pattern.

PDF sewing patterns can be downloaded with the click of a button and printed out at home. No need to pay shipping costs to get a pattern from anywhere in the world. Just download, print and get to work!

Fashion Dos and Donts for the Plump E-book.

Many of you have used PDF patterns by now but I still often get questions like, "How does a download pattern work?

Most "digital (PDF) sewing patterns, new or vintage, are just images of parts of a pattern that, when printed and taped together, make a full-sized pattern ready to cut out and sew.

The quality of the pattern that prints out depends on the skill and experience level of the person creating the pattern, and perhaps how good their design software is. I have downloaded patterns that were simply scans of an original, and some that have been designed with professional pattern drafting software. One is not necessarily better than the other, though the price and image quality are usually quite different.


A Print-at-Home instant download pattern taped together.

Any pattern from Mrs. Depew Vintage described as an instant download, print-at-home pattern will look like the above when you print it out and tape the pages together. They are designed to print on your home printer to A4 or US letter-sized paper. Once put together, they are full-sized, ready to cut and sew patterns.

Other digital patterns can be drafting instructions or diagrams that you can print at home and draft your own patterns from. Take for instance this pattern:

Depew 1123
The above is a Draft-at-Home pattern from Mrs. Depew Vintage.
To get a full-sized pattern you first print out the measuring band and miniature pattern, then use them to draft the pieces scaled to your measurements, much like the Lutterloh system.

You can read all about the different types of patterns available for download from Mrs. Depew Vintage on our pattern types FAQ page.

Thursday, August 26, 2010

Mod Headband Tutorial

Today I was really looking forward to starting on the Burda coat that I've been waiting to sew.  I think I may have made a mistake in pre-washing my taffeta so while I try 6 dozen things to try and iron out all the wrinkles that WON'T GO AWAY, here's a headband tutorial.
This is the perfect project for small leftover scraps from other projects.

You will need:
Fabric scraps big enough for the template
Approx. 9 1/4" elastic (I use 1/4" wide)

Cut two different pieces on the fold using the template. You can use two pieces of the same fabric or two contrasting pieces. If you're wanting to be able to wear either side up, avoid using thin or sheer fabrics because your seam allowance will show through on one side. 


Side one.