Happy weekend to you all, my dear readers! This has been a really busy month for me and I apologise for not posting more often. We had a lot of important events recently in our local military community that kept me busy, as well as pretty much a weekend-long birthday celebration for myself. Not to mention the super fun steroid withdrawals I've been having (Yay! I'm just thrilled to be off the horrid things!) keeping me sickish and therefor lazy. But on the bright side, my chronic pain is better enough that I have a sewing project to share with you!
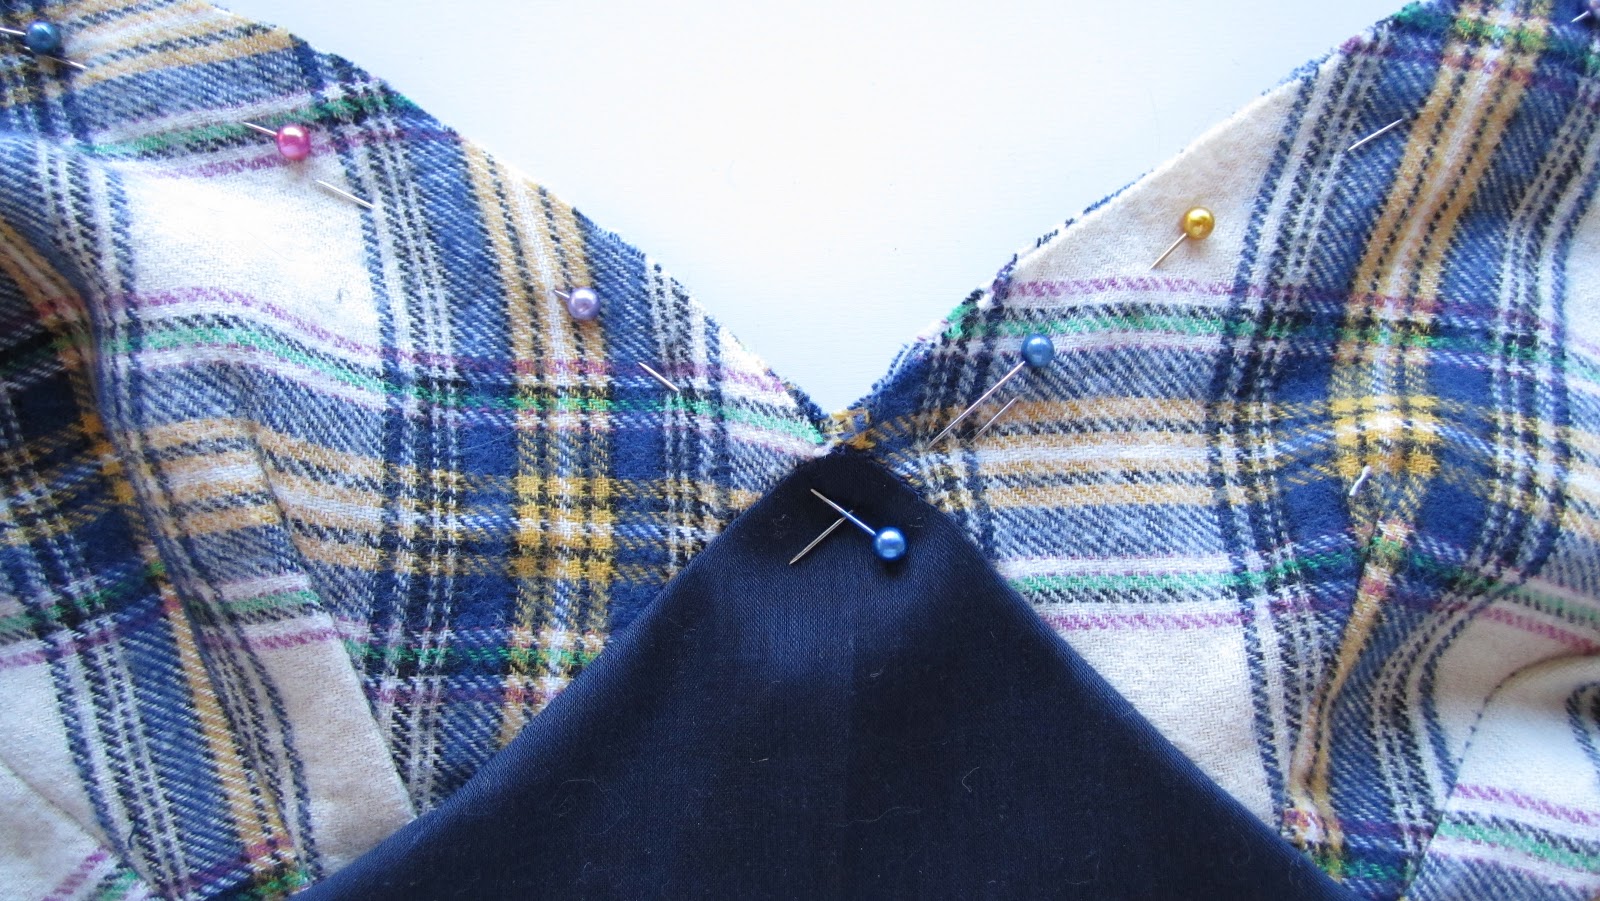
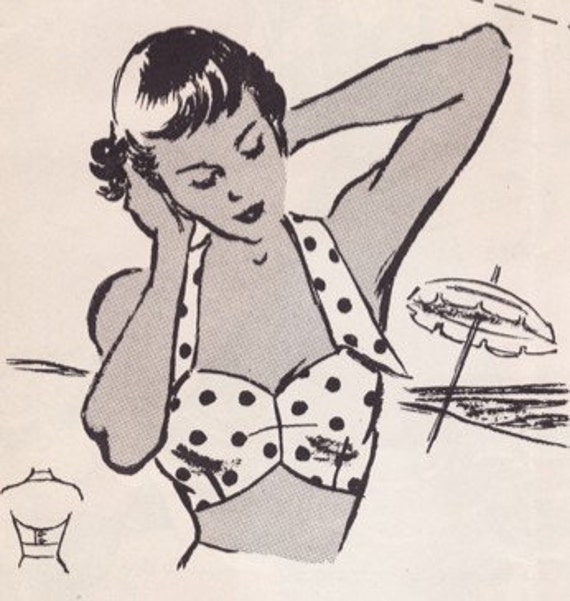
I had a blast sewing this beach bustier top. It was one of those projects where I got to see my sewing practice start to pay off; you know, when you can finally see that you're a better seamstress than you realized? My top stitching came out straight, my seams all matched perfectly, and this little baby is clean from the inside out!
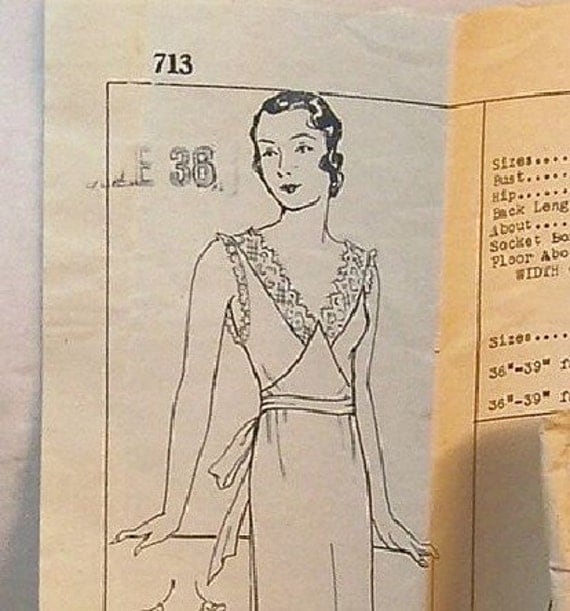
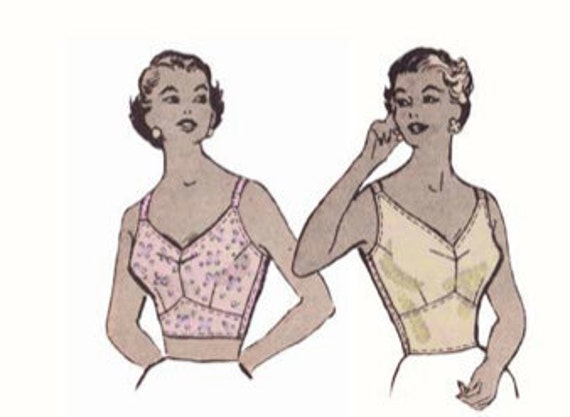
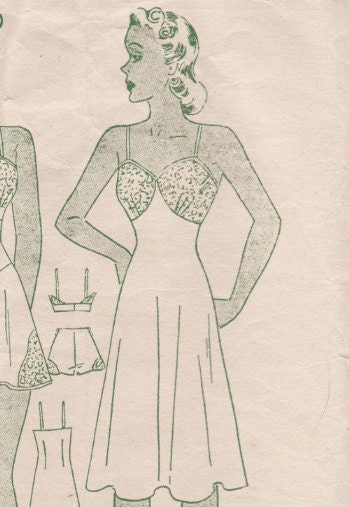
I made this beauty using my 1950's Style Beach Bustier Digital Pattern with the intention of adding a skirt to make it into a dress. I had originally planned on making it strapless so I boned the side seams for more support. Then after a fitting, realized that if I waned strapless I needed to have used a size smaller. So in went the original halter strap which I really liked better in the long run.
I hadn't added any buttons at this point, waiting for the skirt to be attached so I could work out a smooth button/ zipper combo in the back.
Well, I added the skirt, and in a hurry to get it finished in time for an event, completely botched my closure plans. I kid you not, the whole thing has been sitting in a crumpled pile on my guest-bed now for a month. All I need to do is rip the zipper out and sew it in again with a bit of the dress taken in, but have I gotten around to it yet? No. (hangs head in shame).
Well, there you have it. I'm not perfect, but I sure can make a pretty half-done mess, now can't I?
Are there any UFO's (UN-finished objects) laying around your sewing space, shaming and guilting you as you ignore their cries for closure?
Showing posts with label beach bra pattern. Show all posts
Sunday, June 24, 2012
Beach Bustier Adventures
Labels:
1950's fashion,
1950's pattern,
1950s,
bathing suit,
beach bra pattern,
beach set,
beachwear,
beauty,
bikini,
UFO
Thursday, March 1, 2012
Ohh La La Pin Up Sew Along... Everything in One Place.
If you're participating in the Ooh La La Pin-Up Sew-Along then it might be a good idea to bookmark this page. Below are links to each how-to post so far and I'll keep updating to this page as well after each new post.
![]() |
1950s French Corset/ Garter Belt #2002 vintage sewing pattern available for download here. |
1. Introduction.
2. What you'll need.
3. Printing the pattern.
4. Corset boning and why you need it.
5. Grading your pattern up or down.
6. Sewing your muslin.
7. Lace overlay is pretty... and optional.
8. Sewing your French seams.
Ohhh Lulu: Contrasting bone casings.
Ohhh Lulu: Preparing your center back pieces- Eyelet version.
9. Adding your boning.
10. Back hook and Eye Closure.
Ohhh Lulu: Applying your eyelets.
11. Binding your edges.
12. Bias binding: sewing an inverted corner.
Ohhh Lulu: Satin-covered garter straps.
13. Attaching garter straps.
Ohhh Lulu: Adding Bows
14: Adding rosettes, and the finished corset!
![]() |
1950s French Bra pattern available for download here. |
1. What you need to start your bra ~ Courtesy of Ohhh Lulu.
2. Making a muslin of Version 1 and how to adjust for a smaller cup size.
3. Making a muslin of Version 2 ~ Courtesy of Ohhh Lulu.
Long-line Version: Important adjustments if you're a larger cup size ~ Courtesy of Ohhh Lulu.
4. Cutting your Fabric ~ Courtesy of Ohhh Lulu.
5. Darts and lining.
6. Sewing your bra seams.
Long-line Version: Cups and corselet assembly ~ Courtesy of Ohhh Lulu.
Long-line Version: Adding a little extra support ~ Courtesy of Ohhh Lulu.
7. Attaching your lining.
8. Cheating nature a bit... or padding your bra.
9. Bra Back Closure.
10. Binding the raw edges.
11.Sewing on your bra straps and the finished product.
12: Sewing adjustable bra straps ~ Courtesy of Ohhh Lulu.
Part 3, Super Fancy Extended Edition; Betty High Waist Panties:
Where you can find the panties pattern.
1. What you will need to sew the panties. ~ Courtesy of Ohhh Lulu.
2. Sarah: Sewing your muslin. ~ Courtesy of Ohhh Lulu.
3. Anna's Muslin.
4. Cutting your fabric and sewing your vertical seams. ~ Courtesy of Ohhh Lulu.
5. Sewing in the crotch lining. ~ Courtesy of Ohhh Lulu.
6. Finishing the leg and waist openings with elastic. ~ Courtesy of Ohhh Lulu.
7. Anna's Finished High Waist Panties.
Saturday, February 4, 2012
Gorgeous Lingerie in Hiding
I'm not feeling too great today on a new medication so I'm going to keep this short and sweet. While I've been tucked away on the couch, I've been using my ipad for my usual search for vintage lingerie and sewing patterns.
Here are a few goodies:
This is a to-die for 1920's night gown pattern that I've had my eye on for a while. If only I didn't have too long a to-sew list already...
This nightgown/ lingerie set just makes me swoon, and even manages to make bloomers look sexy in a revealing sheer gauze.
If you're into knitting, then this great reproduction booklet for sweet little underthings is right up your alley.
Thinking of lingerie always has me looking for bras. This time I was looking for the 1920's and I found this great little brocade bra. I love how the brocade is sateen and how the rounded top looks a bit like a sweetheart neckline.
And last but not least whilst we have bras on the mind, Sew Vera Venus is offering a giveaway for her recently developed 1940's bra. This design is pure genious and I can't WAIT until it's available for purchase.
I'm dying to know how she does that lovely little stitched pointed V. Swoon. You can click on this link to leave a comment to enter the giveaway.
Have a happy weekend, mama's off to go mix alcohol with pills. Cheers!
Here are a few goodies:
This is a to-die for 1920's night gown pattern that I've had my eye on for a while. If only I didn't have too long a to-sew list already...
![]() |
Vintage Sewing Pattern 1920's Slip Gown Mail Order Lingerie Pattern Ideal 713 |
![]() |
RARE 50's Vintage McCall's Sewing Pattern 3029 - Nightgown, Petticoat & Panties - UNCUT - size 14/32 |
![]() |
Weldon's 6D Knitting Series (5) c.1939 - Vests & Pantie Sets, Ladies' Vintage Lingerie in Knitting |
![]() |
Vintage Bra Deco Era Cotton Sateen Brocade Bralette |
![]() |
Photo from VeraVenus.com |
I'm dying to know how she does that lovely little stitched pointed V. Swoon. You can click on this link to leave a comment to enter the giveaway.
Have a happy weekend, mama's off to go mix alcohol with pills. Cheers!
Tuesday, December 20, 2011
Bra Winner and a Peak at What's to Come
And now what many of you were waiting for, the winner of a pdf of a 1950's Long-line bra!
And the winner as chosen at random by random.org is:
Ale, who commented that she would like to see a suspender belt pattern pdf in the future. Congrats, Ale! Ale, you can email me at afewthreadsloose@gmail.com and I'll send you your pattern.
For those of you who didn't win but still wanted a pattern, I have a new deal at the shop that offers a discount if you would like to buy more than one.

For 3 $5 pdf patterns for $12, click here. For 4 $5 PDF patterns for $15, click here.
Many of you commented that you would like to see more pdf patterns of things like suspender belts, girdles, blouses, and tap panties to be made in silk. Well, here you go!
Yesterday I released the new bias cut tap pantie pattern, and what a wonder! It's in a larger size! It can either be made in a 32" or 34" waist.
For those of you wanting blouse patterns, I'm working on a great 1940's wrap-around blouse as we speak!
And for those of you who asked for girdles and suspender belts, I have something in the works, and I'm waiting for a few new drafting tools to arrive so that I can make the below a reality:
That's right, ladies, wonderful French support garment patterns are soon to come!
Stay tuned soon to see the silk blouse I've been slaving over.
Tuesday, December 6, 2011
Mode Du Jour, June 1951.
For your viewing pleasure today I have images from Mode Du Jour, from June 1951.
Doesn't the cover model look like Madonna?
The gorgeous two piece ensemble above is a great, gathered bandeau and fantastic skirt with draped details.
You can get the look with this pattern.
This halter top bandeau look came into style in the mid to late 1940's and seams to have stuck around for the next decade.
You can get the look with this pattern.
Can you tell that I really can't wait for summer? We haven't seen the sun in 3 days now and it's REALLY getting to me...
Doesn't the cover model look like Madonna?
You can get the look with this pattern.
This halter top bandeau look came into style in the mid to late 1940's and seams to have stuck around for the next decade.
You can get the look with this pattern.
Can you tell that I really can't wait for summer? We haven't seen the sun in 3 days now and it's REALLY getting to me...
Labels:
1950's 1940's,
beach bra pattern,
bikini,
halter,
swim suits
Saturday, November 5, 2011
Lingerie Sew-Along: Everything you need in one place!
I just thought that I would include a link to each individual lingerie-sew along as sort of an index where you could skip to the step you're looking for without having to drag through the rest of the blog posts. Here you go!
Bra:
Part 1: Printing the pattern, and adding seam allowance
Part 7: Starting the Tap Pants
Slip/ Cami:
Part 12: Starting the Slip, Cutting, and Contour Darts in Slip Back
Part 13: Bust Darts and Gathers, Joining Bodice and Slip Front
Part 14: Side Seams, Facing Bodice, Binding the Top
Part 15: Final Touches and the Finished Product
Bra:
Part 1: Printing the pattern, and adding seam allowance
Part 2: Resizing, Layout and Cutting your bra
Part 3: Darts, Pressing, and Attaching the Bra Band
Part 4: Binding the top of the bra
Part 5: Finishing the bra band
Part 6: Closure, straps, finishing touches and pictures
Tap Pants:
Part 7: Starting the Tap Pants
Part 8: Tap Pants Cutting, Darts and Yoke
Part 9: Inner Leg and Front to Back Seams
Part 10: Tap Pants Lace Inset and Front/ Back Facings
Part 11: Tap Pants finishing touches and pictures
Slip/ Cami:
Part 12: Starting the Slip, Cutting, and Contour Darts in Slip Back
Part 13: Bust Darts and Gathers, Joining Bodice and Slip Front
Part 14: Side Seams, Facing Bodice, Binding the Top
Part 15: Final Touches and the Finished Product
Friday, October 14, 2011
Lingerie Sew-Along: Finishing the Bra Band, Part 5
When we last left off, we had finished binding the top of the bra. Now we're going to finish facing the bra band.
First turn your bra inside out so that the WRONG sides are on the outside. Start at one end and pin the bra band together RIGHT sides together.
Pin a few inches of the band at one end, then match up the center and pin that for a few inches, and do the same for the opposite end. Then pin the rest of those gaps. This helps to avoid strange bunches of fabric since the band is cut on the bias.
You'll want to leave a 2" gap in the band just under one of the cups for turning the bra right sides out again.
![]() |
The bra, inside out. |
![]() |
The back bra band, RIGHT sides together. |
![]() |
The bra, RIGHT sides together. |
Thursday, October 13, 2011
Lingerie Sew-Along: Binding the top of the bra, Part 4
First off, for those of you who are interested in a fascinating blog post on the 1940's style bra silhouette, check out this very well researched post on By Gum, By Golly.
We also had a good question yesterday about darts: after resizing her bra pattern to allow for a larger bust size, Xye asked: Anna! Where is the top dart supposed to lie? Mine is pointing the dart nearest the side/furthest from centre - so not central to bust point? And how far from centre back should the tapered point of the upper bra piece end? Mine is ending about 2" from centre back (I think, while squinting and half turning to look in the mirror!). Thanks!
This is a great question! Xye, your top dart is in just the right place! Good job! The back sounds about right too. On mine it is about 2 1/2" from the center back, but this will vary a bit depending on whether or not you extended the back, and how much stretch your bra band fabric has on the bias.
And now on to binding the top of the bra:
When last we left off, we had just finished creating a separate outer and lining. Place the outer and lining pieces WRONG sides together.
Start by matching the center front and pin a few pins to secure them together.
![]() |
Photo from By Gum, By Golly. |
This is a great question! Xye, your top dart is in just the right place! Good job! The back sounds about right too. On mine it is about 2 1/2" from the center back, but this will vary a bit depending on whether or not you extended the back, and how much stretch your bra band fabric has on the bias.
And now on to binding the top of the bra:
When last we left off, we had just finished creating a separate outer and lining. Place the outer and lining pieces WRONG sides together.
![]() | |
Outer and Lining Wrong sides together. |
![]() |
Pin the center front of outer and lining WRONG sides together. |
Wednesday, October 12, 2011
Lingerie Sew-Along: Darts, Pressing, and Attaching the Bra Band, PART 3
For today's post we'll go over our darts, pressing aids, and our first seam for the bra band.
If you have a bit of experience sewing already, you should be familiar with marking and sewing darts. If this is new to you, or you just want a quick refresher, here's a blog post I did on darts.
Here I have marked my darts with pins. This is what it would look like after I pulled the pattern piece off, but before I separated the two pattern pieces. Make sure your darts are on the WRONG side of your fabric! If you have a fabric that makes it hard to tell one from the other, use a chalk mark on the wrong side to help you keep track.
Once you fold your darts and pin them in place, start at the bottom and straight stitch up to a point.
Saturday, October 8, 2011
The Sew-Along: It begins with a bra.
Well, despite the distracting arrival of my serger in the mail, I began work on our lingerie sew-along. As you might remember, we're starting with the Pauline Bra Pattern this weekend.
(UPDATE: if you want me to keep you posted with what's going on during the sew-along, you can go to A Few Threads Loose on Facebook and follow along that way. )
Thus it begins...
Did you pre-wash your fabric yet? When I first started sewing this went totally over my head. Then I got better and better, and realized that if I was going to all this trouble of making something for myself, it would really suck if I wore it once, washed it, and could never wear it again.
PREEEEEEEEEEEEEEEEEE - WAAAAAAAAAAAAAAASH!
Tuesday, September 27, 2011
A Compendium of Lingerie Patterns... Let's talk about a sew-along!
On my last post quite a few said YES! to my thought that we should do a sew along on lingerie. I really want to show you all that lingerie is not hard, not scary, and a very rewarding sewing project. Like all things small, underwear or bras don't take forever to sew, and are practically instant gratification projects.
I would love to get your votes on what you would like to sew with me, and the pattern with the most votes will be what we tackle as a group. Do you want to sew a bra, panties, tap pants, slip, teddy or camisole? Should we use an inexpensive pdf pattern that will be super easy to find or do we want to use a paper pattern, offered in multiple sizes?
Here are nearly all of the great lingerie patterns that I know about. Most of them I'm very familiar with already. Some of them are pdfs from my shop, some aren't. Some are pricier than others. Please don't feel obligated to vote for one of my pdfs just because. Don't pick the pattern that looks the easiest. Pick the pattern that you think you will feel gorgeous in. Pick something that will make you feel special when you wear it. That's the one you want to vote for. I'll help you with the hard stuff!
Leave a comment to tell me which of these you'd like to sew in the sew-along. I know, there are a lot of them, so we'll narrow it down to 3 in this post, and in the next post you can vote again for your favorite.
Slips/ Camisoles:
![]() |
Vintage Pauline Slip and Camisole Printable Sewing Pattern PDF Copy 34 bust. |
Colette Patterns Cinnamon - No. 1012 |
Thursday, July 14, 2011
Best feeling EVER...
Yesterday the lovely and talented Casey of Casey's Elegant Musings posted about my beach bra pattern!
She created her own clever twist on the pattern that has me itching to make another one and try her idea.
Instead of making the back panel button up, she drafted her own back panel and ruched it to make it a more comfortable, slip on version.
You can see all of her lovely photos and clever design work at her blog.
Seeing Casey's version has lit a fire under me to finally create a post featuring everyone's pictures of their own beach bra pattern. I know so many of you have gotten the pattern from my etsy shop and made your own version.
I would love to see your photos, and with your permission, post them on the blog. I love the idea of seeing 30 or so different versions of the same patterns, it's a great way to see other people's style through their fabric choice, accessorizing, and alterations.
So if you've made the pattern, or you would like to, send your photos to me at afewthreadsloose@gmail.com
(you can crop your head out, or send them anonymously if you're shy.)
And don't forget to enter the giveaway for the free hat and purse pattern. I draw the winner on Monday!
She created her own clever twist on the pattern that has me itching to make another one and try her idea.
![]() | |
Photo by Casey |
Instead of making the back panel button up, she drafted her own back panel and ruched it to make it a more comfortable, slip on version.
You can see all of her lovely photos and clever design work at her blog.
Seeing Casey's version has lit a fire under me to finally create a post featuring everyone's pictures of their own beach bra pattern. I know so many of you have gotten the pattern from my etsy shop and made your own version.
I would love to see your photos, and with your permission, post them on the blog. I love the idea of seeing 30 or so different versions of the same patterns, it's a great way to see other people's style through their fabric choice, accessorizing, and alterations.
So if you've made the pattern, or you would like to, send your photos to me at afewthreadsloose@gmail.com
(you can crop your head out, or send them anonymously if you're shy.)
And don't forget to enter the giveaway for the free hat and purse pattern. I draw the winner on Monday!
Labels:
beach bra pattern,
casey's elegeant musings,
feature
Subscribe to:
Posts (Atom)