

 |
| The pattern we're using... |
All right Ladies, it's that time. Hook and eye time. First, allow me to disclaim a bit. This is not my very best work. I did this on day 4 of NO sleep (hurray for medicine side effects) so my pictures and sewing both are a wee bit blurry, I apologize.
This is a bit of a long post so feel free to stop half way though and have a glass of wine. I did.
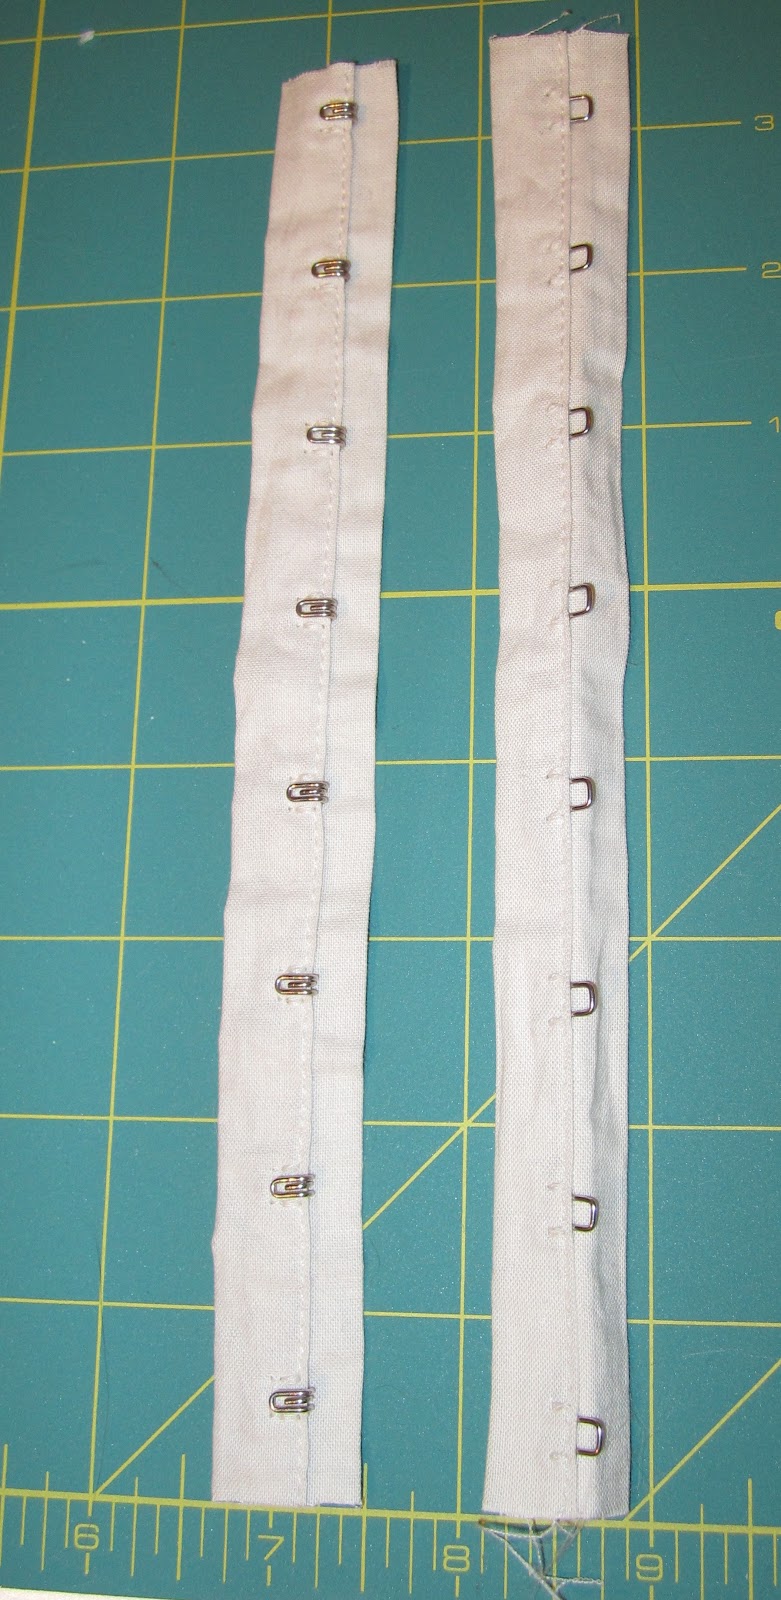 |
| The right hand side of the tape will be our 'raw' edge. |
Decide which side you want the hooks and eyes on. I went with the standard bra formula of Hooks on the Right, Eyes on the Left.
Let's start with they eyes, shall we?
EYES
Lay your corset back edge WRONG side up. For future reference, I'm going to refer to the sewing edge of the eye tape as the 'raw' edge. It is the edge that the eye loops end up pointing towards.
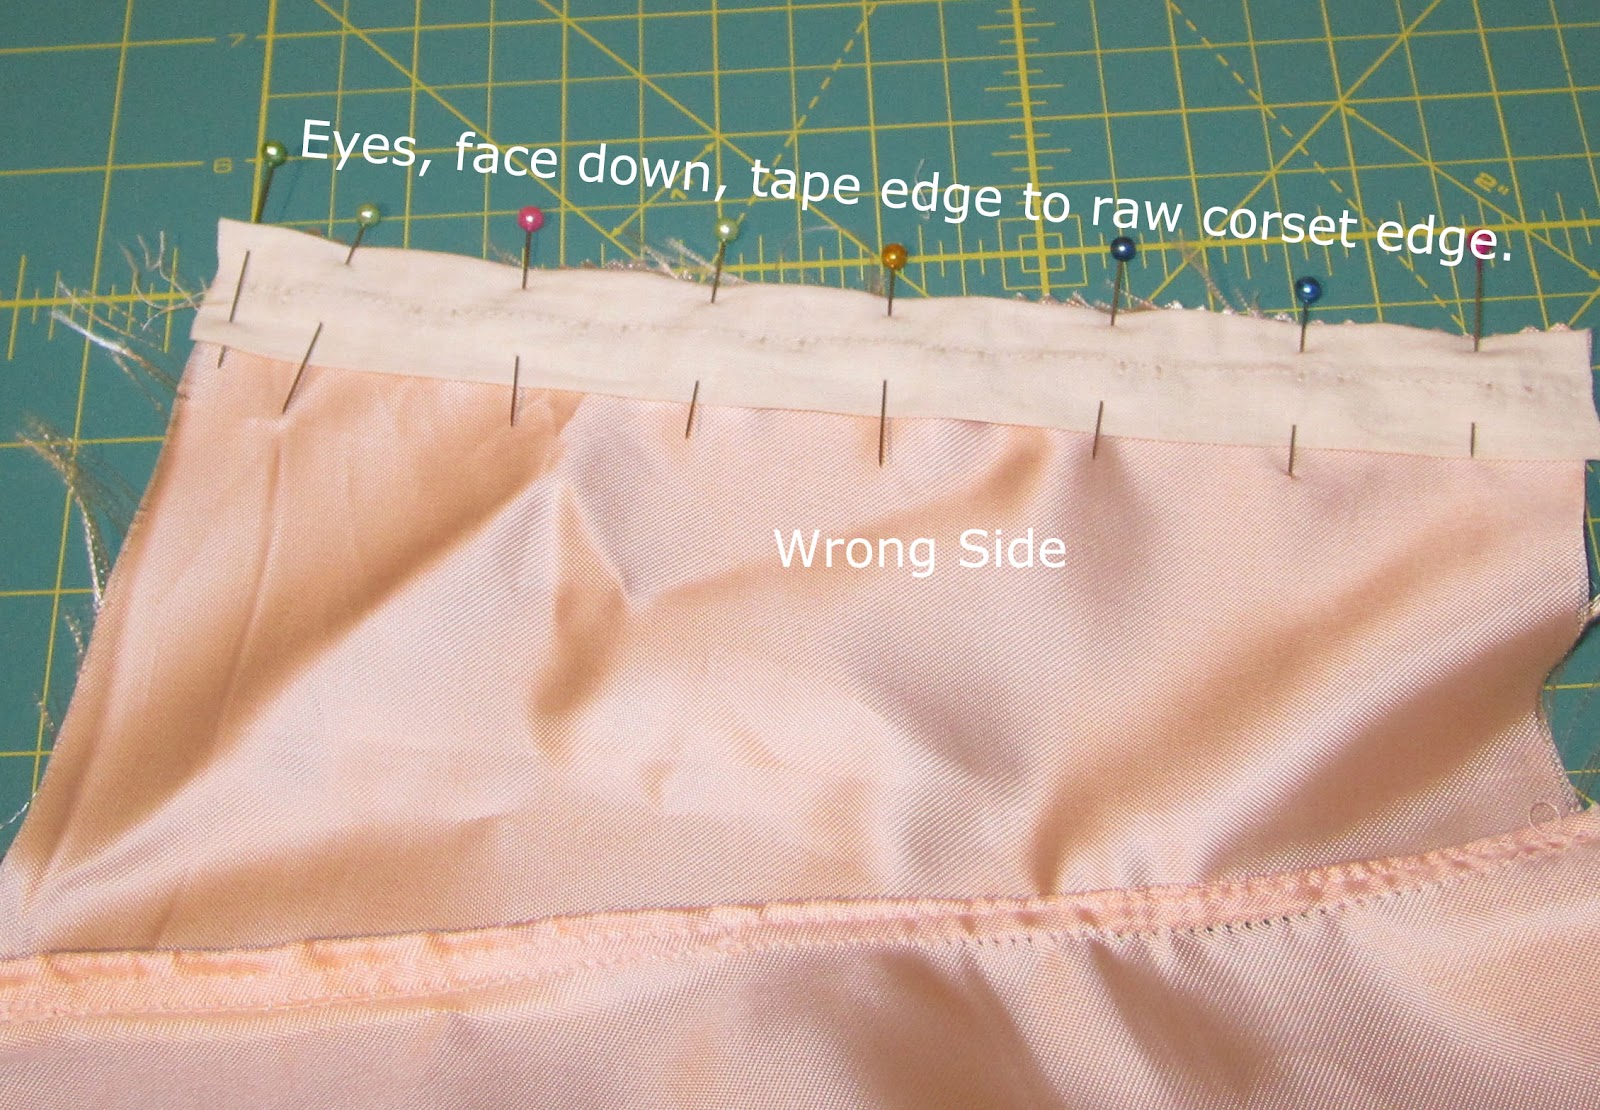
Lay the eye tape face down on the WRONG side of the corset, 'raw' edges matching, and stitch a 1/4" seam. Go slowly, I can't stress this enough. You don't want to slide to far off guide in a hurry and break a needle striking the metal eye.

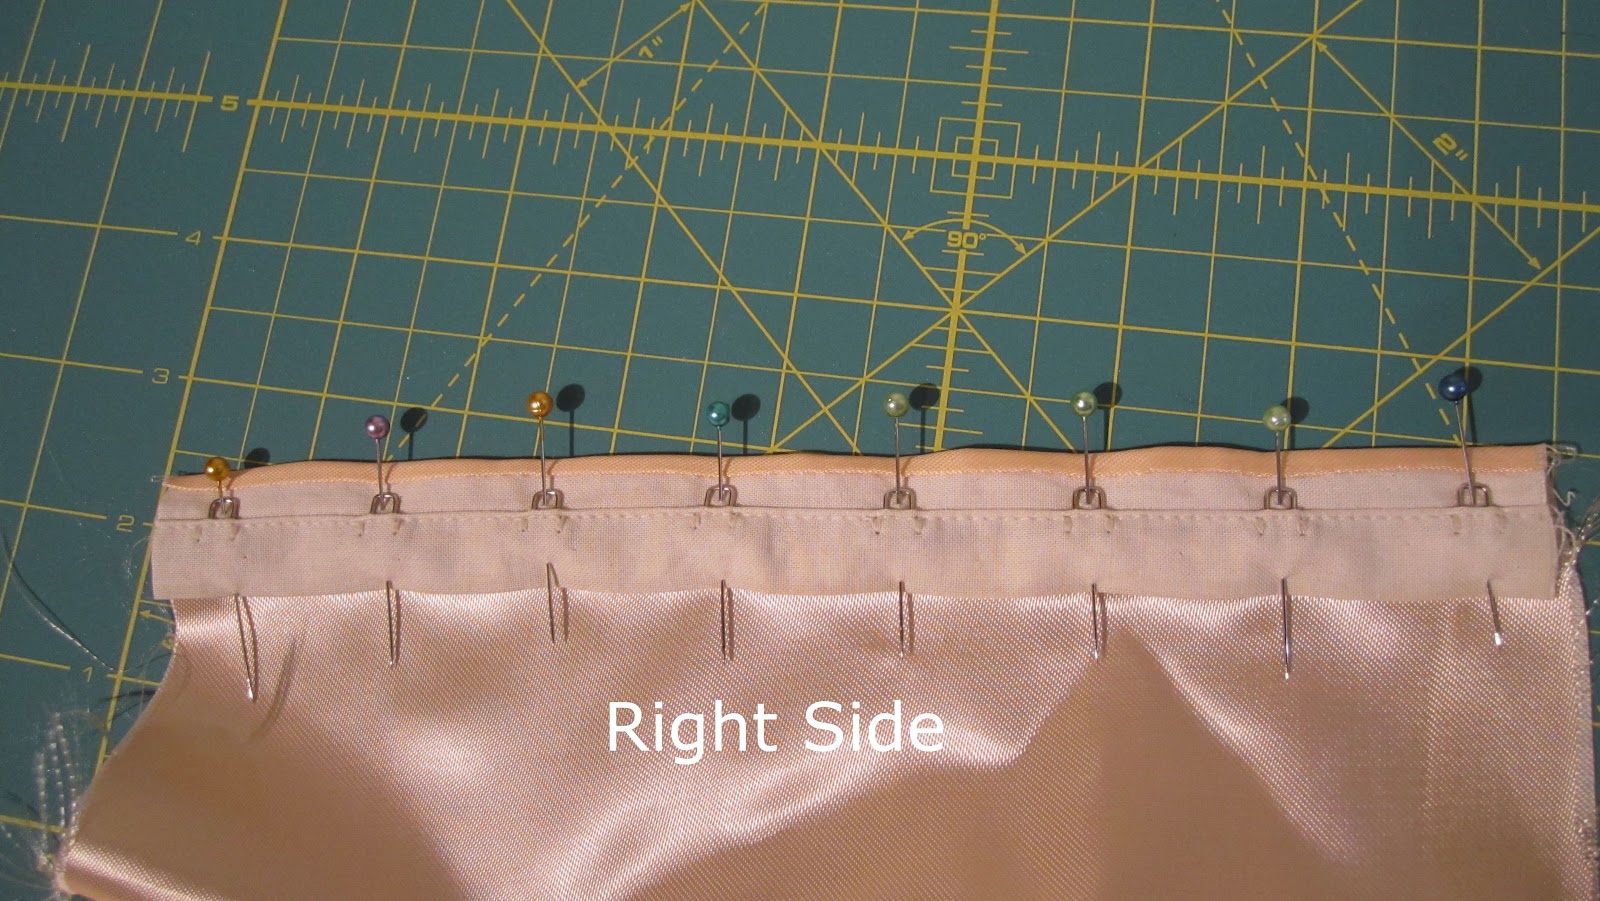
Pin the tape in place and top stitch the left side of the tape from top to bottom.


I have chosen to fold over the eye tape so that there's a 1/4" end of my fabric visible on the right hand side. This can get caught by hooks but I'll be binding it with my contrast binding to protect and neaten the edge. It's good to have a small length of fabric like this between you, and the hooks and eyes.

HOOKS
Now for the hooks. We'll be doing this so that the hooks will end up on the WRONG side of the corset. There will be a tiny bit of overlap to keep the eye-side from showing through if there's a bit of pull during wear.

Lay your hooks Face down, on the RIGHT side of the corset back, matching 'raw' edges. Pin well and carefully stitch a 1/4" seam. I recommend using a 'free style' presser foot so that the hooks aren't pressed down onto your machine by the presser foot. This leaves your fingers more vulnerable so, seriously, be careful!

Now that the hooks are stitched in place, flip the seam open and press.
 |
| Yeah, Vincent made a bed out of my corset last night and left a few claw holes to prove it. Bad kitty. |

This is where my sewing got a bit wonky from the free style foot. This edge will be bound and look oh so pretty when I'm done.
 |
| I'll be binding the uneven sewing job here I did with the free style presser foot. |
8 comments:
ok, I started reading this after my second large glass of wine (it is friday!!) . I think I get the idea, firstly I loved doing the french seams but need to amke them bigger to fit in the boning. Then time to catch up.
PS A great sew along, it has lots of technical and creative bits that to me make a sew along, rather than a photo parade! Well done!!
OK you can tell on the wine bit now!!;-)
What if my hook and eye tape does not look like yours? Mine is only 1/2" wide and doesn't have the raw edge like yours. Will this still work, or should I hunt down some that looks like yours? (Sorry that I have so many questions).
Hi Annabelle,
You don't have to apologize for having questions, that's what a sew-along is for! I think the basic process for your hook and eye tape should still be the same, where you stitch would just be different. You might try pressing your seam allowance under and then stitching the tape over. If you're still stuck, let me know and I'll try to help.
What is a freestyle presser foot? I am altering tons of nutcracker costumes and have been having to sew hook and eye tape by hand because the hook and eyes keep breaking my machine needles. Help!
Hi Laurie,
What a project that must be! A free-style/ free motion presser foot looks like this on amazon:
http://www.amazon.com/Free-motion-Darning-Quilting-Machine-Presser/dp/B004PK6302/ref=sr_1_3?ie=UTF8&qid=1352234543&sr=8-3&keywords=free+motion+presser+foot
I hope it helps! Otherwise, hand stitching is the way to go.
Hey!
You've used the same tape I have which is great, been struggling to find a step by step instructions. Do I need to already have hemmed the sorest seams before I add the eyelets to them? The ones at the back where they fasten?
Will the hook and eye tape be on show on the inside?
Is there anyway to hide it in the side seams?
X
"um is there is photo of the full finished garment to see how it should look closed up and open?
Hi Tracy, you can find pictures of the finished corset here:http://afewthreadsloose.blogspot.no/2012/03/ooh-la-la-pin-up-sew-along-rosettes-and.html
Post a Comment