Showing posts with label applique. Show all posts

Sunday, June 10, 2012

Lingerie in Profile: A Beautiful Lace Bra

Today my lovely readers I would like to show you a wonderful piece of vintage lingerie from my personal collection. This 1930's lace bra has so many beautiful little details that I just had to share it with you.


This bra has many hand made details but has a size 34 label so it was most likely made for resale at a very nice shop. The straps, rosette and binding are all silk ribbon, and the lace is incredibly soft.


Notice the lovely tricolor petals on the silk rosette and these little center pleats to give fullness to the bust... a lovely but futile attempt with a bra that reveals nearly everything.


One cup has a silk flower applique... something that looks a bit like a signature to me. At first I thought it was to mend a tear in the lace, but underneath the lace is flawless. Also, looking at the label, I don't know that this bra has ever been worn or laundered before.


Strap tails finished on the outside of the bra as an ornamental detail... the first I have ever seen.


Whoever made this bra, they, like me, just couldn't quite seem to get their closure to match up perfectly either ( A miscalculation I make time and time again).


 Sigh, oh for the old days. As lovely as this bra is, and it's in my very tiny size, I'm terrified to wear it and risk harming it.

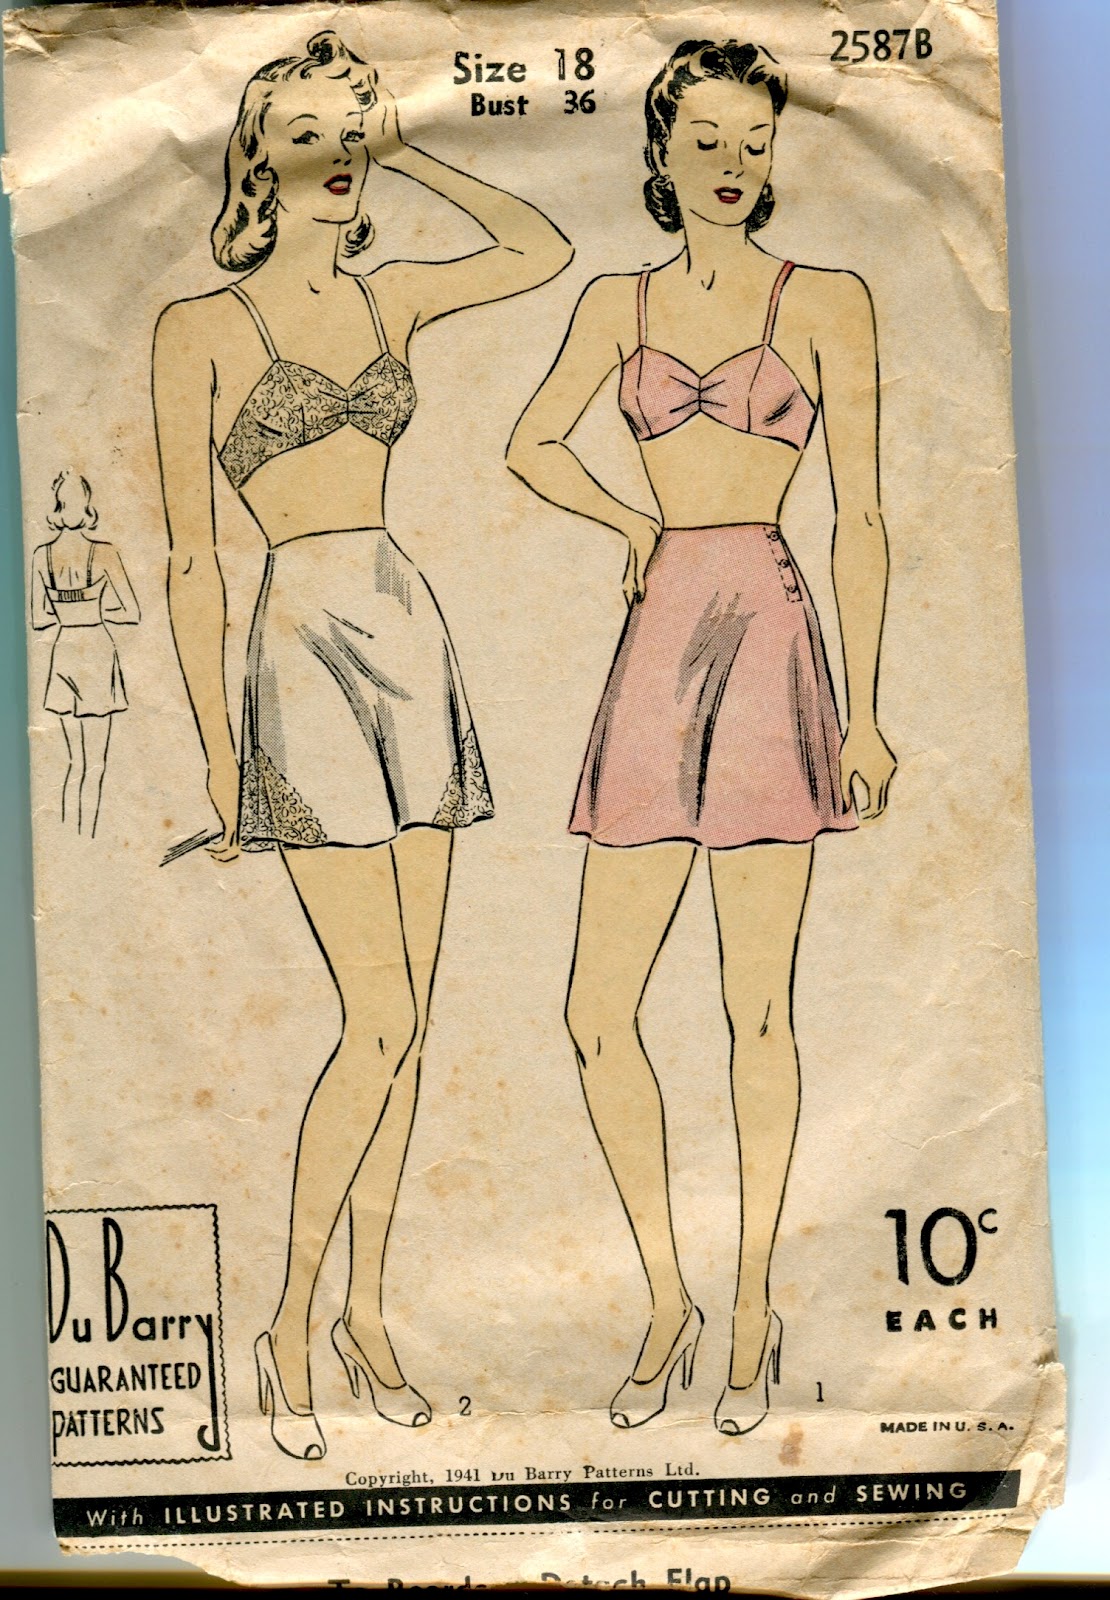
To recreate this bra myself I think I think I would use DuBarry 2587B. This pattern is beautiful and I'm tempted to make a reproduction of it.


How about you? Do you have any vintage lingerie that's just too pretty to wear?


Wednesday, October 26, 2011

Lingerie Sew-Along: Tap Pants Lace Inset and Front/ Back Facings, Part 10

Today we're going to go over the lace inset, and the front and back facings.


In the first post on the tap pants, we traced out a pattern piece for the lace inset. (Before you add any extra to the size of the pattern).


It might come in handy to fold the inset pattern piece in half so that you have a crease guiding you to the center of the inset.

I am using a vintage lace trim several inches wide. The source of the lace? My awesome mother!  Your steps may be different depending on what type of lace you use. What I did above was just center the inset pattern piece over the two scallops so that I could cut my trim at the right point. Then I cut two lengths of the lace, one for each leg.


I have marked the very center of the spot where I'll be laying in my inset on the RIGHT side of the tap pants leg. Since I have chosen to use a scallop- edged lace, I will line up the center point of my two scallops with the pin.

lace inset being set up on the RIGHT side of the pantie leg.
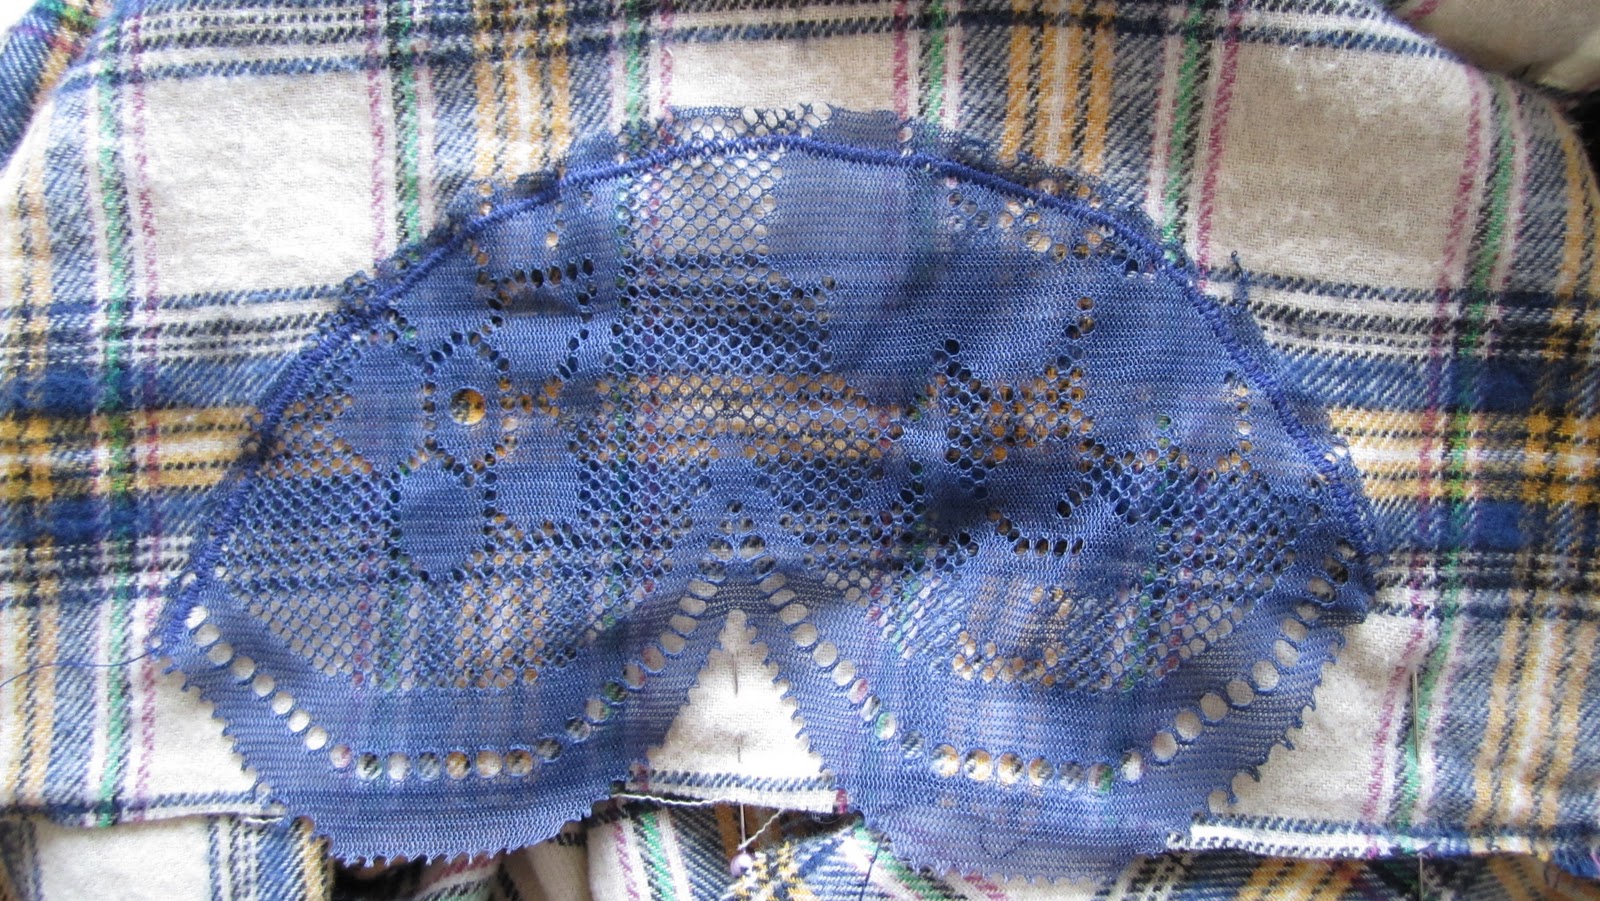
First I lined the scallops in the lace up with my pin marking the center point. Then I laid the inset pattern piece over and pinned it in place to both the lace and the pantie leg. The lace should be resting on the RIGHT side of the fabric. Then I trimmed the excess lace away from the edge.


Above I have removed the pattern piece and secured the lace again to the pantie leg. Now comes the fun part.

In Pretty Pretties, the lace is hand stitched carefully to the RIGHT side of the fabric. Luckily, we have something better now than hand stitching for lace insets. Its called an Applique Stitch and it's our friend! Most machines should have this stitch, and you can look in your manual to find it if you're not sure.

On my Brother machine, my applique stitch is #24. If you don't have an applique stitch on your machine, just use a zigzag stitch. After much experimenting I discovered that the best applique stitch for me is 3 mm wide and 0.5 mm between each stitch.


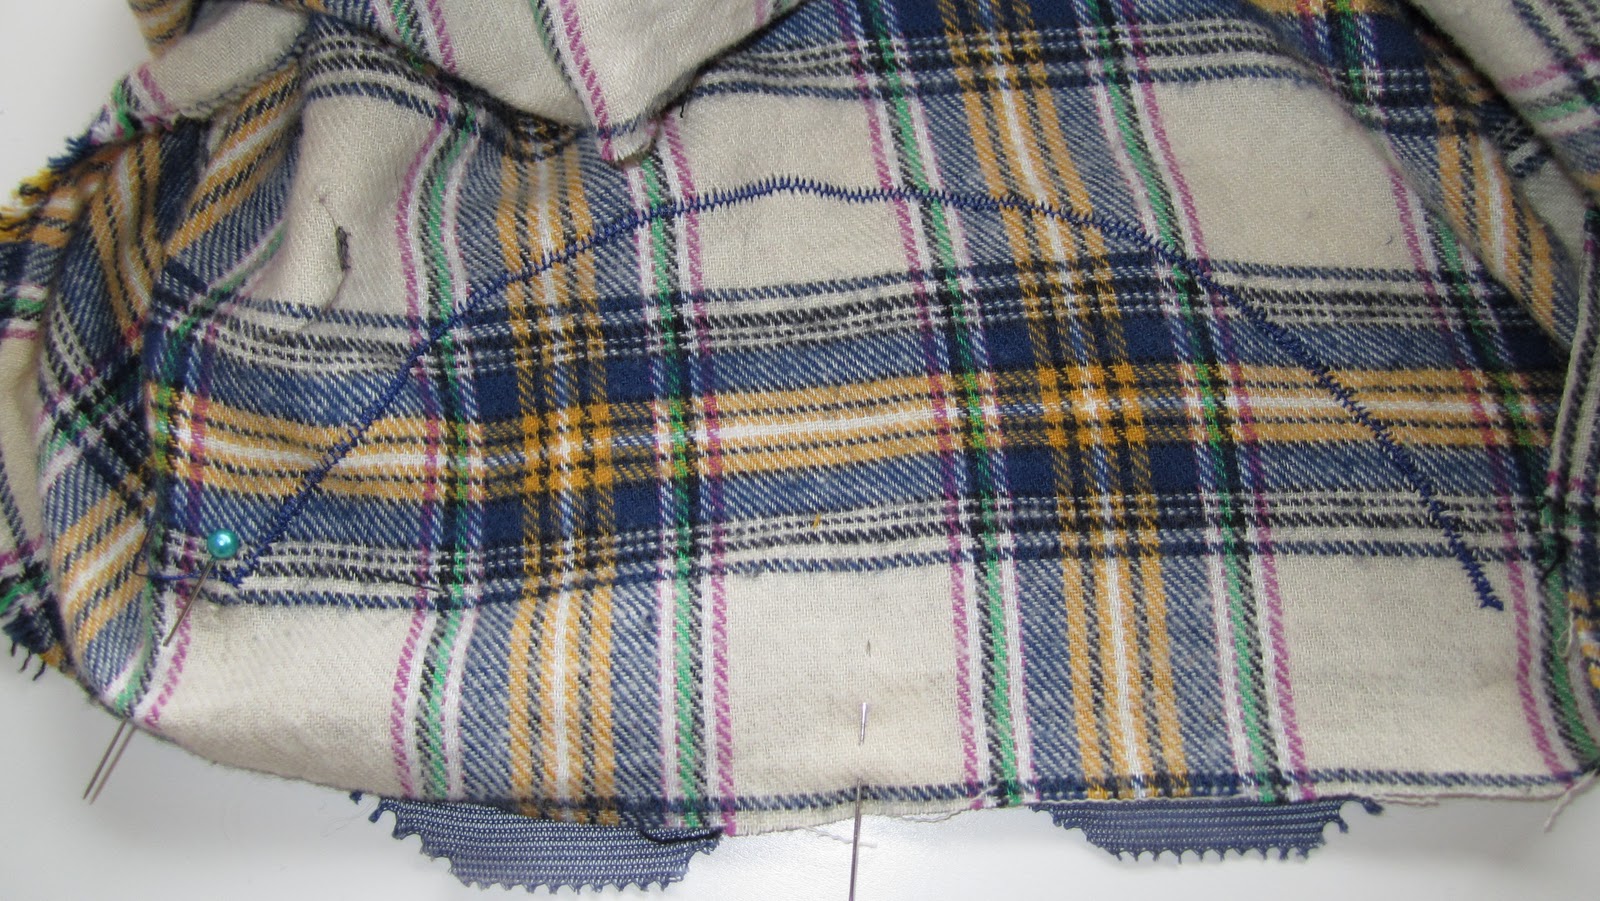
With your lace very securely pinned in place, stitch all the way from one end of the curve to the other, about 1/4" from the edge of the lace. Sewing a bit back from the edge gives your applique stitch as much grip on the lace as possible to keep it safely attached.


Now trim the excess lace from the outside of the stitching, being careful not to clip your stitches.


Your inset stitching from the WRONG side.
Now we need to get rid of the fabric behind the lace. From the RIGHT side of the fabric, flip the lace back to expose the pantie fabric. Trim the fabric away from inside the circle, trimming very close to the stitching.


Since I have a scalloped lace edge, I trimmed the edge of my fabric to a scallop too. This edge will be bound later.

The Facings:
A quick note for those of you who accidentally cut out your V of Doom from the placket opening: For your yoke facing, you'll want to extend the edge of it so it faces the edge of the extension placket I mentioned. Below is just a quick mock up of an extension I drafted to make the yoke facing piece longer.


For the yoke facing, pin it right sides together to the pantie yoke matching up the center and the edges at the placket. Stitch the facing on and press.

The Front yoke of the pantie, with the yoke faced and pressed on the other side.

Now we want to pin the back facing piece to the back of the panties, RIGHT sides together and stitch. Then flip the facing to the inside and press.


The pantie back from the RIGHT side, with the facing pressed to the inside.
The pantie facing pressed to the inside.

Next post we'll cover finishing the raw edges of the facing pieces, the placket, binding the leg, and we're done!

Lingerie Sew-Along: Inner Leg and Front to Back Seams, Part 9

Sunday, September 4, 2011

Fluffy pillows and sexy guns.

I just finished my most recent project last night. The plan is to make some super sexy silk dupioni pillows with gun appliques but first I needed to practice on less expensive, easier fabric.
My test run on the gun applique went so well that I had to actually make it into a pillow. For this one I used micro-suede from fabric.com.


I had toyed with the idea of making it into a purse instead, but after the mass shooting here in Norway, I don't think the locals would respond so positively to anything with a gun on it. Luckily I had the right stuff, a pillow form, and a great futon in the next room to keep it in. (These will be nicely tucked away in my house where my American friends can appreciate them.)

I also had this great old heavy duty zipper from a bunch of vintage notions my awesome mother sent home with me.

From there I experimented a bit, and this is what I ended up with.


Playing with French seams on the inside was a must. I'll need them to prevent fraying and loose threads when I start making these up in silk.


Vincent likes to pop into any and all shots he can, and add his two cents. Here he's screaming FREEZE!


So when my silk gets here I'll have quite the project on my hands. I think I'll be making maybe 4 or 5 of these babies. This was a really fun project, by the way. If any of you want a tutorial on applique, just leave me a comment and I'll pop one together!

Thursday, September 1, 2011

Bathing Beauties, and the winner is...

I have the internet working! We've been moving into our new house and they just connected the darn thing. But enough of my drama, you want to know who the winner is, don't you?

The winner as chosen by the random number generator is commenter #11,  is Holly!
Congratulations Holly and thanks for sharing what makes a swimsuit perfect for you!

"what i look for when i'm buying a bathing suit is basically the suit i had between the ages of 13 and 15. it was perfect. it was kind of 1940-50ish (i thought.) two-piece, white and navy blue polka dots and stripes. the bottoms were belly button high and included loose shorts that gave the impression of being a skirt without the fuss of floating up in the water. the top was a halter and gathered in the middle. i wish i could remember the brand because i would HUNT IT DOWN. i think i got it at dillards. i should figure out how to make that suit."

 
 I think we can all relate to having had that ONE swimsuit that made you look and feel amazing, and wishing you could go back in time and buy 5 of them at once. So Holly, you can email me at afewthreadsloose@gmail.com and I will send you your pattern!

For those of you who still want the pattern, it's a mere $5 in my etsy shop.

On another happy note, I'm decorating the new house like a mad woman, trailing fabric swatches around the house and giving my sewing machine quite the workout. We have wonderful new black leather couches and I'm getting ready to sew some pillows to make the room POP. My fabric is silk dupioni in iridescent jewel colors. I'm going to alternate between these two colors:


What do you think? 
There will be a twist, of course... here's a hint: 


This is my practice run in micro-suede. I see a lot of applique in my future.