Sunday, November 27, 2011

Lingerie Sew-Along: Side Seams, Facing Bodice, and Binding the Top, Part 14

Well, I have officially gotten all of my Christmas shopping done thanks to a bunch of black Friday deals online. Now we can get back to the sewing! Our next step in the Lingerie Sew-Along is to sew the side seams. This is pretty easy, just match the notches, right sides together, and sew.

Side seams pinned, RIGHT sides together.


Then press your side seams. Now you can move onto facing your bodice. For my facing pieces I used a soft, sheer white cotton.

Saturday, November 26, 2011

The Vintage way to Lose Weight

Here I was, thinking that diet and exercise was the way to lose weight. Turns out, all I needed was to chew some gum. Huzzah!

From Simplicity Prevue  February 1939.

Have a nice weekend!

Also, until the end of cyber Monday coupon code "pecanpie" gets you 30% off everything in my etsy shop!

Friday, November 25, 2011

SALE

Has anyone started their black Friday shopping yet?


I'm having a sale over on my etsy shop for 30% off everything.
You can use the code "pecanpie" at checkout.

Happy weekend!

Tuesday, November 22, 2011

Lingerie Sew-Along: Bust dart and Gathers Part 13

 For our next installments in the Lingerie-Sew-Along we will be working on the bodice pieces, darts and optional gathers, and attaching the bodice pieces to the slip pieces.

To see how to sew a dart, or just to get a look at how the same three darts looked in the Pauline bra pattern, click here.

You have two options with the bodice pattern pieces for this slip. You can either sew the darts as instructed, or you can replace the bottom 3 darts with gathers. I have chosen to use the gathers as the fit is more forgiving to the bust contour, and the gathers provide the illusion of fullness at the bust (and let's face it, I can use all the help I can get in that department.)

There are 4 darts on the bodice piece, the single one at the top, and the set of three at the bottom. Sew the dart at the top as you normally would.


Monday, November 21, 2011

Lingerie Sew-Along: Starting the Slip, Cutting, and Contour Darts Part 12

 It's here! The final leg of the Lingerie Sew-Along is upon us and once again, I'm so sorry it took so long for me to make this part happen. Within a couple of days of getting back from the U.S. my camera went missing and my brilliant husband just now found it. We couldn't have a Sew-along without a camera so here we go!

I've been working all weekend to get this baby mostly put together and I've really been enjoying it. It's a nice and straight forward pattern and it feels SO good to get behind my machine again.

Printing: Make sure your printer is set to scale to 100% when you print!
Remember that the original vintage pattern didn't include a seam allowance so you need to make sure you add this before cutting out your pattern pieces.

Let's start with cutting out our pattern pieces, shall we? I chose to make the long version of the Pauline Slip/ Camisole. To make the camisole instead, just cut the pattern short at the lines indicated before laying it out on your fabric. The rest is the same.
Below are my slip pieces laid out on 2 yards of some great navy charmeuse I found at a thrift shop in Nebraska this summer for $1.

Fabric Requirements:
36 inch fabric:
Slip 2 1/8 yds.
Camisole 1 3/8 yds.

Cut out the following:
Slip front, 1 on fold
Slip back, 1 on fold
Bodice, 2 of shell, 2 of facing or same fabric.

Slip pieces laid out, both on the FOLD.

I chose to make the bust pieces in a contrasting white; I'm using a vintage silk handkerchief for fabric. I fell in love long ago with a 1940's vintage slip in blue and white and made the mistake of waiting to buy it. I missed out so this will be my copy.


Once you have your pieces cut out your next task is to mark, pin and sew the darts in your slip back piece. We'll start with the back darts because they are the trickiest. These are known as contour darts and are designed to fit the fullest part of the back and hip nicely.


First mark the darts well; how you do this is up to you but for a contour dart, I recommend a chalk line as it's so much easier to match up the lines.

Saturday, November 19, 2011

Longing for more fur in my life

Living in this cold, icy, god-forsaken winter wonderland of a country has led to a bone deep need for warm, comforting, and fluffy accessories. Some of my go-to wardrobe choices include a hand beaded wool scarf, vintage fur detachable collars, fur lined boots, and various mink and ermine neck warmers. l'm sure you can see where this is going.


With this season in fashion adding fur touches nearly everywhere, it has become glaringly obvious that I need to add a fur purse to my arsenal of accessories.
I had a brief debate with myself over sewing or buying one but it all boiled down to the fact that I have enough sewing projects on my plate as it is.

So I set out on the hunt and I thought that I would share some of my favorites with you.
I was really in love with this mink bag but let's face it, a military wife just can't go and spend $349 on a purse.
So I started looking at vintage and my options got a bit less expensive...until they got more expensive when I stumbled across Hopcotch  Couture and their AMAZING upcycled purses:

Hopscotch Couture

Tuesday, November 15, 2011

Pattern of the Day.

As some of you know, it's been my long held morning tradition of trolling etsy, coffee in hand, for any super unique patterns to have been recently listed. I sort of got out of that recently in an effort to save for my unhealthy Christmas addiction.
But I was weak and gave in today, and much to my delight, I found a great pattern that I only feel slightly giulty for buying.

I give you McCall's 6523.


The rosette is gastly, I know, but the ample hip pleating is just fantastic, and this dress is nearly a double of the only vintage Designer dress I have... and love.. and can't fit into anymore (or ever, for that matter).

I managed to squeeze into this dress for the gala night on our (belated) honeymoon cruise in January. And then we sat down to diner, the ship entered open water, and I was promptly overwhelmed with both seasickness and an inability to breath in my tight dress. I had to run back to the cabin to change and I sort of gave up on the dress afterwards. That and the advent of 10 lbs didn't help either.


My favorite feature of this dress was the way it made my hips seem wider and my waist seam tinier, in the most Monroe-esque way. The pleats have been lined with a very stiff horsehair interfacing, making them almost have a life of their own.
There isn't any more room for me to make this dress bigger... so perhaps I'll just have to sew another one?

Thursday, November 10, 2011

New pattern for the wee ones...

This week, I had one goal. Finish the new pattern I was developing before I started on the slip/ camisole part of the Lingerie Sew-Along. Well, I finished... and now I totally feel like an idiot.
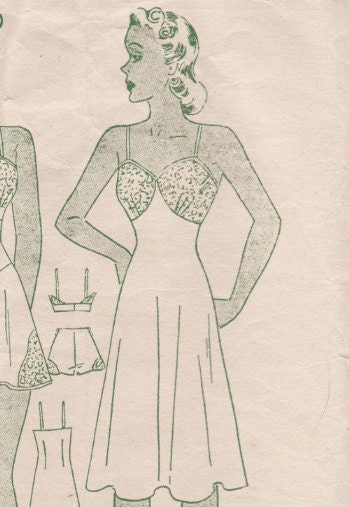
I slaved all this week on this cute little sun suit pattern pdf and then I emailed one to my sister and she so obnoxiously (but rightfully) pointed out, "It's a shorts pattern... it's November, Anna."


DAMMIT!

I started on this adorable pattern in July and then put it aside for other projects, travel, and the big move from one house to the next, and I'm a complete idiot for not leaving it until summer. Luckily, I have a kids trouser pattern from the same era and I can re-do it a bit to include a long overall/ trouser version.
Ugh. I'll be putting that off for a while though so I can start on the Slip/ Cami sew along posts for you all.

In other sewing news, this was drawn to my attention and I seriously need to get some of these nearly poetic sewing labels:


They are offered for sale at Sublime Stitching. And they make a great point! There are so few really easy, immediate gratification sewing projects out there that you can tote or wear around proudly. The good ones always take sooooooooooo long.

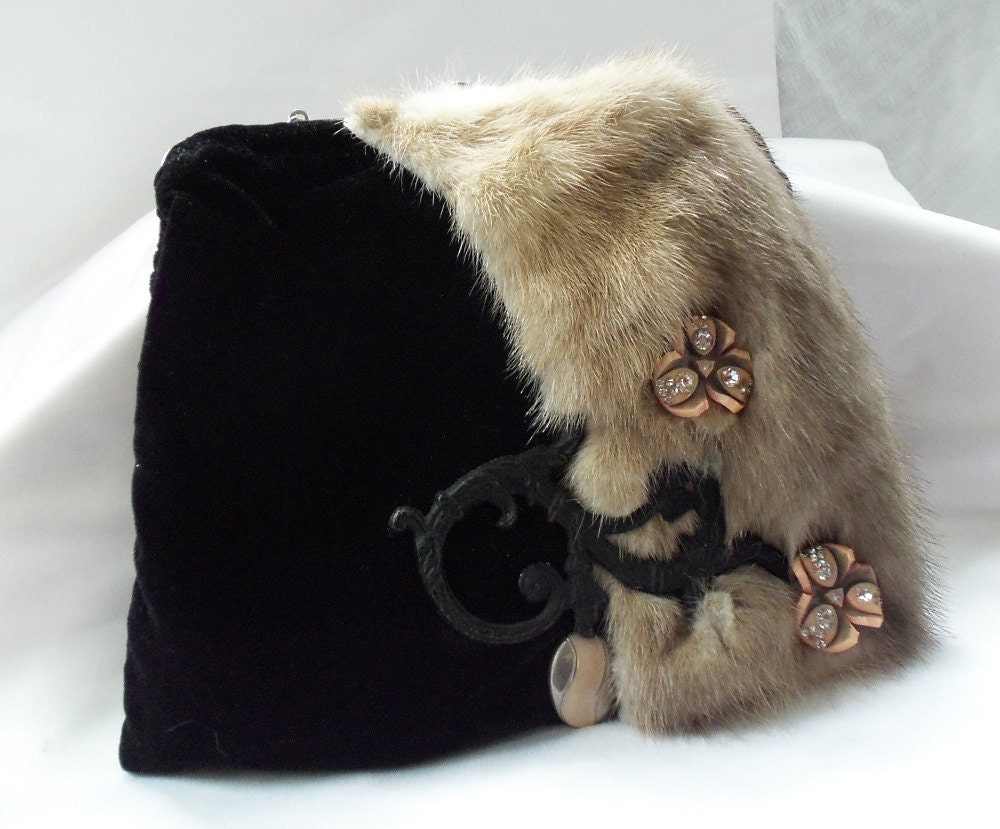
And speaking of things that take forever, that's why I haven't attempted sewing myself a coat yet. That, and wool intimidates me... and I'm not even sure why. But I am sorely tempted to sew one after seeing something else in my Victoria's Secret Catalog:


This gorgeous 
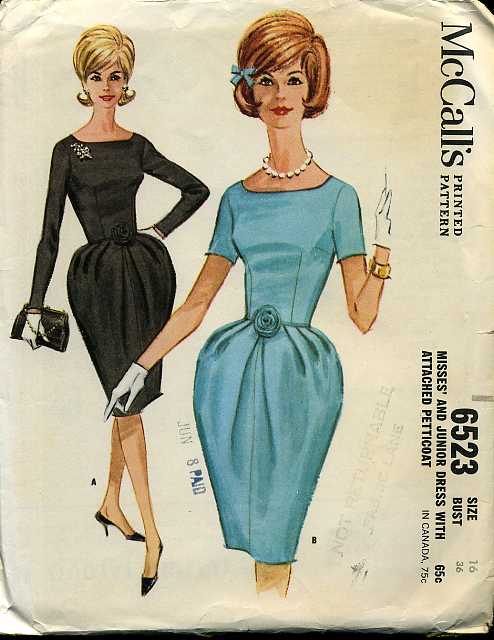
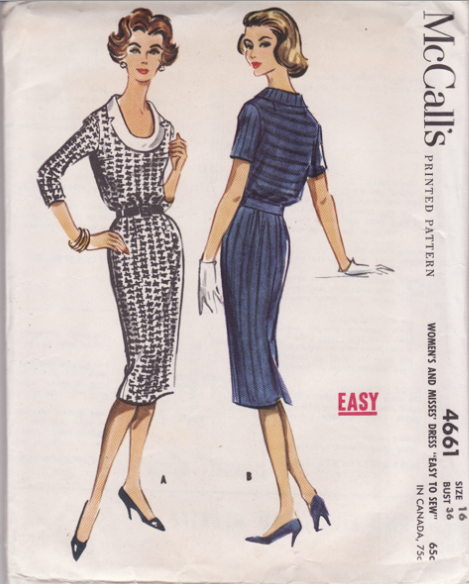
military coat got me to thinking and I dug through my stash to see if I had any coat patterns. Of all wonders, I had McCall's 2054 in two different sizes! The version on the left is nearly identical!


Can anyone recommend a good place online to buy wool fabric?

Tuesday, November 8, 2011

Dress Pattern of the Day

For your viewing pleasure today, we have McCall's 4661 from 1958. The perfect wiggle dress for that Christmas cocktail party.


The collar reminds me a bit of the L'Wren Scott dress that Nicole Kidman made so popular last year.

So pretty... I wish I could keep them all... You can find it for sale here.

Sunday, November 6, 2011

Sunday Roundup.

Here are just some interesting things for your day...

Tilly and the buttons is hosting a giveaway. There's a fantastic observation on fitting a garment to the human form, and the comment to win section is really a great read. She asked that everyone share a sewing secret or tip and the resulting comments are fascinating and informative.

Also, if you like vintage fashion catalogs (swoon) there's a great collection of pictures over on Casey's Elegant Musings, shared with us by her guest blogger, Ashley from Bramblewood Fashion.

In other news, I got my Victoria's Secret catalog in the mail today and instantly fell in love with this:

Velvet Boyfriend Shirt at VS.
So I got online and bought 2 yards of lovely rayon velvet and dug through my Burda Fashion Magazine collection for a great button down shirt pattern. I found a dozen or so. more on that later.
So of course that got me thinking about what else I like in the catalog that I could sew...
and I went straight to the page that had these gorgeous leggings:

VS Siren Legging in corduroy.


Naturally I hadn't checked out yet at fabric.com so did a search for stretch corduroy and found this, and promptly bought some of that too.


This Burda skinny trouser pattern is just what I have in mind. Good thing I have the issue filed away in my collection, ready to go!
I think post sew-along I'm going to have some fully modern sewing on my hands.

Saturday, November 5, 2011

Lingerie Sew-Along: Everything you need in one place!

I just thought that I would include a link to each individual lingerie-sew along as sort of an index where you could skip to the step you're looking for without having to drag through the rest of the blog posts. Here you go!


Bra:

Part 1: Printing the pattern, and adding seam allowance
Part 2: Resizing, Layout and Cutting your bra

Part 3: Darts, Pressing, and Attaching the Bra Band

Part 4: Binding the top of the bra

Part 5: Finishing the bra band

Part 6: Closure, straps, finishing touches and pictures

Tap Pants:

Part 7: Starting the Tap Pants
Part 8: Tap Pants Cutting, Darts and Yoke

Part 9: Inner Leg and Front to Back Seams

Part 10: Tap Pants Lace Inset and Front/ Back Facings
Part 11: Tap Pants finishing touches and pictures


Slip/ Cami:

Part 12: Starting the Slip, Cutting, and Contour Darts in Slip Back
Part 13: Bust Darts and Gathers, Joining Bodice and Slip Front

Part 14: Side Seams, Facing Bodice, Binding the Top 

Part 15: Final Touches and the Finished Product

Mail call, and I still have books on my mind!

I just love it when my sweetie comes home with a big pile of mail for me. He picks it up on base and brings it home from work with him. Yesterday was the first time he checked the mail in about three weeks since we were on vacation in the U.S. and boy, did some good stuff show up!


Most of this I bought online right before we left, or later whilst hunting online, morning coffee in hand, on vacation.

 I'm really excited to find out that Spadea Patterns released their own book, The Spadea Sewing Book: Sewing Tips by World Famous Designers (1967).

Another great book that came in the mail was Underwear and Lingerie from the Women's Institute of Domestic Arts and Sciences (1940). I'm sure you'll hear me referring to this one often, as it covers EVERYTHING!

Thursday, November 3, 2011

Is a seamstress only as good as her library?

I have some great sewing books in my collection. Some REALLY great ones. I'd say that about 50% of what I've learned about sewing in the last 5 years is from those books. And the other 50% is a mix of the internet and calling my mother.
I have 18 sewing books now, and counting. Most are vintage, and some are new, which reflects what I sew. I love getting stuck on a vintage pattern (What the hell does this thing mean by telling me to 'Fell a seam'?) and running over to the bookshelf and pouring through the many appendices until I find the right instructions.


Here are a few that I highly recommend if you can find them:

McCall's Complete Book of Dressmaking by Marian Corey, 1951.
You might recall me mentioning her as the author of Adventures in Sewing, which was published regularly in McCall Fashion News booklets. I love this book just because of the pictures. Swoon.


 Art of Dressmaking - Butterick, 1927.
There are several being sold on Etsy at the moment!
It's one of the few vintage sewing books that I have that mentions lingerie sewing and plackets for underwear and there are lovely photos that illustrate how to do everything!


The Vogue Sewing Book -Vogue Patterns New York, 1970-1978, all editions have been good.
There are so many clear illustrations and instructions that it's almost like having an experienced seamstress in the room.

Lingerie Sew-Along: Tap Panties Finishing Touches Part 11!

I'm ba-ack. Well, to finish my vacation off nicely I had a horrible cold the whole time, and now that we're back and my husband is even more sick than I was, and we've added jet lag and no sleep to the mix? I'm stiiiiiiiiiiiiiiiillllll sick. Ugh.

I really hate leaving you all hanging though, and I'm heavily dosed up with cold medicine right now, so LET"S DO THIS!
There are a few different ways you can finish your inside facings. You can serge the edges and tack them by hand onto the seam allowance, pink them and leave them loose, douse them in vodka and set them on fire, but my favorite is to tape them down. Not the scotch tape way, of course, but the fusible kind like this Dritz Stitch Witchery.


You can use it to fuse two layers of fabric together, or to finish raw edges with seam tape.


Here I have laid down a strip of the (shinny) fusible tape. Next I just stick the (very pretty) vintage rayon seam tape over top and a quick press with the iron makes it permanent.