Showing posts with label 1940's lingerie. Show all posts

Sunday, November 15, 2015

1940' Bra Sew-Along - Finishing with a closure.


Hello my dears. I hope you're having a lovely weekend so far.
I just want to start this post out today with a warm hug for my friends and followers in France. Your country was my first love and my oldest friend, and after the events of yesterday, you are in my thoughts and prayers.

It's a chilly day here in Monterey and the sun is at a low angle in the sky. My house smells like a house should on a cold day - hints of apple cider and a pot roast in the oven are wafting up the stairs to my studio. And it's the perfect time to type up a blog post and finish our sew-along.

In our last post we discussed edge finishing and sewing our straps in. Now all that's left to do is add our back closure and we should be done! I know we're all used to hook and eye closures in bras these days and that's what I prefer for this bra. But if you're going for a full 1940's bra style, know that you can also use buttons and loops if you like, or a French bra back, which is essentially two lengths of elastic and a hook.

For this project I have used plush-backed hook and eye tape with a double set of eyes for adjusting fit. This is pretty much plug and play, but there are a few notes on placement.

The first thing to do no matter what type of closure you use, is to stay-stitch the center back of each piece D to keep it from stretching while you work. This can be done with any straight stitch 1/8" from the edge.


Saturday, November 7, 2015

1940's Bra Sew-Along - How to face pattern pieces and lining options.


Happy weekend, sewers! Ready to do some more bra sewing?

In our last post we talked about adjusting our cups sizes. Since I haven't gotten any more fitting questions from you, we're ready to move on.
Today we need to talk about lining options. What should the inside of our bra look like? Well, there are three methods of lining I have used in bra sewing in the past and one is far superior to the others.
The first is fully lining the bra. As I did with my bra #2001 for the Oooh la la Pin Up Sew-Along, you sew two complete bras (minus straps and closures), one of lining and one of outer fabric. Then you sew those two pieces right sides together all along the bottom seam and then bind the top edge. You can also sew the entire bra together at top, bottom and edges, leaving a gap to and turn the bra right side out. This conceals all of your raw seam edges. This can lead to some of your seams shifting a bit and if you have thin fabric, seam edge shadows can show up all over the place.

From a 1940's Brassiere in Profile - the edges here have been turned under and stitched, or faced with a piece of cotton tape.
Another technique is to sew one bra without lining, but of at least medium-weight fabric, and simply bind or turn the raw edges under as done in the bra above. By far though, I prefer to face my pattern pieces and use top stitching and rayon or cotton tape to finish my edges. This is the closest I can get to a historically accurate bra from the 1940's without hunting down some cotton-backed satin (seriously, it's hard to find!).

So to do this, simply cut the entire bra out from your outer fabric (I'm using white satin from our kit), and another entire bra from your lining fabric - I like fine cotton lawn or muslin for this.

Pieces C in satin and cotton, ready to be pinned.
Lay the lining pieces wrong sides together onto your outer (satin) pieces and pin them securely in place. You'll want your right sides to the exterior for this step.

All pattern pieces in cotton and satin, pinned wrong sides together.
Carefully baste each set of pieces together only along the top and bottom edges about 1/8" from the edge.


You will want to leave the left and right edges (side seam, center front and center back edges on all pieces) un-basted. If they are basted at all edges, this can lead to some creases and bunching that won't sit well on the sewn bra.

--Update: This method is a good one to use if your fabrics aren't prone to fraying. The satin I'm using doesn't fray very much so I'm comfortable with having a trimmed, top-stitched, but unconcealed raw edge inside my bra. If you want a more finished appearance on the inside, then you can either fully line the bra as mentioned above (instead of just facing your pieces) or you can finish the raw edges of each seam with either a serger or an edge stitch (a blanket stitch was very common on curved bra seams in the 1940's).

Here is the interior of my bra using the facing/ top-stitching method.

And now you're ready to sew your actual bra together!
Any questions about lining, facing or binding?

Happy sewing,


Saturday, August 29, 2015

A Vintage Brassiere in Profile... 1940's Bra by Siva of Paris

Hello lovely readers. Recently, I've been working on grading a few of my 1940's bra patterns into larger sizes. While doing this, I tested a few for fit and accuracy by sewing a few samples and became SO inspired to sew more lingerie again! In a fit of passion, I pulled all of my vintage brassieres out to study their construction and was again delighted to see the interesting details that these little beauties featured.

If you ever decide to try your had at some historically accurate bra sewing, here a few details you might like to try!


This little bra by Siva of Paris is from the late 1930's to early 1940's. The fabric is a satin coutil, a wonderful, but very hard-to-find piece of fabric for lingerie sewing. If you can't find coutil, a great substitute is to buy a very lightweight satin and baste it to a soft cotton lawn or fine muslin. This has worked wonders for some of my bra sewing projects.

The closure is one of my favorite types, and adjustable length of elastic (with mini buttonholes!) with a hook. These are incredibly comfortable and are still my favorite way to finish the back of a bra.


Tuesday, February 19, 2013

Lingerie Competition...Let the Voting Begin!

Lovely readers! The much-anticipated day has arrived! Your entries have been an absolute pleasure to see and I can't wait to share them with you.
Once again, there will be one winner and prize for each category (bra, corset, and panties) and contestants are allowed to win more than one category.

All votes (yours, your friends'; anyone can vote once for each category!) must all be in comment form on this blog post so that Sarah and I can keep track of them.
 Let's get started, shall we? And dare I say it, (I'm afraid I must) "May the odds be ever in your favor!"


Here are the very talented contestants according to their categories. They will have little introduction. Normally I would gush but I'm supposed to be impartial (rules, boo!). To see more pictures of their entry, just click on the username under the picture. You can just vote for them by their numbers if you like!
(Please note, the numbering is random, and just there for voting convenience.)

The pattern we used...


#1 Bra by TroubleandStrumpet

#2 Bra/ Bathing suit top by Farmhouse Garde

#3 Bra by MissFloFlo
#4 Bra by Annei-Priscina

#5 Bra by Yvette

#6 Bra by Farmhouse Garde
#7 Bra by TogglesT
#8 Bra by PurplePinCushion

The pattern we used...


#9 Corset by TroubleandStrumpet

#10  Corset by MissFloFlo

#11 Corset by Charmel

#12 Corset By Charmel

#13 Corset by Yvette

#14 Corset by KLCreations

#15  Corset by KLCreations

#16 Corset by AnnabelleBumps

#17 Corset by Miss Charlie

The pattern we used...


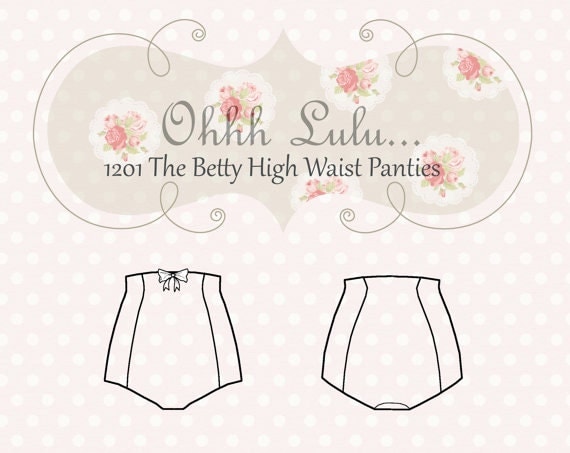
#18 Betty Hipster Panties by Farmhouse Garde

#19  Betty Panties by Farmhouse Garde

#20 Betty Panties by Farmhouse Garde

#21 Betty Panties by Annei-Priscina

#22 Betty Panties by IndoorKitty

#23 Betty Panties by Yvette

Whew! And that's it! If I missed your entry, please let me know and I'll add it in. Everyone can vote once for each 3 categories. Invite your friends and family to vote for you, share on Facebook, Twitter and your blog, and good luck!
Voting will end on February 25th and we'll announce the winners on February 26th!

Sunday, June 10, 2012

Lingerie in Profile: A Beautiful Lace Bra

Today my lovely readers I would like to show you a wonderful piece of vintage lingerie from my personal collection. This 1930's lace bra has so many beautiful little details that I just had to share it with you.


This bra has many hand made details but has a size 34 label so it was most likely made for resale at a very nice shop. The straps, rosette and binding are all silk ribbon, and the lace is incredibly soft.


Notice the lovely tricolor petals on the silk rosette and these little center pleats to give fullness to the bust... a lovely but futile attempt with a bra that reveals nearly everything.


One cup has a silk flower applique... something that looks a bit like a signature to me. At first I thought it was to mend a tear in the lace, but underneath the lace is flawless. Also, looking at the label, I don't know that this bra has ever been worn or laundered before.


Strap tails finished on the outside of the bra as an ornamental detail... the first I have ever seen.


Whoever made this bra, they, like me, just couldn't quite seem to get their closure to match up perfectly either ( A miscalculation I make time and time again).


 Sigh, oh for the old days. As lovely as this bra is, and it's in my very tiny size, I'm terrified to wear it and risk harming it.

To recreate this bra myself I think I think I would use DuBarry 2587B. This pattern is beautiful and I'm tempted to make a reproduction of it.


How about you? Do you have any vintage lingerie that's just too pretty to wear?