
I've been working all weekend to get this baby mostly put together and I've really been enjoying it. It's a nice and straight forward pattern and it feels SO good to get behind my machine again.
Printing: Make sure your printer is set to scale to 100% when you print!
Remember that the original vintage pattern didn't include a seam allowance so you need to make sure you add this before cutting out your pattern pieces.
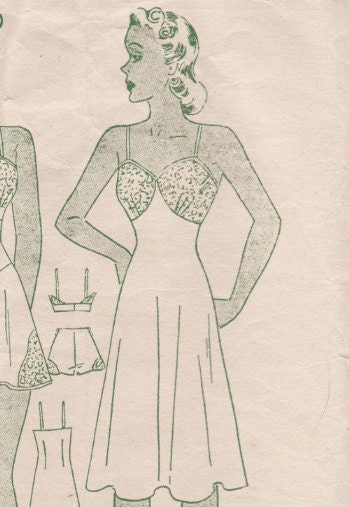
Let's start with cutting out our pattern pieces, shall we? I chose to make the long version of the Pauline Slip/ Camisole. To make the camisole instead, just cut the pattern short at the lines indicated before laying it out on your fabric. The rest is the same.
Below are my slip pieces laid out on 2 yards of some great navy charmeuse I found at a thrift shop in Nebraska this summer for $1.
Fabric Requirements:
36 inch fabric:
Slip 2 1/8 yds.
Camisole 1 3/8 yds.
Cut out the following:
Slip front, 1 on fold
Slip back, 1 on fold
Bodice, 2 of shell, 2 of facing or same fabric.
 |
| Slip pieces laid out, both on the FOLD. |
I chose to make the bust pieces in a contrasting white; I'm using a vintage silk handkerchief for fabric. I fell in love long ago with a 1940's vintage slip in blue and white and made the mistake of waiting to buy it. I missed out so this will be my copy.

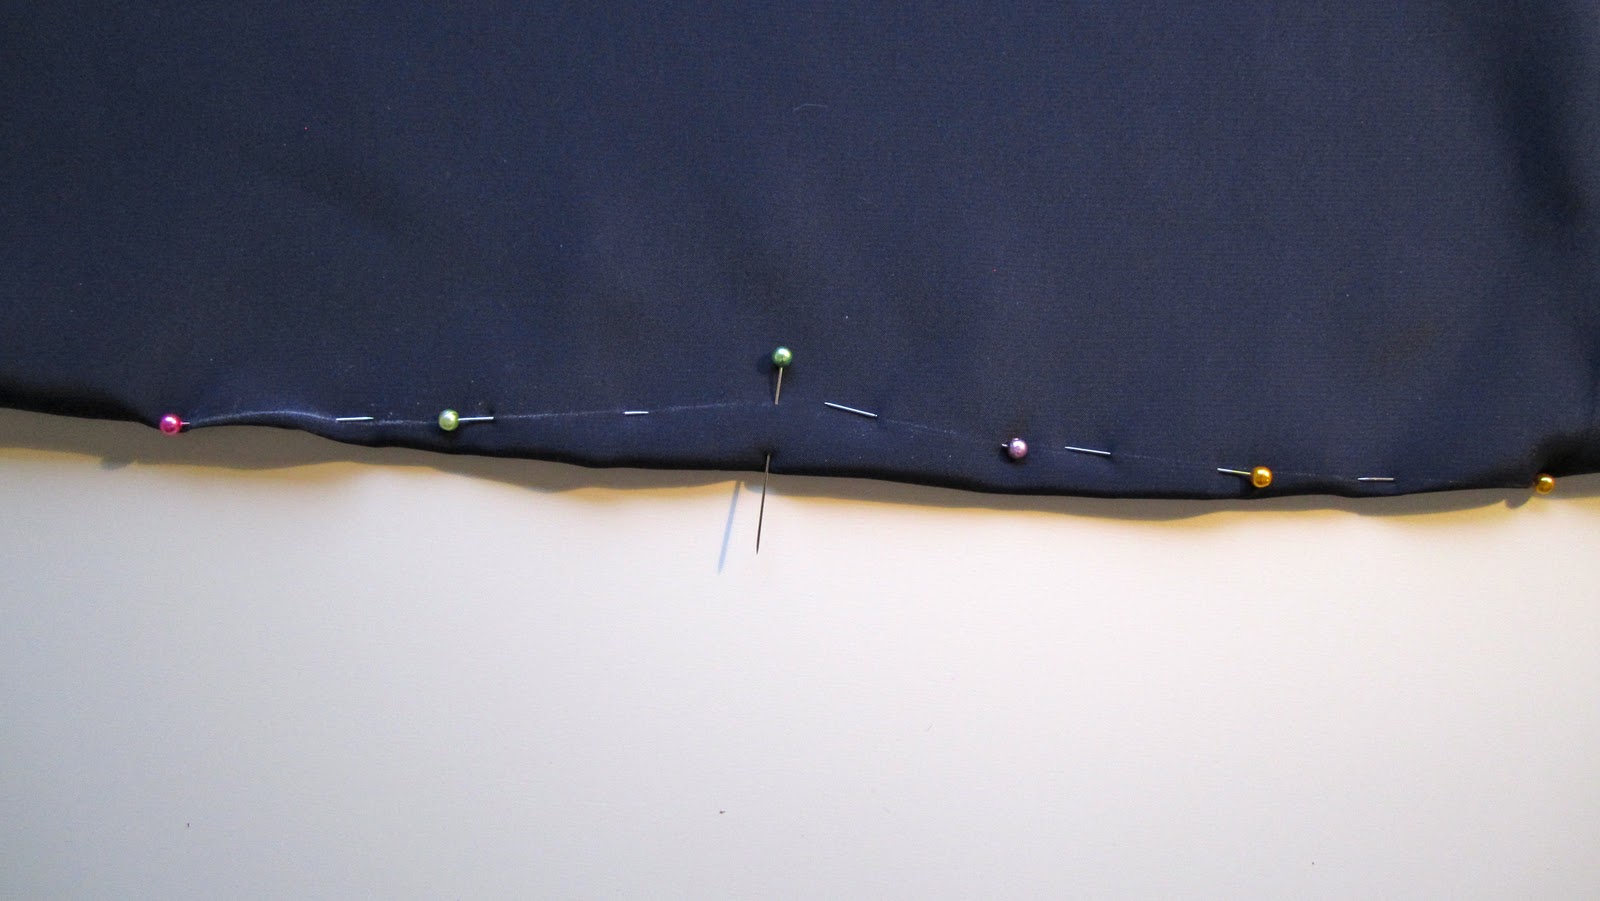
Once you have your pieces cut out your next task is to mark, pin and sew the darts in your slip back piece. We'll start with the back darts because they are the trickiest. These are known as contour darts and are designed to fit the fullest part of the back and hip nicely.

First mark the darts well; how you do this is up to you but for a contour dart, I recommend a chalk line as it's so much easier to match up the lines.


Mark both darts and then you can start pinning them together. Start at the center. I like to stick a pin through both lines in the center first. Then pinch the center together and secure the tip of your pin.
 |
| Yes, chalk makes for very messy pictures. |
You can then pin each tip working towards the center. It should look like this:

To sew, start in the center and sew tapering to a point on one end. Do this again in the other direction, once again starting in the center, overlapping your stitches on the other end a bit to secure.


When you get to to the point of the dart, DO NOT SECURE BY BACK STITCHING. This is very important. Instead, just stitch off the edge, and cut your threads about 3-4" long.

You will want to tie these ends in a very loose knot.

Here's a dart-sewing cautionary tale: When I first started sewing here in Norway I made this amazing dress that had back contour darts like this. I didn't know about the loop- tie yet so I just back stitched my dart points and moved on. The very first day I wore the dress, I bent over to put on my shoes, and the fabric at the tip ripped away and created a dime-sized hole. The dart points on a contour dart always need a bit of room to stretch out as you move. Otherwise, they will be ruined. (You can get away with not doing this on some bust darts, but in my case, I always have enough room in the bust area for my darts to never be stressed)

Anyways, next you'll want to snip the center of the back contour dart to within 1/8" of the stitches. This will relieve any stress on the dart.
Also, I'm a crappy artist so this diagram from Denver Fabrics might be handy:

 |
| Your finished back darts. |
Voila! Up next: sewing the darts on your bodice, and using optional gathers instead of darts to enhance bust fullness.
Helpful hint: If you have a sewing machine with an automatic thread cutting option, you can secure the points of your darts as follows:
First select the stitch that back-stitches in place, without using your feed dogs. Then sew the dart, tapering to a point. Just as you reach the tip, sew one stitch off of the fabric edge. Then back-stitch in place 3 stitches and hit your auto thread cutter button. When you pull your threads loose, they should already be tied in a nice, loose little knot for you. (Note: this works on my Brother machine)
How about you? Do you have any tips or tricks that you like to use with darts?
5 comments:
As I have a very curvy figure I tend to baste darts first, then once the garment is completely together I check the fitting and adjust the darts as needed. The adjustments are stitched securely and the basting is taken out. I typically have to make my darts a bit longer or shorter and almost always wider to adjust for my significantly narrower waist.
What kind of fabric do you recommends for this? I haven't bought my fabric yet, as I didn't realize the sewalong was starting today.
@Erin
Hi Erin, That's a good question. I'm using silk charmeuse for mine, but you can really use anything you like. Cotton, satin, lace, silk...
If you use a stretch fabric, let me know and I'll make a couple of tips in the post for how to handle the stretch for the pattern.
Oh, that navy and white is going to be beautiful. I still want to make a full slip but it's now way at the bottom of a long list of projects. I'll be following along to see how you put this one together.
Hi Anna, I was thinking of using either a stretch fabric or something with a little stretch to it (eg 3% lycra)...what tips would you give for using such a fabric? Thanks xx
Post a Comment