Showing posts with label sewing lingerie. Show all posts

Sunday, October 25, 2015

1940's Bra Sew-Along: Where to get your supplies...


Alright then, my dears, it's time to collect our bra-making materials!
Since this is a vintage-inspired bra pattern, the materials won't be quite too hard to find. No need to hunt down underwires or anything like that.

So, here is a list of what you'll need:

1. The pattern. 
2. 1/2 yard of 35" or wider muslin fabric for testing the fit.
3. 1/2 yard of 35" or wider light to medium weight woven (non-stretch) fabric for the outer. I recommend soft cotton or lawn, satin, silk or rayon crepe, or even charmeuse.
4. 1/2 yard of lining fabric (if you choose to line, that is.) I recommend lightweight woven (non-stretch) cotton lawn but the general rule of thumb is, if you don't want it touching your girls, don't line a bra with it.
5. Purchased bra straps. You can use medium to heavy weight ribbon, but adjustable straps are so easy to just sew in.
6. 1/4 yard of plush-backed hook and eye tape, preferably adjustable with at least 2 sets of eyes.
7. Matching thread.


The kit includes enough fabric to test, sew and line your bra, straps, closures, thread, and the pattern.

But if you're not up for white satin, here are a few places I recommend:
Bra Maker's Supply (great for straps and closures).
Sew Sassy Fabrics (great for fabrics and notions).
Etsy.com (great for fabrics and notions).


Once you've got your materials, just leave a comment on this post to let me know you're ready to get started. Keep in mind that sew-alongs don't need to have deadlines, and if you're busy now, or if you need at 2 week break in the middle, the posts will ALWAYS be here on A Few Threads Loose and you can follow along to sew your bra any time that works for your schedule!
Don't forget that you can always leave comments if you have a question about anything - materials, tips, tricks, posts etc. - I'm here to help and there is no such thing as a stupid question here!

This Sew Along is now complete. Click below for each post.

Happy sewing,


Wednesday, April 17, 2013

French Knickers Sew-Along... Adding Elastic to the Waist.


Hello lovely readers. Today for the French Knickers Sew-Along I'll show you how to add elastic to the waist of your knickers. First though, to my readers in Boston, know that you're in my thoughts and prayers. I have nothing but admiration for how Bostonians, first responders and civilians alike, have helped victims and their families in these last horrible few days.

It may seem silly to talk about sewing in light of how saddened we all are at such senseless violence, but for some of us, sewing is a form of therapy. For those of you who find comfort in the simple, reliable hum of your sewing machine, and the feel of fabric at your fingertips, here is the next step in our Sew-Along.

~Elastic~


For my knickers, I have chosen 3/8" picot elastic. It has a plush underside that is quite comfortable against one's skin.

First, follow the instructions in the pattern for measuring the length of elastic you'll need.
Lap one end of the elastic over the other and baste in place with a few stitches.


Before pinning your elastic to the waist, first measure your elastic in halves, and then quarters and mark these points with a pin. Pin these quarter points to the front, back and side seams of the knickers so that your elastic is equally distributed between these four points as you stitch.


Picot elastic, pinned plush side up to the RIGHT side of the fabric, and with the plain edge even with the knickers raw edge.

For picot elastic, first pin the elastic to the OUTSIDE of the knickers, with the plain edge of the elastic even with the raw edges at the waist.


Elastic pinned at the four major seams.

 Stitch close to the picot (ornamental) edge with a narrow zig-zag stitch, stretching the elastic gently as you sew and keeping the plain edge of the elastic even with the knickers raw edge.


Here I am keeping my elastic stretched evenly by gently pulling at the nearest seam until it is straight.

To help distribute the elastic evenly as you sew, pinch the waist and elastic at the nearest seam and gently keep it taught as you stitch.


The knickers waist after the first half of elastic stitching.


Now turn the elastic to the inside and carefully trim any excess fabric that peaks above the elastic edge.


The excess fabric trimmed away from the elastic.

Then fold elastic to the inside and stitch again, on the right side using a 3 step zig-zag stitch, again gently stretching the elastic as you go


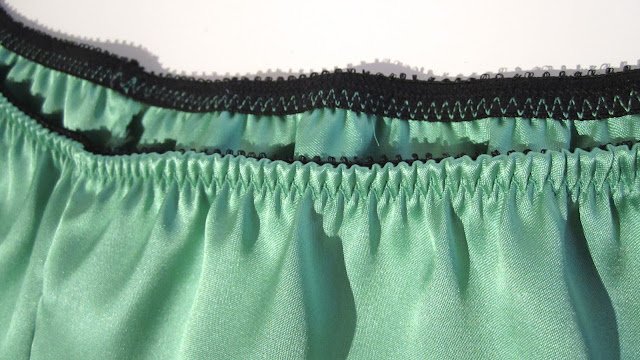
The elastic stitched to the INSIDE now with a 3 point zig-zag stitch.


The waist after the elastic has been folded to the inside and stitched.


Pretty, no? In our next post we'll add the cotton crotch insert and then we'll go over more ideas for embellishing the knickers.

Any questions?