It's here! The final leg of the
Lingerie Sew-Along is upon us and once again, I'm so sorry it took so long for me to make this part happen. Within a couple of days of getting back from the U.S. my camera went missing and my brilliant husband just now found it. We couldn't have a Sew-along without a camera so here we go!
I've been working all weekend to get this baby mostly put together and I've really been enjoying it. It's a nice and straight forward pattern and it feels SO good to get behind my machine again.
Printing: Make sure your printer is set to scale to 100% when you print!
Remember that the original vintage pattern didn't include a seam allowance so you need to
make sure you add this before cutting out your pattern pieces.
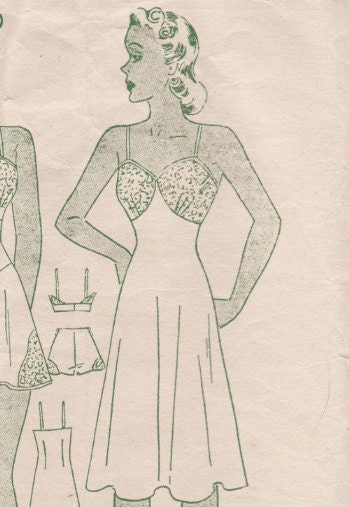
Let's start with cutting out our pattern pieces, shall we? I chose to make the long version of the
Pauline Slip/ Camisole. To make the camisole instead, just cut the pattern short at the lines indicated before laying it out on your fabric. The rest is the same.
Below are my slip pieces laid out on 2 yards of some great navy charmeuse I found at a thrift shop in Nebraska this summer for $1.
Fabric Requirements:
36 inch fabric:
Slip 2 1/8 yds.
Camisole 1 3/8 yds.
Cut out the following:
Slip front, 1 on fold
Slip back, 1 on fold
Bodice, 2 of shell, 2 of facing or same fabric.
 |
| Slip pieces laid out, both on the FOLD. |
I chose to make the bust pieces in a contrasting white; I'm using a vintage silk handkerchief for fabric. I fell in love long ago with a 1940's vintage slip in blue and white and made the mistake of waiting to buy it. I missed out so this will be my copy.
Once you have your pieces cut out your next task is to mark, pin and sew the darts in your slip back piece. We'll start with the back darts because they are the trickiest. These are known as contour darts and are designed to fit the fullest part of the back and hip nicely.
First mark the darts well; how you do this is up to you but for a contour dart, I recommend a chalk line as it's so much easier to match up the lines.