Showing posts with label french knickers. Show all posts

Tuesday, May 7, 2013

French Knickers Sew-Along... Everything in one place.


The time has come to wrap up my knickers sewing! I've only got 3 weeks until our things get packed up to be shipped back overseas and while that may seem like a lot of time, for an overseas move, it's just a moment.
Below I have summed up a list of the sew-along posts so that if you try the sew-along later (there's never any expiration date, I'm always here to answer your questions!) you have everything in one place.
  1. Getting started.
  2. Choosing your fabric. (With tips for stretch fabrics.)
  3. Where do I buy my fabric?
  4. Your first seams.
  5. Ribbon trimming the leg openings.
  6. Adding elastic to the waist.
  7. Adding "Le Crotch" insert.
  8. Trimming the legs with lace.
  9. Embroidered Touches
  • For those of you who have asked about sewing the knickers with a drawstring... keep in mind that they will be a bit bulky for undies after that, but that they would make great sleep shorts. To make these with a drawstring, simply add a 1" allowance to the top of the waist before cutting it out. Sew two small buttonholes in the center front, 1" apart on either side of the seam. Then sew the extra inch allowance into a casing and stitch down. Thread your ribbon or tie string through and voila!
  • To add a lace inset, check out this older tutorial for the Pauline Sew-Along.
  • For adding the perfect bow, check out this great tutorial by Sarah from Ohhh Lulu.
French knickers sewing seams.
A Map to your Knickers!
 And of course, here are some of my finished knickers!

French Knickers in Tencil Knit Jersey
French Knickers in tencil knit jersey.
French Knickers in silk twill with ribbon trimmed legs.
French Knickers in lace
French Knickers with lace trim.
How about you? For those of you who have had the time, how have your knickers turned out? What fabrics and trimmings have you used? Tried any neat variations I haven't mentioned here?

Thursday, May 2, 2013

French Knickers Sew-Along... Embroidered Touches


Hello lovely readers. Today I want to chat a bit about finishing touches on your French Knickers... or any lingerie for that matter. Many of you know that I'm constantly inspired by my collection of vintage lingerie and lingerie patterns. My biggest source of inspiration is lingerie from the 1920's. I feel that the handwork details, fabrics used, and styles are all easily accessible to the modern seamstress.

vintage bra and panties sewing pattern from the 1920's

There are no scary under-wires, boning, and not too many elastics to worry about. The styles are so simple to sew that more time and attention can be payed to tiny details like lace applique and embroidery.

vintage 1920's embroidered camisole, lingerie embroidery
1920's Lingerie Top Via Etsy shop The Paraders.

My goal in creating my own lingerie has always been to reach a point where I can skillfully make some beautiful, new or vintage-inspired pieces of lingerie for my own enjoyment using techniques that I've learned from my exploration of vintage pieces.

Here are just a few of the amazing pieces that inspire me to keep trying:

vintage 1920's embroidered camisole, lingerie embroidery
Vintage Camisole Via Etsy shop Rococo Vintage.
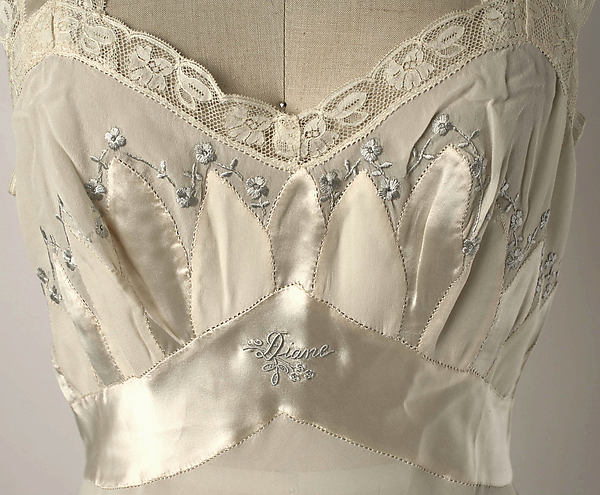
Vintage 1950's embroidered silk nightgown, lingerie embroidery
1950's Nightgown from the Metropolitan Museum of Art
Sigh... some day I'll be that good. Then I'll make something like the above and be too chicken to wear it in case I hurt it.

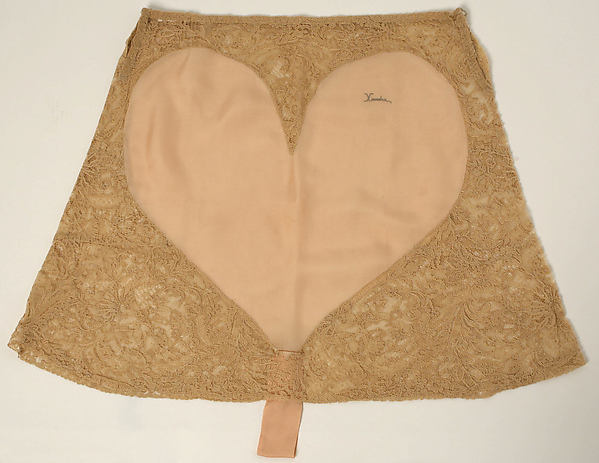
Vintage lace and embroidered tap pants from the 1920's
Tap panties from the Metropolitan Museum of Art

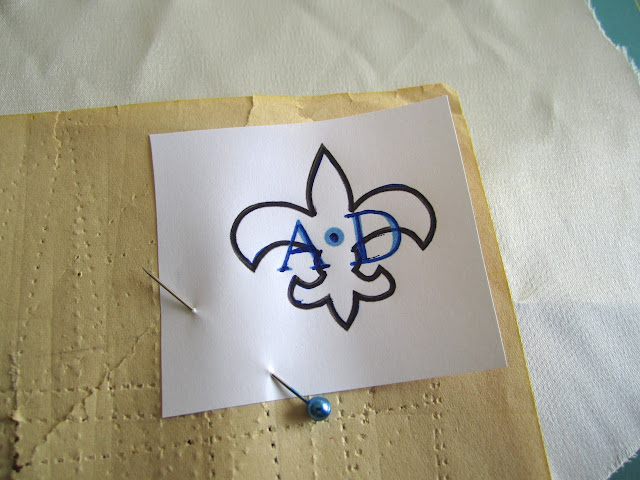
I especially love the use of embroidering one's initials or name into beautiful handmade lingerie. So I decided to sign my work. I set to work in Photoshop with a basic fleur de lis, played around with size and fonts, and came up with a basic template that I could trace onto my fabric and embroider.

Embroidery transfer, how to

I used some transfer paper scraps (look for them at your local thrift shop, so handy!) over a scrap of satin, with my printed test image over that, and traced over it all with a pen.

Pardon the ratty fabric scrap and the horrible photo... I still have no lights in my studio!
 It's definitely a good idea to do a practice version first on the same fabric as your lingerie piece... my practice run was o.k., but I found that the blue silk embroidery thread I was using was just way too thick for my fabric. (I'm still learning! If you'd like to bombard me with embroidery tips, I'll take them gladly!)

Not too great, but it could have been worse :)
 I switched threads and with a bit more care this time, embroidered the same design (minus the center French knot) onto my lace and satin knickers from our last post. It came out much better!

Fleur de lis embroidered monogram, lingerie embroidery

I used a simple back stitch to embroider the whole design. I'm no pro so I won't preach at you about embroidery technique, but here is a great post at Sublime Stitching that shows you this super easy stitch.

Fleur de lis embroidered monogram, lingerie embroidery

And voila! This was really quite easy for a novice embroiderer myself so I strongly encourage you to try it for yourself! Embroidery is so soothing!

Do you plan on adding any other little touches to your French Knickers or other hand-made lingerie? Or do you have a favorite piece of clothing with a tiny, beautiful little embellishment that makes it just that much more dear?

Monday, April 29, 2013

French Knickers Sew Along... Let's add some lace!


Hello my lovely readers. The electrician hasn't made an appearace yet, but the sun did yesterday, just briefly, so I was able to get some photos taken so that I could walk you through trimming with lace.

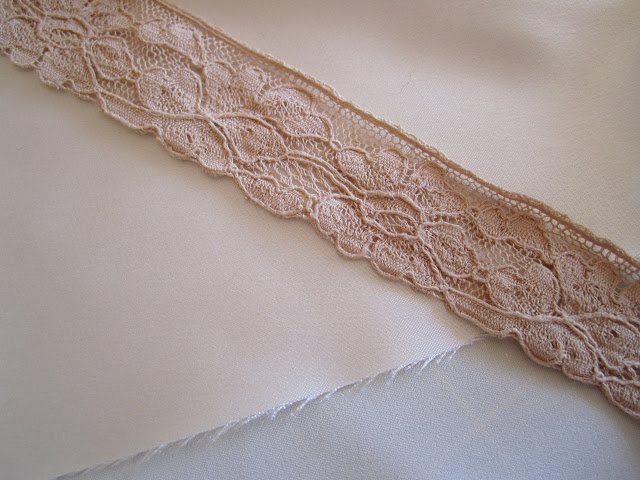
I started by sewing a simple pair of the French knickers using some cream colored satin. I chose to use some vintage lace from my stash (originally acquired from my mom and her lovely shop).

Sewing lace to underwear

My lace is about 1" wide (2.7 cm). Lace much wider than this might not sit right, and might look funny on your thighs. If you have some wider lace you'd like to try, test it out by pinning a length to one leg opening and see if it fits ok.

Sewing lace to underwear


Since I'm using some rather old lace, here are some tried and true tips for sewing with vintage lace:
  • start by gently hand washing your lace. If it survives a hand washing then chances are it's strong enough to be used in your project, worn, and gently washed in the future.
  • carefully press you lace on low heat.
  • examine the lace carefully for any hidden stains before you start sewing with it.
  • if you have them, silk pins can help you secure more delicate lace to your fabric as you sew.
You'll need about 1 1/4 yards of lace (about 1 meter, 15 cm).

Start at the crotch seam and pin your lace, right side up to the outside of the knickers leg opening.
By starting at the crotch seam, we ensure that if there are any small mistakes at the finish, they'll be well concealed there.

This might just be me, but pinning like this, as opposed to perpendicularly, helps keep slippery fabrics in place.

When pinning the lace, the upper edge of the lace should be 3/8" from the edge, which is the seam/ hem allowance along this edge.


Reserve a 1/4" overlap on each lace end so that you have a seam allowance to join your two lace ends together.


Pin your lace ends right sides together, and then flip the lace over and lay it flat against the leg opening. Check to see if there is any excess, or if you need to adjust the lace at all.

As you can see here, the lace is the right length, but I'll need to move my lace seam over a bit to match the crotch seam. This only matters if you're super particular about things like this :)


Flip back to the wrong side of the knickers and lace, and hand stitch the lace ends together. A small overcasting or blanket stitch on the ends will finish it nicely.


Now finish pinning your lace in place at the seam, and get ready to stitch.


The best stitch for attaching lace to other fabrics is an applique or satin stitch. Check your sewing machine manual to see if you have one. If not, use a narrow, tight zig-zag stitch.

It's stitch #24 on my Bother HE-240


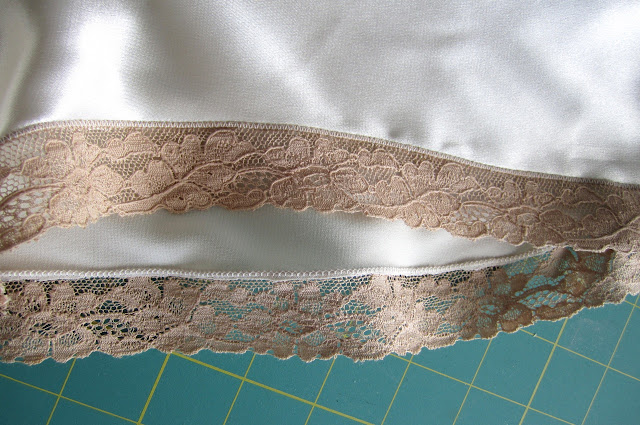
My stitch is the exact width of the narrow end running along the top of my lace. Stitching slowly, applique stitch the lace all the way around the leg opening.
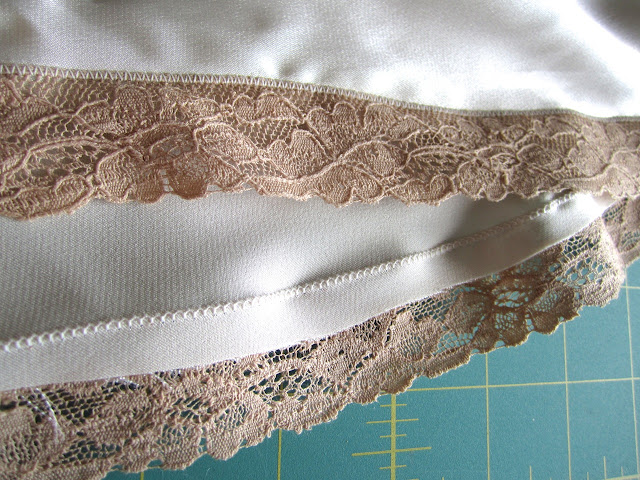
Sewing lace to underwear with an applique stitch
My lace stitched to the leg opening.
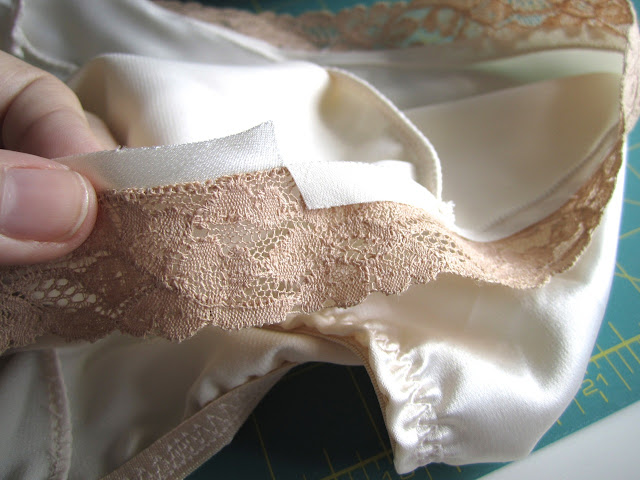
 Now for the interesting bit! On the inside you need to trim the fabric away from the edge of your stitching. If you do this with the lace on the underside as in the photo below, then you have a really good chance of accidentally cutting into your lace too. It's an easy mistake to make.
Here's how to avoid it completely:

Sewing lace to underwear with an applique stitch

Make a vertical snip into the fabric to be trimmed off as in the photo above. This is your starting point.


Flip one end of the fabric up, and fold the lace underneath down so that the lace is folded to the right side of the knickers.


Now you can easily snip the excess fabric away right up to the applique stitch, without worrying about cutting into your lace.

My hem allowance trimmed away from the lace on the inside.
Sewing lace to underwear with an applique stitch
The lace edge from the outside.

Sewing lace to underwear with an applique stitch

And tada! You have a nice and clean lace edge for your knickers!

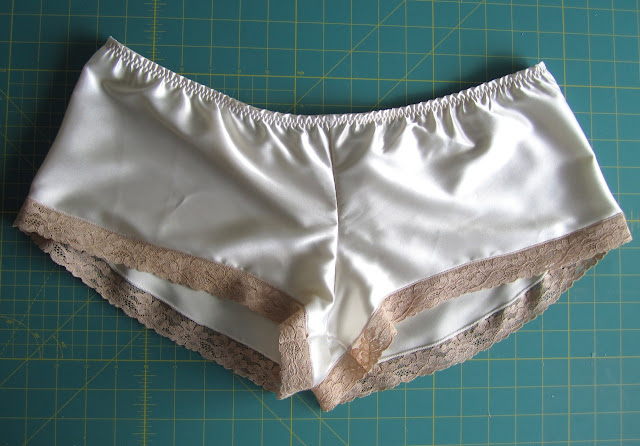
Here is my (almost) finished lace trimmed version of the Ma Cherie French Knickers.

French knickers underwear with vintage lace edging.

What more do they need, you might ask? Why, my initials delicately embroidered into one of the edges, of course. More on that next time!

Thursday, February 21, 2013

Celebrating 500 Followers with a Giveaway!

My lovely readers, imagine my delight when I woke up the other day, took a peak at A Few Threads Loose, and saw that I had reached 500 followers through Google! I know that there are more of you through Bloglovin', bookmarks, and other readers but ever since the blog started to have a regular following, I've always dreamed about hitting that 500 mark!

Welcome to our new followers, (I hope you find the blog useful!) and my warmest thanks to my current readers, especially to those of you who have stuck with me for so long. You all make my life so much richer with your comments, moral support, and friendship.

To thank you all, I would love to do what I love doing the most on this blog: Have a Giveaway!

It's good timing too, because I have just finished my newest pattern for Mrs. Depew Vintage, and one lucky reader will win a copy!

French Knickers Depew 2018
 I have recently sewn what feels like a hundred of these little knickers and have really had a blast making different ones in all sorts of styles.

The pattern only takes a couple of hours to sew and is suitable for beginners. It also includes fully illustrated instructions. 

The sky is the limit with a simple pattern like this. You can trim the knickers with ribbon, lace, bows or buttons to suit your own style. I've been making mine with a great silk twill from Denver Fabrics and the results are heaven.


Above is the knickers in Kelly green silk twill with silk rose ribbon trim. The matching bra is from a pattern that I'm currently working on as well. It should be out soon!

The knickers pattern includes sizes X-Small through X-Large to fit a wide range of figures.


To enter to win, leave a comment telling me what you would use to make the knickers from. Do you have a favorite fabric? Would you embellish with lace, ribbons etc?

For an added entry, you can do any of the following.  Just leave me a comment to let me know which you've done:

1. Become a follower of A Few Threads Loose on Twitter, Google, or Bloglovin'.

2. Like A Few Threads Loose on Facebook.

3. Like Mrs. Depew Vintage on Facebook.

4. Mention this giveaway on your blog or share it on Facebook.


5. Re-pin the pattern on Pinterest.


I'll announce the winner on March 1st. Good luck, and thanks for reading A Few Threads Loose!