Showing posts with label vintage sewing pattern. Show all posts

Monday, March 6, 2017

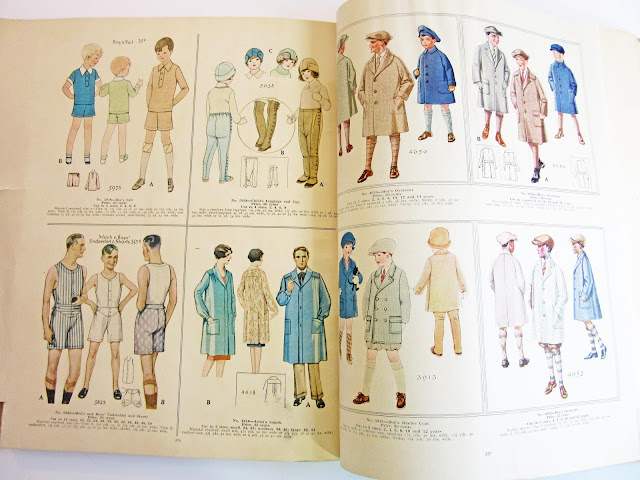
Some McCall Catalog Love from 1930...

My dears, I have another catalog from my collection to share with you today.
This time it is the April, 1930 McCall Counter Catalog and boy, is it a beauty! These little gems are scarce as hen's teeth these days and finding one that hasn't been partially cut up for paper dolls (yes, that has happened, twice.) is a treat.

So without further ado...


I have one of these on the left available as a reproduction pattern here.


And I have the top right pattern available as a reproduction here.


I have the one on the right available as a reproduction pattern, too!

Friday, February 24, 2017

How to count and inventory sewing pattern pieces.


Once a vintage sewing pattern has made its way to your hands, it's a very good habit to inventory the pattern pieces straight away. Make sure that the pattern has all of its pieces and instruction sheets before putting it away. That way, you can leave accurate feedback or address any concerns with the seller as soon as possible. It's also handy when you're finally ready to sew it.

This one is missing A, B and E, (the cup and strap pieces.) I don't care, I love it anyways!

Imagine: you've pulled the pattern out of a drawer, made plans, bought fabric, and as you lay the pattern pieces out, you're missing half of them!
I've been there. The downside was that I had bought the pattern for $30 the year before, advertised as complete, and I didn't check it when it came in the mail! My return window had come and gone.

So how do you tell how many pieces your pattern should have?
Most of the time this information will be on the back of the envelope, as you can see here from my vintage McCall's 6276.

Don't actually draw on your vintage pattern envelopes in pen. It's bad, m'kay?
There is an exception to this, and it's a tricky one. Certain vintage patterns (often doll, accessory and hat patterns) will all be printed out on one or two sheets, and the companies sometimes just listed "2 pieces" as you see below.


In this case, you need to count the pieces illustrated instead.

You need to also make sure that the pattern has the instructions! Keep in mind that a few companies (I'm looking at you, vintage Vogue) had more than one instruction sheet. Make sure that if you only have one instructions sheet, that it has both the sewing instructions, AND the cutting layout diagrams.

A handy way to keep track of this all is to use a simple inventory sheet. I've put a quick one together for you below. On the back you can always make a list of the pattern pieces (i.e. A, B, C or 1, 2, 3) and then check them off as you count them.


I will print a sheet of 9 of these on one page, cut them out, and keep a completed one with each pattern I've counted.
And last but not least, if your pattern is printed, it's a good idea to make sure that the 10 pieces you have in an envelope are the actual 10 pieces that belong in it. Double check the pattern number (and even the size if you have time) printed on each pattern piece. I recently purchased a pattern online, checked the pieces, and it had 10 pieces as advertised, but one was for a completely different pattern - an honest mistake, but one that is avoidable if you have the time.

But wait, what do you do if you go to all of that trouble and pieces are missing! Assuming you don't return it to the seller (not if you got it for pennies at a thrift shop!), what are your options. You have some great ones, actually!
I'm one of the Admins for a great little Facebook group that you will love! The goal of the Vintage Pattern Pieces Lost and Found Group is to complete every missing pattern we can find! You can join the group, post your pattern with a photo/ description of what you're missing and wonderful, helpful collectors will search their archives and try to make copies of what you're missing!

Another option is to find another copy of your pattern for sale and message the seller asking if they would consider tracing a copy of your missing piece.

This pattern is missing a couple of pieces and I'm still SO happy to have it in my collection!

Whatever you do, please don't throw away incomplete patterns! Even an empty envelope or a stray instruction sheet is valuable to a collector. I still buy incomplete patterns all the time, and I know many other collectors who do the same - many of us like a challenge!

A new organization headed by a dear friend of mine is designed to be a rehabilitation and matchmaking destination for incomplete patterns. You can donate your extra pattern pieces, incomplete patterns, empty envelopes, spare instructions and old pattern tracings to the Vintage Sewing Pattern Catalog Graveyard. All pieces from all eras are welcome and each piece will be catalogued and hopefully someday united with a pattern to call home.


How about you? Do you have any tips/ pattern counting tricks that you find useful?

Happy sewing!


Other sewing pattern related articles you might find helpful:

How to properly mend sewing patterns.

How to add a sewing pattern to the Vintage Pattern Wiki.

Using Evernote to catalog your sewing pattern collection.

Helpful Hints for vintage patterns sellers.

Sew Expensive... A McCall 1987 hat pattern and what makes a buyer tick!

What constitutes a sewing pattern.

Friday, April 22, 2016

Lovely 1920's Couture and a New Pattern Release!


Well, hello my dears!
I have been hard at work doing two things very diligently. The first has been working on a pattern project a very long time in the making. The second is learning how to stop and take care of myself. It has taken me a few years but I have finally learned the lesson that chronic pain teaches everyone familiar with it: You have to learn when to stop. It's not easy, especially when you're an obsessive workaholic who loves what you do for a living!
This lesson has called for less blogging and more gardening, less pattern drafting and more quiet moments with a good book, less 14 hour days and more tea, yoga, dog walking, and wine in the garden breaks.
Self-neglect is a hard habit to break, but at least I've been enjoying the learning process :)

When I haven't been seeking those quiet, peaceful, relaxing activities, I've been quite happily working on a reproduction for what I consider one of the crown jewels of my vintage pattern collection. But it had to be done right, and that called for some painstaking research and a lot of work.

The pattern in question: A 1929 Maggy Rouff Couture design that looks more like it's from the early 1930's. Maggy Rouff was rather fashion forward in general but in 1929 it seems like she started setting the stage for the hemline making its descent from the flapper just-below-the-knee, to the calf-length we associate with the early 1930's.


This wonderful design features three versions that can be sewn long sleeved or sleeveless. The front has a wrap effect with yokes trimmed in bows and a flounce for a faux-bolero effect. However, the most interesting feature by far, is the straight skirt which is trimmed with asymmetric flounces for the suggestion of an uneven hemline -  in a manner that was very fashion-forward for 1929. 

My favorite part about adding the original pattern to my collection was how it felt a little bit like an Easter egg. I knew it was familiar-looking when I bought it, but couldn't quite place it. Then I opened it up and there was a photograph printed on one of the pattern pieces. The photo of the original Maggy Rouff design that the pattern had been designed from. I ran back to my collection of vintage magazines, and sure enough, in a fall 1929 magazine, there it was. The dress! The original pattern envelope made no mention of any designers on the front as they usually do.

The dress in question at far right.
The flounce creates the illusion of a longer, asymmetrical hemline and calls to mind en evening look if one were to leave off the sleeves.
Also from Maggie Rouff and her fellow designers that year, came the beautiful, flounce bedecked evening gowns that merely flirted briefly with the floor:

Maggy Rouff on the left, Patou on the right.
All of this of course, eventually led to a reproduction. But I had several mangled and badly torn pattern pieces to re-draft along the way (poor little pattern, I'll save you!). And this pattern, with 13 pieces and a half dozen flounces takes up more paper/ fabric than any pattern I've yet to work with. But she's finally here!

Ladies and gentlemen, I present to you, Depew #3061.

Depew #3061 Ladies' Dress Sewing Pattern.
I've been playing about with some sketches and draping and there's even a way to sew this dress up for an evening look! Simply leave the sleeves off, extend the front and back hems about 4", cut a few more flounces like the ones at front and back, sew them a few inches below the first set and voila, evening dress!
A quickie in Photoshop - not my best work but you get the idea.

You can really play around with this dress by leaving the flounces off at the bodice, or cutting them from contrasting lace, or leaving all flounces off for a smoother day-time silhouette.
The sky is the limit!

Happy sewing,


Saturday, August 23, 2014

Sewing 610... Straps, Closures and a finished bra!

 
Let's discuss bra straps!
I have chosen to use some very delicate silk ribbon for my straps. I'm going for a very dainty, light weight, almost gossamer effect with this bra and I don't want too heavy of a strap. However, I can get away with that because, let's face it, I'm tiny up top and I don't need any support. If you're larger up top and using a heavier weight fabric than charmeuse or crepe de chine, I recommend using either purchased straps or at least silk satin ribbon. It's heavier and sturdier.

If you'd prefer to make some adjustable straps of your own, check out this great tutorial over at Ohhh Lulu.

For a more hand-stitched route, you can use this old-fashioned technique for adding bra straps to a finished bra without sewing the strap between layers.

I chose to sew my straps between the layers this time just to mix things up.
You'll need to test the fit of your bra at this point and (with some help if you can get it) pin a length of ribbon to the front and back of the bra to help you measure how long your strap should be.
As a starting point, my straps were about 20" long with seam allowances figured in.


Before starting on straps, place the two bra layers right sides together, then pin and sew the bottom seam only. This makes it easier to wrangle your layers when doing the next two steps.
--Tip for working with slippery fabrics: Years ago, I remember asking my Mama about how to work with slippery silk and she responded with "When in doubt, sweetie, just pin the hell out of it!" Mama was right - it works like a charm.

Now the easiest way to sew a bra strap (ribbon) between layers is below. Simply roll that sucker up and paper clip it, leaving a few inches out to work with. This will keep your ribbon from straying all over the place as your work with it, and more importantly, it keeps your ribbon from going rogue and  getting caught in a seam somewhere!

A paper clip can keep your ribbon from going rogue.

The best place for your bra strap placement at the front is just to the outside of your upper dart, though during a fitting with your muslin, you should test and see if this works for you too.

My two layers of fabric, open at the top and ready for the ribbon.
Add the ribbon just to the outside of the upper dart (the side closest to the under-arm).
Pin the ribbon in place securely and then tuck your rolled and secured ribbon in between the two layers.
The back end of the straps is going to be stitched to the outside of my bra once everything else is finished.

Now for the bra back closure. I'm using my usual French bra back closure (I won't use any other closure method any more!) but you can use any other method you're comfortable with.
For a button and ribbon loop closure, check out this tutorial.


You want to make sure that any bra closure method you use is facing to the inside of the bra as you sew the layers completely together. That way, when you turn your bra right side out, the closure is on the outside.
If you go this route, test your closure on your muslin version. You'll want the hook opening to be facing up, but which side do you want the hook on? Left or Right? This depends on what feels most comfortable for you and perhaps which of your hands is dominant.

Once you have your closure pinned securely in place, (this is another good time for a fitting!) you can pin the rest of the outer and lining together, matching seams and darts.

Stitch the layers together, taking time to back-stitch at the bra strap edges and closure for extra strength. Be sure to leave at least a 2" gap open towards the back so that you can turn the bra right side out!

First trim down the corners of the back of the bra, then carefully turn your bra right side out, press the edges, and slip-stitch the gap closed.

To secure your bra straps to the back of the bra, you can either  use the old fashioned method mentioned above or do as I did.
I simply folded the raw edge under 1/2" and then hand-stitched the ribbon about 1" away from the back of the bra edge.


Annnnd, we're done!

I pressed the black edge of the bra up just a tiny bit fron the blue side and it the way it sits looks like there is a little bit of contrast piping.

I'm in love with my French knots... I want to put them on absolutely everything now!

Did we just sew a completely reversible bra? Why yes, yes we did ;)


Tada!

Any questions, my dears?

P.S. For those of you just tuning in, you can find all of our Sewing #610 posts, as well as where to find the pattern by clicking here.

Sunday, March 4, 2012

Warm Weather Thoughts... and Clothes.

So for a little break from the Ooh La La Pin-Up Sew-Along posts I thought I'd share something not lingerie-related for once.


Last spring I made this set and for some reason never took photos. Mostly because it was SO COLD and never warmed up over the summer. This ended up neatly tucked away with all my other warm weather clothes and projects.

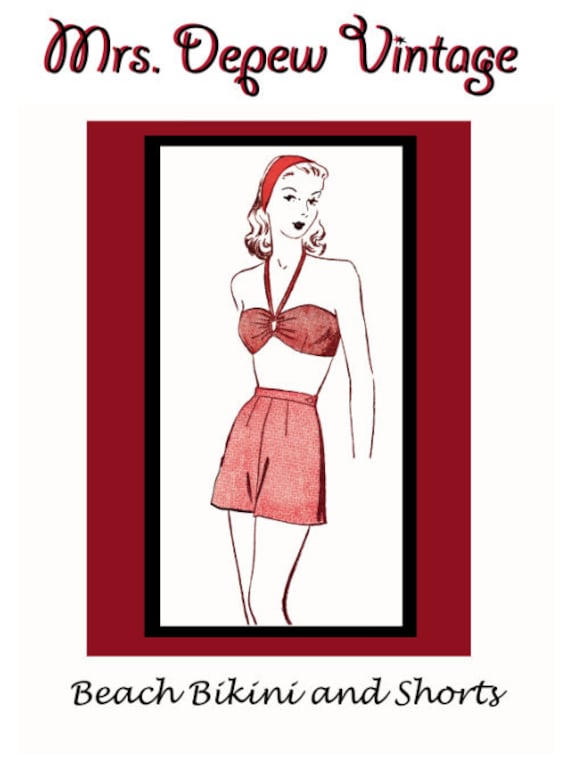
For just the short pattern, click here.
Lately people have been asking me if I have a shorts pattern at Mrs. Depew Vintage and I do! Does that mean it's warming up somewhere in the world? It gives me hope, and reason to air out my summer pretties.

I used this great Beach Set Pattern PDF that I had based on a great 40's pattern in my stash.

To make the contrasting top and bottom strips I just cut 2 more of the waistband piece and sewed it on like bias tape before sewing any of my seams together.


Because of the nifty gathering effect of the pattern front, there's actually quite a bit of room in the bust area, depending on how tight you tie the knot at the bust. This is a 38" bust and a friend with an enviable DD pair tired it on and it fit great. I had to snip 2" off the center seam of the pattern to make it fit my much less impressive measurements.


For the shorts fabric I used a stretch cotton sateen from fabric.com that they unfortunately don't sell anymore. As much as I love the sateen effect on cotton (ah, sateen sheets) it's a complete cat hair magnet so I'll probably avoid it in the future.


How about you? Are you starting to get a bit anxious for spring? Do you have any fun spring clothing sewing plans? I'm already thinking about more sew-along ideas and I think next time we'll try some fun separates. Maybe a blouse? What would you like to see next?