Pages

Wednesday, April 25, 2012

What Mrs. Depew has been up to...

This month when I haven't been substitute teaching at my local school or staking out my mail box in anticipation of the fabric I need for finishing my Betty High Waist Panties, I've been in my studio madly working away at pattern after pattern. Here's a little of what I've been up to.

Today I woke up very early (gotta love the sun coming up bright and early at 6 am... soon it won't even bother to set and I'll have to sew new blackout drapes for the bedroom.) and put the finishing touches on a new pattern.

Many of you have asked for dresses before and I've been working off and on with this one for a looooong time. Now I can finally show it off!

Depew 3005

This dress pattern was so fun to work with. It's based off of a vintage French pattern from 1959 and features tons of bias binding, bias trimmings and a faux front closure. It's my first pattern that prints out as a pattern sheet with the pieces laid out over each other (much like the Burda Fashion patterns) and prints as only 9 pages (my printer just heaved a huge sigh of relief, the poor thing).

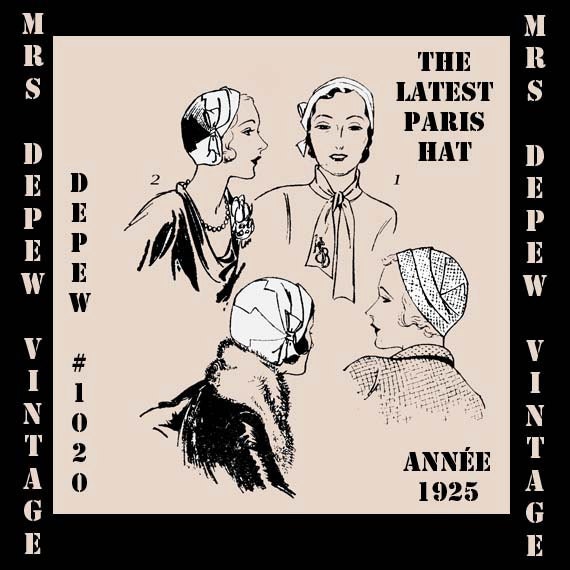
Aside from working on the above, I seem to have been stuck on the 1920's. I don't know how it happened but I released 4 new 1920's digital reproductions. I'm beginning to think that here in the land of baggy non-fashion I could totally get away with the flapper look. I think I'll test my theory with a cloche:

Depew 1020

When I got my hands on the original of this pattern, I was absolutely delighted to find that it included a fold out booklet advertising the newest patterns from Pictorial for 1925. I included a digital copy of it with the pattern because it was just too good to keep to myself. Here's just one page of many.

We were recently discussing robes, and I know many of you are still hoping for a glamorous 1940's style robe pattern (don't worry, it's in the works!) but I'm personally a really big fan of the 1920's style kimono robe, then known as a negligé (and may have 2 or 3 silk ones tucked away in my closet).

Depew 3004

And then there's the little step-in/ teddy that one must wear underneath one's gorgeous kimono robe.

Depew 3003
And the dress one would wear outside when not prancing about the house in lingerie:
(I work from home so unless I go out, I'm almost always decked out in some kind of vintage slip and silk robe ensemble. Why not, right?)

Depew 3001
Whew! I HAVE been busy! I'm exhausted just looking at the list of things I've gotten done. I think I'll go check the mail one last time and then curl up with a good book and a glass of rosé.

Saturday, April 21, 2012

Ooh La La Pin-Up Sew-Along Super Fancy Extended Edition!... Sewing your Muslin

Wow it's been over a week since I've posted, I'm sorry! I've been overwhelmed with work and lots of substitute teaching and have hardly stopped running, running running for days!
Bad Anna...
But I'm back, and while I'm still waiting for my lovely fabric to arrive so I can complete my Betty High Waist Panties, I have gotten my muslin whipped up.

When my fabric gets here I'll be making my center and back panel from my woven satin (the same fabric I made my bra and corset from) with lovely cream stretch panels on the sides. So for my muslin I used a woven fabric (cotton voile) for the front and back and some jersey for the sides.

I cut my front and back panels on the bias as the pattern recommended and the side panels with the grain.


The muslin went together in minutes, literally! I think it maybe took me 1/2 hour to whip the whole thing together after cutting and sewing... I love it when that happens.


When I saw the finished product my first impression was, "Oooh, these look rather big. Will I look funny in these pretty Easter pastel pants?


And then I tried them on and I have to tell you, even as a muslin, in a very silly pastel combination of whatever I had laying around in my stash, these panties looked DEAD SEXY on me.


And that's with all of my latest prescription side effects having me a good 10 lbs over my limit and all the major mirror insecurities that go along with it. DEAD SEXY, I tell you.

I can't wait to make these in every color under the sun. Sarah, my dear friend, you have designed an AWESOME pattern.

For Sarah's complete instructions walking you through the muslin process and all the rest of the High Waist Pantie Sew-Along posts check out Ohhh Lulu...

Friday, April 13, 2012

Simplicity Lingerie in the 1930's: the S Series


A few days ago I listed Simplicity S604 in my pattern shop. As I was writing the description I looked the pattern up on the Vintage Pattern Wiki and became intrigued. At that moment there was no listing for my pattern (which is normal) so I looked instead at other Simplicity patterns in the same number series and stumbled across a lovely window into the lingerie soul of 1930's Simplicity pattern designers.
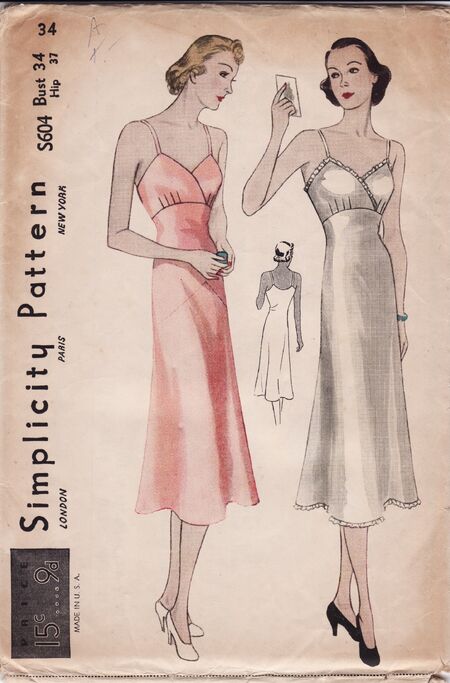
S604: Mine!

Allow me to explain. Simplicity added the S prefix to their pattern numbering scheme for a short time (I'm still trying to find out when exactly and why) and it was just to a handful of the most beautiful lingerie patterns I've ever laid eyes on.

I looked everywhere for a copy of a 1930's Simplicity Fashion Forecast (later named Simplicity Prevue in the 1940's) to date these patterns but found nothing.(If you find a Simplicity Advertisement for these, I would love to see it, or buy it!)

But they're all so darn pretty I just had to share:
Simplicity S601: Misses' and Women's Nightgown.

S601: Updated - Now in my collection!
Simplicity S602: Misses' and Women's Nightgown. Style I has low neckline and the bias cut skirt extends up in a shaped piece, to meet neckline and gathers on each side. Straps on the under-arm. Style II has a deep "V" neckline with applique lace and deep arm-holes.

S602: Updated - Now in my collection!
Simplicity S605: Ladies' and Misses' Combination Undergarment.

S605: In my collection.
Simplicity S606: Ladies' and Misses' Nightgowns.
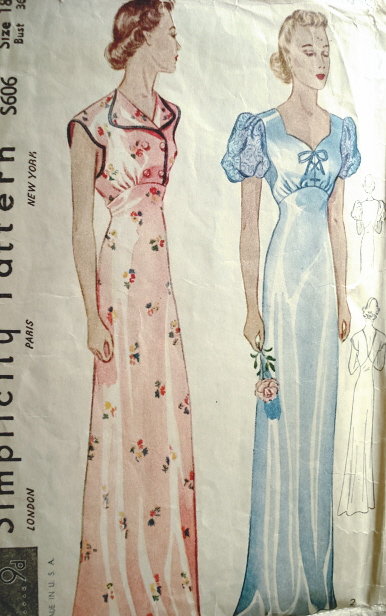
S606: I have this one!
Simplicity S607: Misses' Nightgown. Style I has off-the-shoulder neckline finished with lace band and ties at the shoulder. Circular gathered sleeves. Double draw-string waistline in Empire effect. Style II has deep square neckline in front and "V" in back.
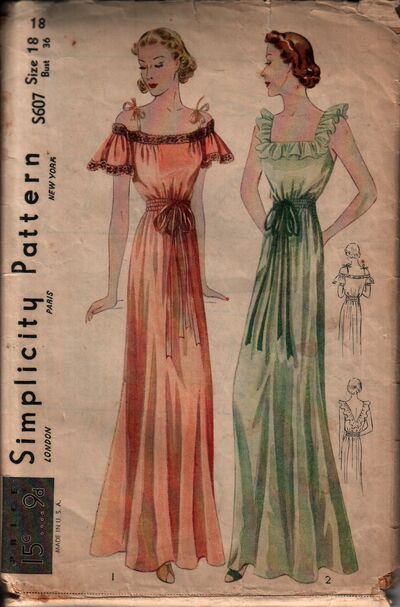
S607: Wanted!
Simplicity S610: Ladies' and Misses' Nightgown: Style 1 has deep "V" Neckline, which crosses in a surplice line at center front and back. Turned back tuxedo revers in front. Gathers below shoulder and finished with bow at shoulders. Bias cut skirt joins the upper section in a shaped line. Style 2 has lace finishing the front.
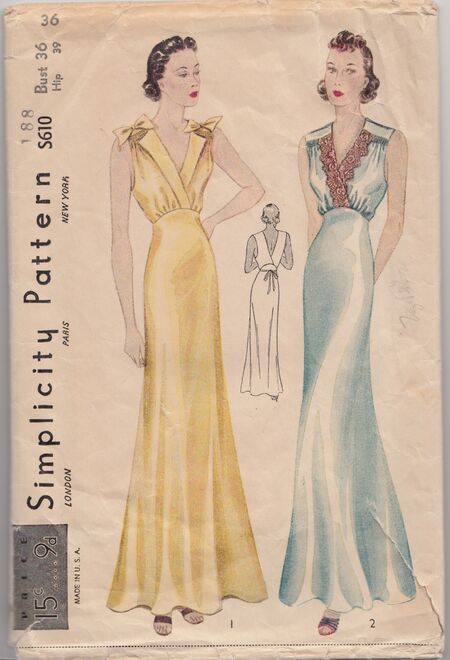
S610: In my collection!

Simplicity S611: Misses' and Women's Nightgown. Style I has square neckline finished with lace edging and insertions. Bias skirt joins the blouse in a pointed line in front and rounded line in back, below the deep "V" neckline. Style II has a tailored turn-over collar and buttons down the front in shirtwaist effect. Trimmed with hand hem-stitching. Long bishop sleeves gathered to a cuff, or short sleeves.
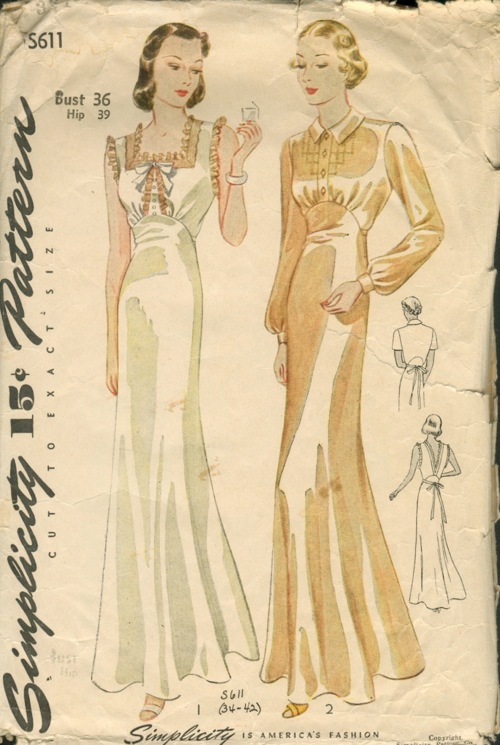
S611: Just added to my collection.

Simplicity S612: Bra and Panties with transfer for applique. Misses bra and panties, version 1 is an uplift bra fastened at center back, version 2 is a bra for evening wear with cross over strap fastened at front. Panties may be made with or without lace. Transfer pattern included for applique.
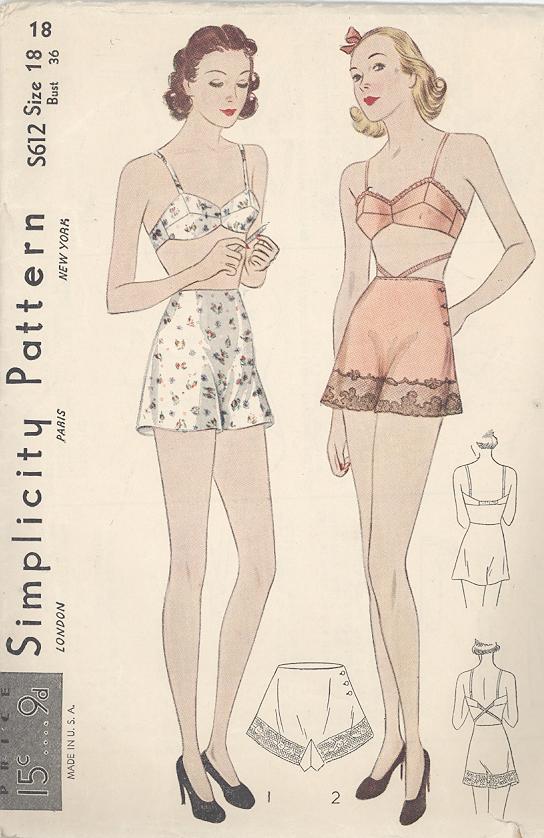
S612: In my collection.
Simplicity S614: Ladies' Housecoat: The house coat has turnover collar and short puff sleeves or long straight sleeves with turned back cuff. The skirt joins the blouse in a pointed line in front and is finished with slide fasteners or loops and buttons. Flared back panel.
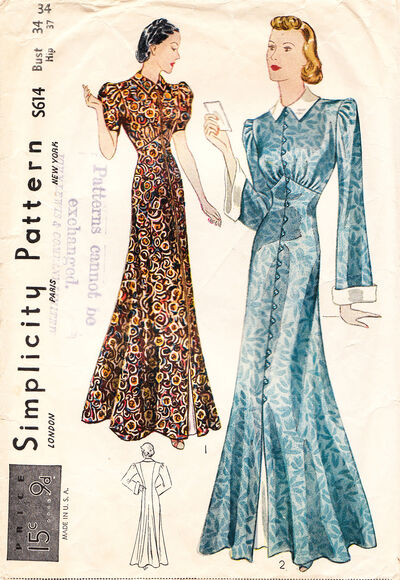
S614: Just added to my collection.

Simplicity S615: Children's Pajama.

Simplicity S615: In my collection.
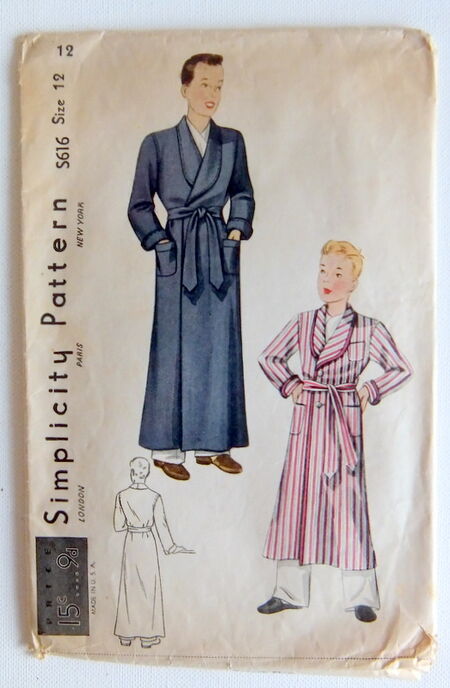
Simplicity S616: Boys' Robe.
Simplicity S616: In my Collection.

 Simplicity S617: Misses' Step-In Pajama in Two Lengths. Style I has "V" neck-line and is sleeveless. Joins the short lower section at waistline. Patch pockets. Opened at the center back. Style II is ankle length straight cut pajama.

S617: I have this one in my collection!


Simplicity S618: Misses' Pajama Set: 2 Piece Pajamas. Style 1 over-blouse has applied band at neck and on short sleeve. Lower section joins blouse in a pointed line at the front. Straight pajamas. Style 2 neckline is lace trimmed and short circular cap sleeves are also lace trimmed. Has tie belt across the back.
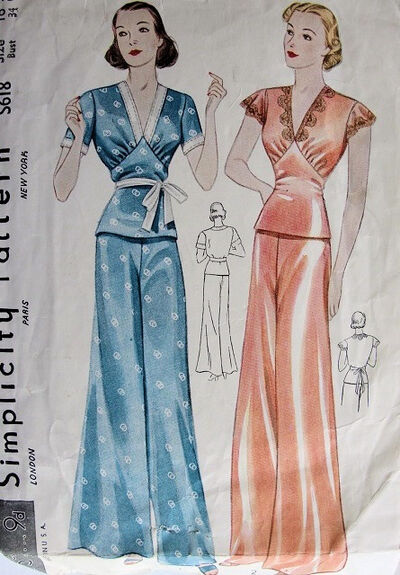
S618: I have this one in my collection!
Simplicity S619: Child's Romper Set.

In my collection.

Simplicity S620: Misses and Women's Bra and Bloomer: Pointed fitted bra with opening at the back, and bloomers gather on elastic at the waistline and lower edge.

New! I added it to my collection!

 Simplicity S622: Set of Bed Jackets. Style I has draw-string neckline. Full sleeves tied at the wrist with ribbons in draw-string effect. Style II has shaped front yoke and straight back yoke. Collar ties with bow. Short gathered sleeves. Style III has straight yoke continuing into the band. Small turnover collar fastens at the front with two bows. Three-quarter length sleeves gathered to a narrow band.
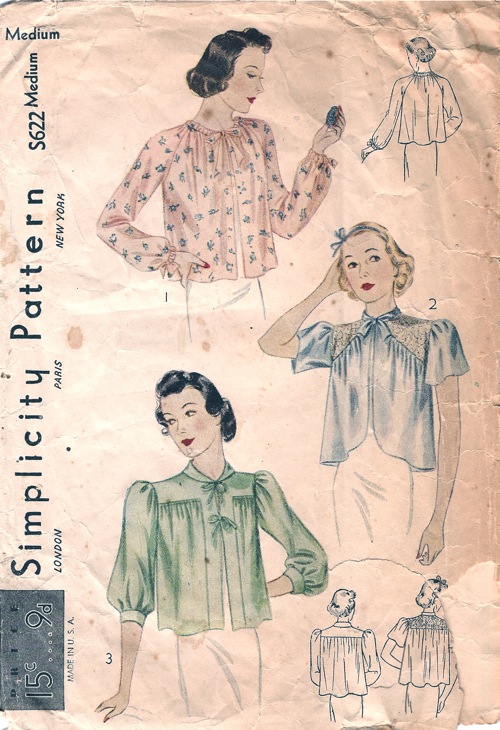
S622: Updated - Now in my collection!

Aren't they lovely?


Update: Repoductions of the following S-series patterns are now available in print and download at MrsDepew.com!
Just click on the links...
S605 Camiknickers
S612 Lingerie Set
S617 Pajamas

Monday, April 9, 2012

And the winner is...

Hello lovely readers. Today is Monday, and you know what that means. It's time to announce the winner of the giveaway for my new sewing pattern!


And the lucky winner is: JacieKakes! You can email me afewthreadsloose@gmail.com and I'll send you your pattern! Jacie also happens to have started writing a blog recently and I found myself giggling at the clever way she describes things. You should really check it out! Jacie also commented that the next pattern she would like to see from Mrs. Depew Vintage would be a Geisha style robe like the one in this picture:


And I have to say, you're totally right! This is gorgeous and I've been wanting to do a robe pattern for the longest time! Wow, Lana turner... what a babe.

On my last visit home I recently acquired a beautiful cream silk charmeuse robe almost exactly like this. The lovely thing was coming apart at the seams and I spent most of the last two days carefully hand stitching it back together. Now it's soaking in my laundry room sink and I'm hoping some old stains will work their way out (any tips?)

I'm thinking about starting with a pattern from one of my old German pattern magazines and working my way out from there. What do you think of this one? (robe/ nightgown on the left)


Which leads me to a very important question that I would really like your input on. A robe pattern would be a great deal larger to print out as a digital pattern than what I've done thus far. To save paper and ink for the seamstress using it, I could overlap pattern pieces onto the same sheet (much like a Burda pattern sheet, only with one pattern). My question is, if you've already gone to the trouble of printing it out, is too inconvenient to also have to trace a few pattern pieces off? Or is the right pattern worth all the trouble?

And in other news, here's a quick sneak peak at what I'm working on right now:


If you didn't win the bathing suit pattern and would still like a copy, you can download it directly from my Craftsy shop, (yay instant download!) or you can find it in my Artfire shop, and my Etsy shop.

And don't forget to stop by Ohhh Lulu... to enter the giveaway to win her beautiful new Betty High Waist Panties pattern (yay Sarah!). I've already got my pattern and I'm off to the fabric shop (I've nickname the place, 'the mess') tomorrow to get supplies!

How about you? What are you working on this week?

Friday, April 6, 2012

The Much-Anticipated Bathing Suit Pattern Giveaway!

My lovely readers, you have been so patient with me. I put off the main part of my pattern drafting work to do the Pin-Up Sew-Along and now that we've reached a nice lull with that, I have finally had time to finish the much asked-for and anticipated bathing suit pattern!


Many of you are familiar with the famous photograph of Marilyn Monroe in the lovely and clingy white bathing suit and that was my main inspiration for putting the pattern together. I find myself getting a bit curvier than I used to be (isn't that always the case?) and I love the idea of a suit that emphasizes those curves while still providing a bit of modesty for the one's you'd rather not draw attention to.


I also created it in sizes x-small through x-large, in two versions, one strapless and one with halter collar strap for supporting those more endowed like Marilyn than myself.

Before I got started I had fun using an app called Penultimate to create a mood board with bathing suits and patterns that fit into this glamorous Hollywood image that I wanted to recreate, adding sketches and ideas to incorporate into my cover image for later as I progressed.


And of course, as I always do when I release a new pattern, I'm offering a free copy to one lucky winner!

To enter the giveaway you can do one or all of the following, just leave a comment for each entry to get your name in the proverbial hat.

1. Tell me what kind of pattern you'd like me to create next. I'm always open to suggestions!

2. Become a follower of A Few Threads Loose on Twitter, Google, or Bloglovin'.

3. Like A Few Threads Loose on Facebook.

4. Like Mrs. Depew Vintage on Facebook.

5. Mention this giveaway on your blog.

I'll announce the winner this Monday the 9th.
Good luck! 


Thursday, April 5, 2012

Sneak Peak

I have been slaving away for a couple months now off an on and I think my new bathing suit pattern will be ready in a few days....

Took me long enough, didn't it?

Tuesday, April 3, 2012

Ohh La la Pin-Up Sew-Along... Sewing on your bra straps and the finished product!


We have arrived at the end of the bra! Hurray! Today I'll show you how I sewed on my bra straps, and then the finished bra!

The pattern we're using...

Sarah did a really great post on how to sew adjustable bra straps and posted photos of her gorgeous finished long line bra (which I'll include here at the end as well).

Image courtesy of Ohhh Lulu...
I haven't tried sewing bra straps like these yet, they're beautiful, aren't they? I'm excited to sew them for my next bra now (there's always a next bra, it's me we're talking about, after all.)

For my straps I'm using the simple old fashioned technique that I learned from Pretty Pretties ( I learned a LOT from this little gem of a booklet!)


I'm using super soft plush lingerie elastic for my strap. Start by pinning your strap where you want it on the inside, raw edge towards the top of the bra. You can machine stitch it on if you like, but the stitches will show through on the outside of the bra. This way keeps your work nice and hidden.

Monday, April 2, 2012

Singer got it all wrong!

I was turning the pages of my lovely 1934 McCall Style News today and I discovered an ad that just tickled me pink!


According to this Singer ad, the sewing machine of the 90's (1890's, that is...) will never be back in style again.
If only they could have seen into the future when Singer would have the brilliant marketing idea to release a 160 year anniversary edition machine that would make vintage lovers and seamstresses alike swoon.


Are you as turned on as I am?


Sunday, April 1, 2012

Ooh La La Pin-Up Sew-Along... Binding the raw edges.


Last time for the Ooh La La Pin-Up Sew-Along we had just finished our bra back closure and basted the top together in anticipation of binding the raw edges.

The pattern we're using...

Allow me to begin with a nice healthy rant. Here in Norway we don't have any convenient fabric shop chains like I enjoyed when we lived in the States. Here my only option is the local, often poorly stocked and messy haberdashery. I buy my pretty satin bias binding by the meter/ yard from a roll (about $6 per yard, ouch!).  I recently asked for 1 meter and watched as it was measured out and cut before my eyes. Then I got it home and realized that the shop attendant had carefully concealed between pinched fingers the fact that the length was cut right in the middle and TAPED together. I was furious. I needed the whole thing to be one continuous piece!


Grrr. I hate sewing binding together, that's the whole convenience of not making my own, dammit.

So I thought about what I could do to bind the top of my bra and still have it look nice without some sort of center binding seam.

I decided to bind the top starting at the center and working my way out in each direction, then add a nice little embellishment to the center front to conceal any imperfect edges. This is a focal point, after all. :)


If you're not sure how to attach your bias binding, it's the same as when we bound our corset. (Thanks again to Sarah for such a great post!)


My closure back edge, almost neatly bound.

So to add that extra unique touch, and to have a cleanly finished center front, I took the extra couple of inches of bias tape I had left over and pinned it down the center front outside of my bra with the ends folded under at the top and bottom and overlapping to the inside by about 1/2".


A couple of rows of stitching about 1/8" from the outside edge secured it nicely in place.


 And after we sew our straps on in the next post, we'll be done!
Wow! How is your bra coming along? Have you hit any speed bumps? Any questions for Sarah and I?